
Starting your embroidery journey is an exciting step into a world of texture, color, and creative design. If you are planning to use an embroidery machine, one of the most critical components you will need to master is the bobbin. Unlike hand embroidery, which relies solely on manual stitches and embroidery floss, machine embroidery requires a dual-thread system where the top thread and the bobbin thread lock together to form stitches. Understanding the specific type of bobbin your machine requires is essential to achieving clean, professional-looking designs without damaging your equipment. Selecting the correct bobbin sewing setup ensures your machine runs smoothly and your stitches remain secure.
Do You Actually Need Bobbins for Your Embroidery Projects?
Before purchasing any supplies, it is important to clarify the method of embroidery you plan to pursue. Hand embroidery is a traditional craft where you use hand needles, embroidery hoops, and multi-strand cotton floss to stitch designs directly onto fabric. If you are focusing entirely on hand embroidery, you do not need bobbins at all. Instead, your primary tools will be needles, hoops, and embroidery floss skeins, which you manage manually.
Machine embroidery, on the other hand, is a mechanized process that uses a specialized sewing or embroidery machine to stitch complex designs rapidly. This method absolutely requires bobbins. The machine operates on a lockstitch mechanism, which means it uses two separate threads: a top thread that passes through the needle and a bottom thread wound onto a bobbin. As the needle penetrates the fabric, the top thread loops around the bobbin thread, securing the stitch in place.
Products mentioned in this guide
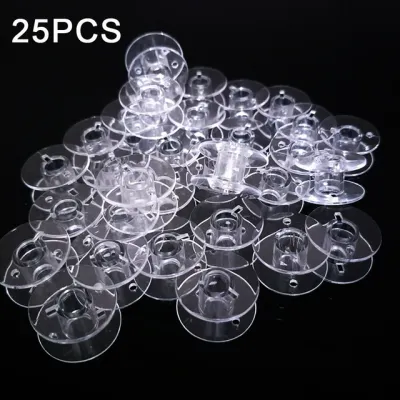
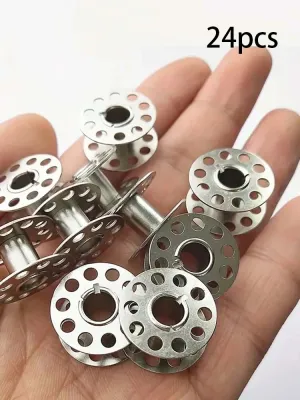
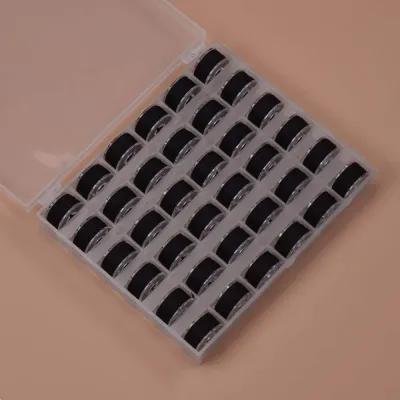
Prices are valid at publication and may change. Please refer to the product page for the latest price.
You can easily identify a machine embroidery setup by its physical components. These setups feature a motorized machine body, a digital screen or computer interface, a specialized embroidery hoop that attaches to an embroidery arm, and a bobbin compartment located beneath the needle plate. If your project involves setting up a machine, selecting the right bobbin is a fundamental step in your preparation.
How to Identify the Correct Bobbin Size for Your Machine
When entering the world of bobbin sewing, many beginners assume that all bobbins are identical. However, bobbins come in various heights, diameters, and shapes, and using the wrong size can lead to severe stitching issues or even permanent machine damage. The absolute primary source of truth for your machine’s bobbin requirements is the manufacturer’s user manual or the physical label located on the machine itself, often found on the underside of the machine or inside the bobbin compartment door.

There are several common bobbin styles used across different machine brands, though these are non-exhaustive examples. Class 15 (also known as A-style) bobbins are flat and widely used in many modern home sewing and embroidery machines. Class 66 bobbins have slightly curved sides and are common in older or specific vintage-style machines. For specialized embroidery machines, you might encounter L-style or M-style bobbins, which are frequently used in commercial or semi-professional multi-needle setups due to their specific thread capacities.
Using an incorrectly sized bobbin—even one that differs by a fraction of a millimeter—can cause immediate problems. A bobbin that is too tall may prevent the bobbin cover from closing or rub against the needle plate, while a bobbin that is too short will wobble in the bobbin case, leading to uneven tension, skipped stitches, and severe thread jams. In worst-case scenarios, an improper bobbin can cause the needle to strike the bobbin case, resulting in broken needles and costly repairs. Always verify the exact model compatibility before purchasing.
Pre-wound vs. Empty Bobbins: Choosing the Right Option
As a beginner, you will face a choice between buying pre-wound bobbins or purchasing empty bobbins to wind yourself. Pre-wound bobbins are wound by manufacturers to precise tensions and contain a highly consistent amount of thread. The primary benefit of pre-wound bobbins is convenience; they save significant setup time, allowing you to focus entirely on your embroidery designs. They are particularly useful for large projects where you might need to change bobbins multiple times. Pre-wound bobbins are available in cardboard-sided, plastic-sided, or sideless varieties, so you must check which style is compatible with your machine’s bobbin holder.
Empty bobbins, which you wind yourself using your machine’s built-in bobbin winder, offer greater cost-effectiveness over time. Winding your own bobbins allows you to use any thread color or type you choose, which is highly beneficial when you need the bobbin thread to match the top thread or the fabric backing exactly.
For most machine embroidery, the standard practice is to use a lightweight bobbin thread, typically 60-weight or 90-weight polyester, which is much thinner than standard sewing thread. This thin thread prevents the back of the embroidery from becoming bulky and stiff. White and black are the most common bobbin thread colors used, as they remain hidden on the underside of the fabric.
As your skills develop, you may find a balance between the two options. Many embroiderers use pre-wound bobbins in neutral colors for standard projects to maximize efficiency, while keeping empty bobbins on hand for custom color matching or specialized thread weights.
Checking Bobbin Material and Tension Settings
Bobbins are generally made of either plastic or metal, and it is crucial to use the exact material specified by your machine’s manufacturer. Plastic bobbins are lightweight and allow you to easily see how much thread is left, while metal bobbins are heavier and highly durable. You must never substitute a plastic bobbin for a metal one, or vice versa, unless your manual explicitly states it is acceptable. Some machines use magnetic sensors or specific tension systems calibrated precisely for the weight of a plastic or metal bobbin; using the wrong material can disrupt the tension completely.
In Singapore’s humid climate, storing your bobbins and threads properly is also essential. High humidity can affect thread strength and cause metal bobbins to corrode over time or plastic bobbins to trap moisture. Storing your bobbins in airtight plastic containers with silica gel packets helps maintain thread integrity and ensures smooth feeding through the tension discs.
Achieving the correct tension is vital for smooth, puckering-free embroidery. You can perform a basic visual check of your bobbin tension by examining the underside of a test stitch. In a balanced embroidery stitch, about one-third of the top thread should be visible on each side of the bobbin thread on the back of the fabric. Physically, the bobbin thread should pull smoothly from the bobbin case with a slight, consistent resistance.
If you notice that the bobbin thread is pulling too easily or is extremely tight, consult your user manual for instructions on adjusting the bobbin case tension screw. Additionally, lint buildup in the bobbin area can mimic tension issues. Regularly brushing out lint from the bobbin case with a small cleaning brush prevents friction problems. If you encounter persistent tension issues, or if the manual instructions are unclear, stop operating the machine and consult a professional technician to avoid damaging the delicate bobbin case mechanism.
Your First Bobbin Sewing Setup Checklist
To ensure a successful start to your first embroidery project, follow this structured checklist to prepare your machine and bobbin setup:
- Verify Specifications: Open your machine's user manual and confirm the exact bobbin class (such as Class 15 or L-style) and material (plastic or metal) required.
- Clean the Bobbin Area: Remove the needle plate and use a soft brush to clear out any accumulated lint or thread fragments from the bobbin housing.
- Inspect the Bobbin: Check the bobbin for any cracks, chips, or rough edges that could snag the thread.
- Wind or Select Thread: Ensure your bobbin is wound evenly with appropriate 60-weight or 90-weight embroidery bobbin thread.
- Insert the Bobbin: Place the bobbin into the bobbin case, ensuring it rotates in the direction specified by your manual (usually forming a "P" shape when the thread is pulled).
- Thread the Tension Spring: Guide the bobbin thread carefully through the slot and under the tension spring of the bobbin case.
- Perform a Test Stitch: Always run a sample design on a scrap piece of the same fabric and stabilizer you plan to use for your project. Observe the stitch balance on both sides before proceeding to your final piece.
Frequently Asked Questions (FAQ)
Can I use regular sewing thread in my embroidery bobbin?
While it is physically possible to wind regular 50-weight sewing thread onto a bobbin, it is generally not recommended for machine embroidery. Regular sewing thread is thicker than specialized embroidery bobbin thread, which is typically 60-weight or 90-weight. Using thicker thread in the bobbin can result in a bulky, stiff design, and it may cause the bobbin thread to pull through to the top of your fabric. Always check your machine manual for the recommended bobbin thread weight to ensure optimal stitch quality.
Why is my bobbin thread showing on the top of my embroidery?
If your bobbin thread is visible on the right side of your fabric, it usually indicates a tension imbalance. This issue is often caused by the top thread tension being too tight, or the bobbin thread tension being too loose. It can also happen if the bobbin was inserted incorrectly or if the thread missed the tension spring in the bobbin case. To resolve this, completely unthread both the top needle and the bobbin, clean any lint from the bobbin area, and re-thread the machine strictly according to the manual’s instructions.

Community discussion
Share your experience or ask a question. Comments are reviewed before publication.