
Starting crochet does not require a massive financial investment or a room filled with specialized gear. You can begin learning this versatile craft with just two primary items: a single crochet hook and one skein of yarn. By focusing on a streamlined selection of high-utility tools, you can master the basic stitches without cluttering your space or overspending.
This targeted approach allows you to build muscle memory and discover your personal crafting style before committing to advanced accessories. Understanding which tools are truly essential—and which can wait—is the best way to ensure a smooth, frustration-free introduction to your new hobby.
The Absolute Minimum: Core Tools for Your First Project
To begin your crochet journey, you only need three physical items. The first is a medium-sized crochet hook. For absolute beginners, a hook size between 4.0mm (often labeled G/6) and 5.5mm (labeled I/9) is the ideal sweet spot. Hooks in this range are large enough to hold comfortably and see your stitches clearly, yet small enough to manage without hand strain.
Products mentioned in this guide
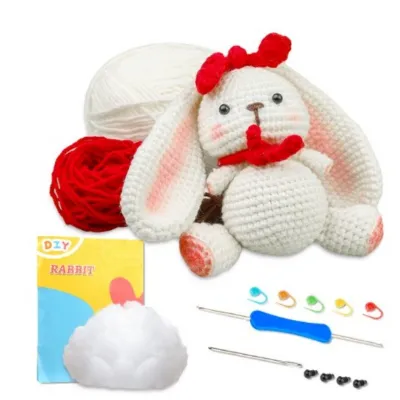
Prices are valid at publication and may change. Please refer to the product page for the latest price.
The material of your first hook also plays a significant role in your learning speed. Smooth aluminum is highly recommended for beginners because it allows yarn to glide effortlessly over the shaft, preventing frustrating snags. Alternatively, high-quality, smooth plastic hooks are lightweight and budget-friendly, though they can sometimes create a slight squeaking sound with certain synthetic fibers. Avoid wooden or bamboo hooks for your very first project, as their natural texture provides more grip, which can make it harder for a beginner to maintain a smooth, even rhythm.
The second essential item is a ball of yarn. Beginners should look for a worsted weight (Category 4) or Aran yarn. This medium thickness is exceptionally easy to handle and behaves predictably under tension. Choose a yarn in a light, solid color—such as cream, soft yellow, or pastel blue—and avoid dark shades like black or navy, as well as variegated multi-colored yarns. Light, solid shades make it simple to identify the “V” shape of each stitch, helping you see exactly where to insert your hook for the next step.
The third tool is a pair of small, sharp scissors. While any household scissors can technically cut yarn, a dedicated pair of sharp embroidery or sewing scissors is highly beneficial. Dull blades crush and fray the yarn fibers, making it incredibly difficult to thread the yarn through needles or maintain neat ends. Keeping a small, dedicated pair in your project bag ensures clean, crisp cuts every time.
With just this minimal combination of a medium hook, light worsted yarn, and sharp scissors, you have everything required to complete foundational projects. You can comfortably practice flat swatches, craft simple winter scarves, construct basic coasters, or even complete your first simple amigurumi (stuffed toy) shapes.
Highly Recommended Additions for a Smoother Experience
While you can technically crochet with only a hook and yarn, incorporating a few low-cost accessories will dramatically reduce frustration and prevent common mistakes. The most critical of these additions is a set of locking stitch markers. In crochet, stitches can easily unravel if the active loop is dropped, and counting rows can be challenging for untrained eyes. Locking stitch markers look like plastic safety pins and can be opened and closed securely around a stitch.

It is vital to choose locking or split-ring markers rather than the solid, closed-ring markers common in knitting. Closed knitting rings are designed to slide along a needle and cannot be removed from a finished crochet stitch without cutting the yarn. Locking markers allow you to secure your active loop when pausing your work, mark the first and last stitches of a row to keep your edges straight, and track complex pattern repeats.
Another indispensable tool is a blunt-tipped tapestry needle, sometimes called a yarn needle. When you finish a crochet project, you are left with loose yarn tails at the beginning and end. These tails must be woven into the body of the stitches to prevent the project from unraveling during use or washing. Tapestry needles feature a large eye that easily accommodates thick yarn and a blunt tip that slides between fibers rather than piercing and splitting them, ensuring a secure and invisible finish.
Finally, a flexible measuring tape is highly recommended for tracking your progress. Unlike rigid wooden or plastic rulers, a flexible fiberglass or plastic tape conforms to the soft, shifting curves of crocheted fabric. This flexibility is essential for accurately measuring your gauge—the number of stitches and rows per inch—and ensuring your finished items match the intended dimensions of a pattern.
What to Skip: Avoiding Unnecessary Crochet Purchases
When browsing craft stores or online marketplaces, it is easy to feel overwhelmed by the sheer volume of specialized crochet gadgets. To protect your budget, avoid purchasing large, multi-size ergonomic hook sets immediately. Ergonomic hooks feature padded, thick handles designed to reduce hand strain, but their comfort depends heavily on how you hold your hook. Until you know whether you naturally use a “pencil grip” (holding the hook like a pen) or a “knife grip” (holding it overhand like a dinner knife), you cannot predict which handle shape will feel comfortable.
You should also skip mechanical yarn-management tools like yarn winders and swift rollers. These devices are designed to wind loose hanks of yarn into neat, center-pull cakes. However, almost all beginner-friendly yarns sold in local craft shops come in pre-wound skeins or balls that can be used directly from the outside or center. Winding equipment is a significant investment that is only necessary once you begin purchasing luxury hand-dyed yarns that arrive in loose, twisted hanks.
Similarly, specialty finishing tools like foam blocking mats, rust-resistant T-pins, and mechanical row counters are unnecessary for your first few projects. If you need to keep track of your rows, a simple pen and paper or a free digital smartphone app works perfectly. For early projects like basic scarves or acrylic coasters, formal wet blocking is rarely required, meaning you can safely postpone purchasing blocking boards until you transition to complex lace patterns or fitted garments.
How to Match Your First Crochet Hook and Yarn
Achieving the perfect fabric texture requires understanding how to pair your hook size with your yarn weight. If your hook is too small for the yarn, the resulting fabric will be stiff, dense, and difficult to work; if the hook is too large, your work will be loose, floppy, and full of accidental holes. Fortunately, yarn manufacturers print clear, standardized guidelines directly on the yarn label.
When inspecting a yarn label, look for a small square icon containing a picture of a crochet hook, usually accompanied by a recommended metric size (such as 5.0mm) or a US letter/number designation (such as H/8). This recommendation is a highly reliable starting point calculated by the manufacturer to produce a balanced, medium-tension fabric. The label will also display a gauge grid, showing how many stitches and rows should fit into a 10cm by 10cm square using that specific hook size.
For your first practice sessions, the physical texture of the yarn is just as important as its weight. Opt for smooth, tightly plied yarns made from acrylic, cotton, or a basic wool blend. “Plied” means the yarn is made of multiple smaller strands twisted tightly together. Avoid fuzzy, novelty, boucle, or eyelash yarns, as their textured fibers hide the structure of your stitches, making it nearly impossible to see where to insert your hook. Furthermore, smooth yarns are much easier to “frog”—a common crochet term for ripping out stitches to correct a mistake—without the fibers tangling and locking together.
Keep in mind that these label recommendations assume average hand tension. If you complete a practice swatch and find that your stitches are incredibly tight and difficult to slide along the hook, your natural tension is tight, and you should switch to a hook that is 0.5mm or 1.0mm larger than recommended. Conversely, if your swatch looks highly loose and gappy, your natural tension is loose, and you should drop down to a slightly smaller hook size to achieve a neater, more structured fabric.
In Singapore’s warm, humid climate, lightweight cotton or cotton-acrylic blends are highly popular for local wear because they produce breathable garments and accessories, whereas heavy wools are less practical. A single metal hook typically costs around S$3 to S$8 in local specialty shops, making it an affordable entry point for testing your tension before investing in more expensive tools.
Signs You Are Ready to Expand Your Crochet Kit
As your skills progress, your physical comfort and the complexity of your projects will naturally signal when it is time to upgrade your toolkit. One of the clearest indicators is a shift in the types of projects you want to make. If you decide to transition from warm winter scarves to delicate lace doilies, you will need to invest in fine steel crochet hooks and thin crochet thread. Conversely, if you want to create chunky, cozy blankets, you will need large, thick hooks ranging from 8.0mm to 15.0mm.
Physical feedback from your body is another critical signal. If you find yourself experiencing hand cramping, joint fatigue, or wrist soreness after short crocheting sessions, this is your cue to transition to ergonomic hooks. Testing a single high-quality ergonomic hook with a soft, rubberized, or molded thumb rest will help you determine if a specialized grip resolves your discomfort before you invest in a complete set.
Finally, entering the realm of garment construction requires a higher level of precision. When fit matters, you will need to invest in proper blocking tools—such as interlocking foam mats and rustproof T-pins—to stretch and set your crocheted panels to their exact schematics before sewing them together. A precise metal gauge-checking ruler will also become essential to ensure your stitch counts match the pattern exactly, preventing sizing errors in your finished sweaters or cardigans.
Frequently Asked Questions (FAQ)
Can I use knitting needles instead of a crochet hook?
No, you cannot use knitting needles for crochet because the two crafts utilize entirely different mechanical principles. Knitting requires two pointed needles to hold an entire row of multiple active, open loops simultaneously. In contrast, crochet uses a single hook featuring a carved throat and notch to pull yarn through only one active loop at a time, making knitting needles physically incompatible with crochet stitches.
Is it better to buy a full crochet hook set or individual hooks?
For absolute beginners, it is highly recommended to purchase individual hooks in the specific sizes required by your first few patterns. Buying individual hooks allows you to test different brands, materials, and handle styles without a significant upfront cost. You can reserve the purchase of a full, multi-size set for later, once you are certain of your preferred hook style and find yourself regularly working across a wide range of yarn weights.
Do I need a yarn bowl for my first project?
A yarn bowl is a helpful convenience accessory designed to keep your yarn ball from rolling across the floor, collecting dust, or tangling, but it is not a necessity. For your first project, you can easily replicate its function by placing your yarn ball inside a clean, smooth-sided household container, a heavy mixing bowl, or even a clean zip-top bag with the corner slightly open to feed the yarn through.

Community discussion
Share your experience or ask a question. Comments are reviewed before publication.