
Selecting your first watercolour set is a major milestone in your creative journey, but the sheer variety of options can quickly feel overwhelming. To make the best choice, focus on three primary criteria: student-grade pigments, a half-pan format, and a limited palette of 12 to 24 colours. This combination offers the ideal balance of affordability, ease of use, and colour-mixing education, allowing you to develop your skills without a massive upfront financial investment.
While many starter kits come bundled with brushes and paper, these included accessories are often of lower quality and will require early upgrades. Prioritising the quality of the paint itself, rather than the quantity of the bonus items in the box, ensures that your early painting sessions are rewarding rather than frustrating. By understanding how pigment grades, paint formats, and palette selections impact your workflow, you can confidently choose a setup that fits your goals and workspace.
Quick Answer: Key Features to Prioritise
For a complete beginner, the ideal watercolour set profile is a student-grade half-pan set containing 12 to 24 colours. Student-grade paints use affordable synthetic or alternative binders and pigments, making them highly cost-effective while still offering vibrant, blendable colours. The half-pan format—which consists of small, dry blocks of concentrated paint housed in a plastic or metal tin—is highly recommended because it is incredibly easy to clean, highly portable, and prevents paint waste.
Products mentioned in this guide
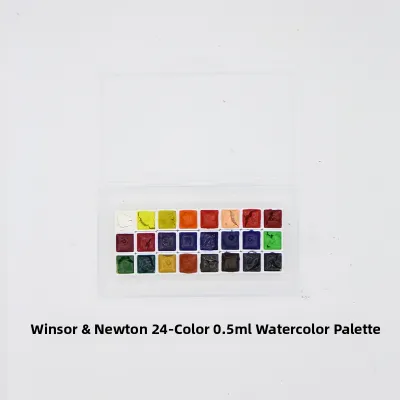
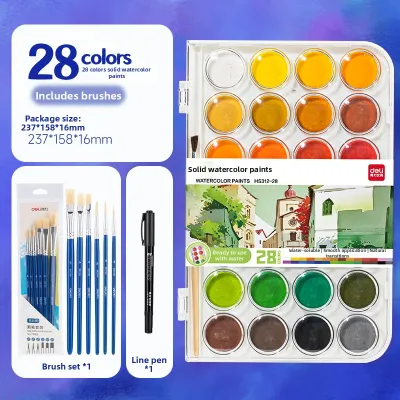
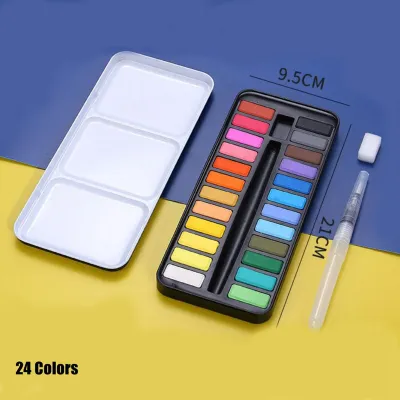
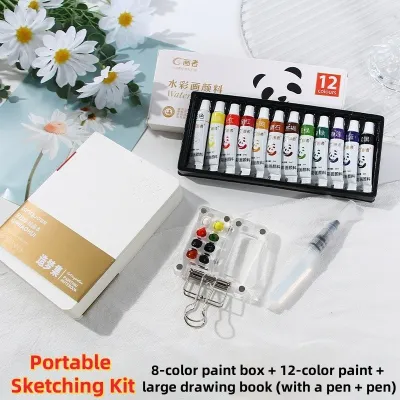
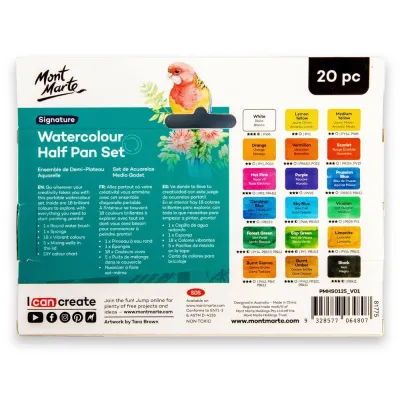
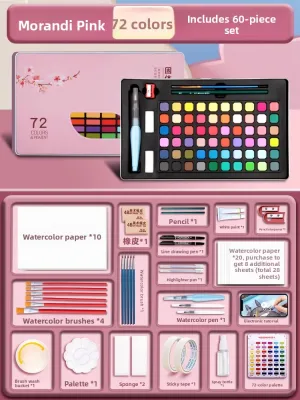
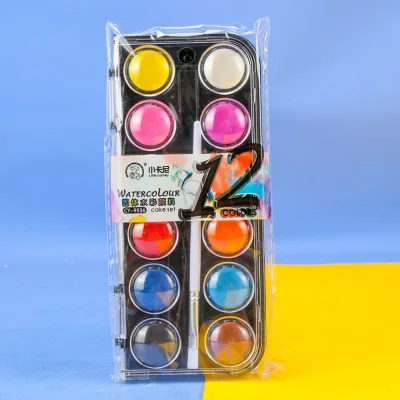
Prices are valid at publication and may change. Please refer to the product page for the latest price.
When evaluating potential sets, do not let bundled accessories sway your decision. The brushes and paper pads included in budget-friendly kits are typically made of cheap materials that buckle under water or lose their bristles quickly. Instead, focus your budget on the paint quality and the durability of the casing.
Before adding any set to your cart, verify the following specifications on the product label or online listing:
- Pan Size: Ensure the set uses standard half-pans or full pans, which are easy to replace individually when you run out of a specific colour.
- Casing Material: Look for a sturdy metal tin or a heavy-duty plastic case that can withstand travel and frequent opening.
- Built-In Mixing Wells: Verify that the lid of the case fold out to reveal deep, flat mixing areas that prevent your paint puddles from running into each other.
Pan vs. Tube Watercolours: Choosing the Right Format
Watercolours are primarily sold in two physical formats: solid pans and liquid tubes. Pans are dry blocks of paint that activate when touched with a wet brush, while tubes contain moist, toothpaste-like paint that you squeeze onto a separate palette. For absolute beginners, understanding how these formats affect your daily practice, cleanup routine, and water control is essential for choosing the right setup.

Pan sets are highly practical for beginners because they simplify water control. When using pans, you must introduce water to the dry paint block to lift the pigment, which naturally teaches you how to balance the ratio of water to paint on your brush. Tubes, on the other hand, dispense highly concentrated, wet paint that makes it easy to accidentally pick up too much pigment, leading to dark, opaque washes that ruin the transparent quality characteristic of watercolours.
Furthermore, in humid tropical climates like Singapore, tube paints squeezed onto an open palette may remain sticky and fail to dry completely, making storage difficult and increasing the risk of dust accumulation or mold. Pans dry quickly and cleanly, making them much easier to store in compact drawers or carry in a bag for outdoor sketching.
| Format | Portability | Cleanup Effort | Paint Waste | Best Use Case |
|---|---|---|---|---|
| Half-Pans | High; compact tins fit easily into pockets or small bags. | Minimal; close the lid and let the dry blocks sit safely. | Very Low; unused paint simply dries in the pan and reactivates later. | Beginners, travel sketching, small-to-medium illustrations. |
| Tubes | Moderate; requires carrying separate tubes, a palette, and water. | Moderate; requires washing or wiping down a large mixing palette. | Moderate to High; excess squeezed paint is easily wasted if washed away. | Large-scale washes, heavy studio work, mixing massive paint quantities. |
While tubes are excellent for artists working on very large canvases who need to mix massive quantities of paint quickly, they present several limitations for beginners. Squeezing too much paint out of a tube is a common mistake that leads to significant paint waste, as the excess paint often gets washed down the sink during cleanup. Additionally, if tube caps are not sealed perfectly after every use, the paint inside the nozzle can dry out, rendering the remaining contents of the tube difficult to extract or use.
Student vs. Artist Grade: Balancing Quality and Budget
When browsing for a watercolour set, you will notice a stark price difference between “student-grade” and “artist-grade” (sometimes labeled as “professional”) options. This price gap is directly tied to the ingredients used in the manufacturing process. Understanding these differences will help you decide where to allocate your budget without sacrificing your learning experience.
Artist-grade watercolours feature a high concentration of pure, finely milled pigments bound with natural gum arabic, resulting in exceptional vibrancy, superior lightfastness (resistance to fading over time), and unique characteristics like granulation. However, these premium ingredients make professional sets quite expensive, often costing three to four times more than student equivalents.
Student-grade paints, by contrast, use synthetic alternatives or lower concentrations of pigments, supplemented by fillers and extenders like chalk or dextrin. While this makes the paint slightly less vibrant and occasionally chalky when dry, student-grade formulas are specifically designed to be highly forgiving and incredibly budget-friendly. They allow you to practice basic techniques—such as flat washes, wet-on-wet blending, and glazing—without the constant anxiety of wasting expensive, professional-grade materials.
To identify the grade of a set, look closely at the manufacturer’s labeling. Student-grade lines are often clearly marked with words like “Student,” “Academy,” “Fine,” or specific sub-brand names established by major manufacturers (such as Winsor & Newton’s Cotman line or Daler-Rowney’s Aquafine). Additionally, student paints are usually sold at a flat price per set or tube, whereas artist-grade paints are divided into “series” numbers (Series 1 to Series 5) on the label, with prices scaling upward based on the rarity of the raw pigment used.
As a beginner, you should plan to stick with student-grade paints until you have mastered the basics of water control and colour mixing. You will know it is time to transition to artist-grade paints when you begin selling your work, require archival permanence, or find yourself wanting to experiment with advanced pigment properties like granulation, where paint particles settle into the texture of the paper to create beautiful, organic patterns.
Colour Palette Size: How Many Shades Do You Really Need?
It is incredibly tempting for beginners to buy the largest paint set available, assuming that a massive array of 48 or 72 pre-mixed colours will make painting easier. In reality, oversized sets are often a hindrance to your artistic development. They encourage a passive approach to painting, where you search for the “correct” pre-mixed shade in your tin rather than learning how to mix it yourself.
Starting with a limited palette of 12 to 24 colours has immense educational value. A smaller set forces you to learn colour theory and understand how primary colours interact to create secondary and tertiary shades. By mixing your own greens, purples, and browns, you will develop a much deeper understanding of colour harmony and avoid the flat, muddy look that often results from using unmixed, straight-from-the-pan colours.
Furthermore, massive budget sets frequently contain redundant shades or colours formulated with multiple cheap pigments. When you attempt to mix these multi-pigment paints together, the result is almost always a dull, brownish-grey mud. A well-curated 12-colour set containing single-pigment paints will actually yield a wider variety of clean, vibrant mixed colours than a cheap 48-colour set.
When selecting your first set, check the color names listed on the back of the packaging to ensure a balanced selection of warm and cool primaries. A highly versatile starter palette should include:
- Two Yellows: A cool, greenish-yellow (like Lemon Yellow) and a warm, reddish-yellow (like Cadmium Yellow Hue).
- Two Reds: A cool, pinkish-red (like Alizarin Crimson Hue) and a warm, orangey-red (like Cadmium Red Hue).
- Two Blues: A cool, green-leaning blue (like Phthalo Blue) and a warm, red-leaning blue (like Ultramarine Blue).
- Earth Tones: Essential mixing neutrals like Yellow Ochre, Burnt Sienna, and Burnt Umber.
Recommended Watercolour Set Profiles for Beginners
To help you navigate your options, we have structured three distinct beginner profiles based on different painting environments and goals. Use these profiles to evaluate the inventory at your local art supply stores in Singapore or online marketplaces, verifying the specific dimensions, casing materials, and included tools against your personal preferences.
The Comprehensive Student-Grade Pan Set
This profile is the most versatile option for beginners who plan to set up a dedicated workspace at home, such as a study desk or a dining table. This setup typically features 12 to 24 half-pans housed in a sturdy metal or plastic tin. The primary advantage of this configuration is longevity; the tin is durable, and the individual plastic half-pans can be easily replaced or refilled with tube paint once they are empty.
When shopping for this profile, it is critical to verify if the tin lid includes integrated mixing wells. A good metal tin will have a fold-out metal flap that doubles your mixing surface, providing ample space to pool water and mix large washes without your colours contaminating one another. This set is perfect for those who want a reliable, long-term learning tool that can grow with them as their skills develop.
The Compact Travel and Sketching Set
If you have limited desk space, enjoy urban sketching, or want to paint in local cafes or parks, a compact travel set is your best choice. These pocket-sized sets are designed for maximum portability and often feature smaller, highly concentrated pans or unique folding designs. Many travel sets include a pocket-sized water brush—a synthetic brush with a refillable water reservoir in the handle—which eliminates the need to carry a separate water cup.
Before purchasing a travel set, pay close attention to the durability of the closure mechanism and the overall weight of the casing. Because these sets are designed to be held in one hand while painting, they should feel lightweight yet secure when closed. Keep in mind the trade-offs: travel sets have significantly smaller mixing areas, and you may still need to carry a small cloth or tissue to wipe your brush clean between colour changes.
The Budget-Friendly Introductory Kit
For those who are completely new to arts and crafts and want to test the hobby with minimal initial investment, an all-in-one introductory kit is highly suitable. These boxed kits are designed to get you painting immediately, usually containing a basic set of paints, a single synthetic brush, a small pad of watercolour paper, and sometimes a mixing palette or a water cup.
While these kits offer excellent convenience, you must manage your expectations regarding the quality of the included accessories. The paper and brushes in these entry-level boxes are typically low-cost items meant for casual testing rather than serious practice. If you enjoy the medium after your first few painting sessions, plan to upgrade your paper first, as high-quality paper will instantly improve how the paint behaves on the page.
Essential Accessories to Pair With Your First Watercolour Set
Even the highest-quality watercolour set will perform poorly if paired with inadequate accessories. Because watercolours rely entirely on the interaction of water, pigment, and paper, investing in a few key supporting materials is essential for developing proper technique.
First and foremost, you must use proper watercolour paper. Standard drawing or sketch paper is too thin and lacks the chemical treatment (sizing) required to handle wet mediums. Always look for paper with a minimum weight of 300gsm (140lb). Paper of this thickness can absorb significant amounts of water without severe buckling, warping, or tearing when you apply multiple layers of paint.
Additionally, pay attention to the texture of the paper:
- Cold-Pressed Paper: This paper has a textured, slightly bumpy surface that slows down water absorption, giving you more time to work. It is highly recommended for beginners because it is incredibly forgiving and handles washes beautifully.
- Hot-Pressed Paper: This paper is completely smooth, causing water to pool and dry quickly. It is ideal for detailed botanical work or pen-and-ink illustrations, but its fast drying time makes it challenging for beginners learning to paint smooth gradients.
Instead of relying on the stiff, flat plastic brushes that often come bundled in cheap kits, purchase two or three dedicated synthetic round brushes. A round brush is the most versatile shape in watercolour painting; a size 4 and a size 8 or 10 round brush are all you need to start. Look for synthetic brushes designed specifically for watercolours, as they are engineered to hold a generous amount of water while maintaining a sharp, fine point for detailed line work.
Finally, always set up your painting station with two separate water containers. Use the first container exclusively for rinsing dirty paint off your brush, and keep the second container filled with pristine, clean water for wetting your paper or diluting fresh paint. This simple practice prevents your clean yellow and blue mixes from turning into a dull, muddy grey before they even touch the paper.
Frequently Asked Questions (FAQ)
Can I use standard printer paper for watercolour painting?
No, you should never use standard printer paper for watercolour painting. Printer paper is typically very thin (around 80gsm) and lacks the internal sizing required to resist water absorption. When wet paint is applied, printer paper will immediately buckle, warp, pill, and tear, making it impossible to blend colours or apply washes. Investing in a pad of 300gsm cold-pressed watercolour paper is the single most impactful upgrade you can make to ensure your paints behave correctly and yield beautiful results.
How do I reactivate dried watercolour pans?
Reactivating dried watercolour pans is a quick and simple process. Before you begin painting, use a spray bottle or a clean brush to drop one or two drops of clean water directly onto the surface of each dry paint pan. Let the water sit undisturbed for 30 to 60 seconds to soften the binder and pigment. Once softened, gently swirl a damp brush over the pan to lift the paint. Avoid scrubbing the dry pan aggressively with a stiff, dry brush, as this can permanently fray your brush bristles and create unwanted paint dust.

Community discussion
Share your experience or ask a question. Comments are reviewed before publication.