
Starting your journey with watercolour is an exciting creative step, but walking into an art supply store can quickly feel overwhelming. The sheer variety of paints, brushes, and papers available makes it difficult to know which products will help you learn and which will only lead to early frustration. To make the best choice, a beginner must understand that the secret to watercolour does not lie in buying the most expensive professional paints, but in selecting a balanced set of tools where the paper, brushes, and pigments work in harmony.
Quick Answer: What Makes a Good Watercolour Starter Set?
A high-quality watercolour starter set does not need to be expensive, but it must meet several non-negotiable standards to prevent technical frustration. Before purchasing any pre-packaged kit or assembling your own, use this quick checklist of essential components:
- A Curated Paint Palette: Look for 6 to 12 student-grade colours. This should include warm and cool variations of the three primary colours (red, blue, and yellow) plus at least one earth tone like Burnt Sienna.
- Versatile Synthetic Round Brushes: You only need two or three brushes to start—specifically sizes 6, 8, and 10. Synthetic fibers are durable, springy, and hold water predictably.
- Heavyweight Watercolour Paper: This is the most critical component. The paper must have a minimum weight of 300gsm (140lb) and a cold-pressed (medium texture) finish. Anything lighter will warp, buckle, and ruin your washes.
- A Functional Mixing Palette: Ensure the set includes a mixing tray with deep, spacious wells so your paint mixtures do not run together.
By prioritizing paper quality over expensive professional-grade pigments, you will create a highly forgiving learning environment that allows you to master water control and colour mixing effectively.
Products mentioned in this guide
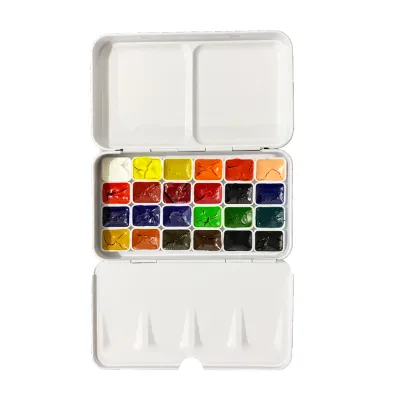
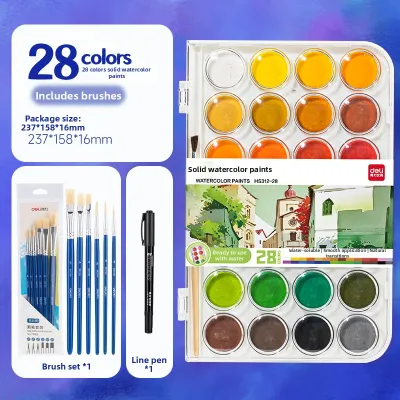
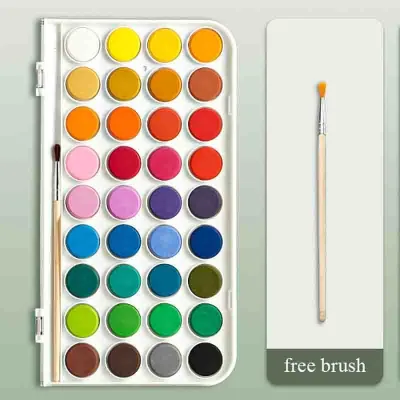
Prices are valid at publication and may change. Please refer to the product page for the latest price.
Paints: Understanding Student-Grade Pigments and Formats
When choosing your first watercolour paints, you will immediately encounter two distinct quality tiers: student-grade and professional-grade. Student-grade watercolours are formulated specifically for beginners and hobbyists. They contain a higher proportion of binders (such as gum arabic or synthetic alternatives) and fillers relative to pure pigment. This composition makes them less intensely concentrated than professional alternatives, which is actually an advantage for beginners. Because the pigment load is milder, the paint is far more forgiving when you are learning to balance the ratio of water to paint on your brush, and it keeps the entry cost highly affordable.

These paints are primarily sold in two formats: half-pans and tubes. Half-pans are small, dry cakes of pigment nestled in plastic cups. They are highly portable, dry to the touch, and virtually eliminate waste because you only activate what you need with a wet brush. They are ideal for small-to-medium washes and detailed illustrations. Tubes, on the other hand, contain wet, paste-like paint. They allow you to quickly dispense large quantities of rich, concentrated pigment, making them superior for painting large washes or mixing massive pools of colour. For added versatility, you can squeeze tube paint into an empty plastic palette and let it dry; it will behave exactly like a pan paint when re-wetted.
Avoid the temptation to buy massive 48-colour sets filled with pre-mixed, redundant hues. A massive palette hinders your learning because it discourages you from understanding colour theory. Instead, look for a curated set of 6 to 12 essential colours based on a “split-primary” system. This system includes a warm and a cool version of each primary colour: a warm red (like Cadmium Red Hue), a cool red (like Alizarin Crimson), a warm blue (like Ultramarine), a cool blue (like Phthalo Blue), a warm yellow (like Cadmium Yellow Hue), and a cool yellow (like Lemon Yellow). Adding an earth tone like Burnt Sienna allows you to quickly mix rich, natural greens, deep purples, and subtle greys.
Before purchasing, verify the quality of the paint by checking the packaging for lightfastness ratings. Reliable student-grade brands print these ratings directly on the tube or pan wrapper, typically conforming to the American Society for Testing and Materials (ASTM) standards. Look for ratings of ASTM I (excellent lightfastness) or ASTM II (very good). In Singapore’s bright, sunny tropical environment, choosing paints with verified lightfastness ensures that your finished artwork will not fade or discolor over time when exposed to ambient daylight.
Brushes: Choosing the Right Shapes and Bristles for Basic Techniques
Beginners often assume that natural hair brushes, such as those made from Siberian kolinsky sable or squirrel hair, are necessary for watercolour. In reality, modern synthetic or synthetic-blend brushes are highly recommended for those starting out. Synthetic bristles made from nylon or polyester are incredibly durable, hold their shape over hundreds of painting sessions, and are significantly more affordable and cruelty-free. They also offer a predictable level of springiness, which helps beginners maintain control over their brush strokes far better than the ultra-soft, floppy nature of pure natural hair.
To paint almost any beginner subject, you only need three essential brush shapes and sizes:
- Size 6 Round Brush: Excellent for fine details, sharp lines, and small-scale botanical work.
- Size 8 or 10 Round Brush: The ultimate workhorse. A good round brush has a fat "belly" that holds a generous reservoir of water, yet tapers to a needle-sharp point, allowing you to paint both broad washes and fine details without changing brushes.
- 3/4-Inch or 1-Inch Flat (or Wash) Brush: Essential for wetting large areas of paper, laying down broad background skies, and painting sharp, geometric edges.
To ensure you are buying a quality brush rather than a cheap toy, you can perform two quick, observable quality checks in the store or immediately upon unboxing. First, perform the “Snap Test”: wet the brush thoroughly in water and flick it gently with a quick wrist motion. The bristles should immediately snap back into a perfectly sharp, unified point. If the tip remains splayed, split, or bent, the brush will make detailed painting impossible. Second, perform the “Shedding Test”: gently rub the dry brush head against your palm or pull lightly on the bristles. If any hairs loose themselves from the metal ferrule, the brush is poorly constructed and will constantly deposit annoying hairs into your wet paint washes.
Avoid extremely cheap, stiff nylon craft brushes that are typically bundled in generic children’s craft sets. These bristles are designed for heavy acrylics or tempera; they cannot hold water, will scratch the delicate surface of your watercolour paper, and will quickly ruin your painting experience.
Paper: Why Weight and Texture Are Your Most Critical Choices
It is a common beginner mistake to spend the bulk of a budget on expensive paints while settling for cheap drawing paper. In watercolour, the paper is the single most important component of your setup. Because this medium relies entirely on water to flow and blend, the paper must be specifically engineered to handle heavy moisture without disintegrating.
The most critical specification to look for is the paper’s weight, which must be at least 300gsm (grams per square meter), equivalent to 140lb. Anything lighter, such as standard 190gsm wash paper or 90gsm sketch paper, will instantly warp, buckle, and pill when wet. When paper buckles, water pools in the resulting valleys, creating uncontrollable backruns, dark edges, and muddy patches. A 300gsm sheet is thick enough to remain structurally stable under heavy wet-on-wet washes.
Watercolour paper is also defined by its texture, which falls into three main categories:
- Cold-pressed (Not): This paper has a medium, textured surface. It is the most versatile and forgiving option for beginners. The slight "tooth" slows down the flow of water, giving you more time to manipulate the paint, and it holds pigments beautifully in place.
- Hot-pressed: This paper is completely smooth, having been pressed between hot metal rollers. It is highly absorbent, meaning water dries quickly and can leave sharp, hard edges. While excellent for precise pen-and-ink work or botanical illustration, it is incredibly difficult for beginners to control during soft, blended washes.
- Rough: This paper has a heavy, pronounced texture. It is fantastic for expressive, dry-brush landscape techniques, but making fine, detailed lines is highly challenging.
The material composition of the paper also dictates how it behaves. Cellulose paper (made from wood pulp) is highly affordable and dries relatively fast. Paint sits primarily on the surface of cellulose, which makes “lifting” (erasing dry paint with a damp brush) very easy, though it makes layering multiple washes difficult without disturbing the underlying paint. Cotton paper (100% cotton) is the premium standard. It absorbs water deeply and evenly, allowing you to paint wet-on-wet for extended periods without the paper drying out mid-stroke. Many high-quality student pads use a blend of cellulose and cotton, which offers a great balance of performance and price.
Finally, pay attention to “sizing” and binding. Sizing is a starch or gelatin treatment applied to the paper fibers to control absorbency. Without sizing, the paper acts like a paper towel, sucking the paint straight down and leaving flat, dull, fuzzy marks. In Singapore’s humid climate, high relative humidity can slowly degrade paper sizing over time (a process called hydrolysis). To protect your paper, store your pads in airtight plastic containers with silica gel packets. When buying, look for gummed pads or blocks—where the sheets are glued together on all four sides. This built-in tension keeps the paper perfectly flat while you paint; once your artwork is completely dry, you simply slide a dull knife under the top sheet to release it.
Palettes and Accessories: Spotting Useful Tools vs. Gimmicks
A good starter set should include a functional mixing palette. The best palettes are made of ceramic or heavy-duty, sturdy plastic with deep, spacious wells. Ceramic is highly prized because paint does not bead up on its surface, allowing you to see the exact colour and dilution of your wash before applying it to paper. If your set includes a plastic palette, you can easily prepare it by gently rubbing the mixing wells with a soft pencil eraser or a tiny dab of non-gel toothpaste; this removes the factory oily sheen and prevents your paint from pooling into unusable droplets.
Avoid sets that rely on flimsy tin lids or tiny, shallow plastic wells. If the mixing areas are too small, your colours will inevitably bleed into one another, turning your mixing space into a muddy mess.
For water management, you will need two separate water jars. One jar is used strictly for rinsing dirty paint off your brushes, while the second jar remains filled with crystal-clear water for mixing clean washes and wetting your paper. While any recycled glass jam jar works perfectly, collapsible silicone water cups are highly useful additions to a starter kit due to their portability and textured ridges at the bottom, which help gently clean pigment out of brush bristles.
Be sure to supplement your kit with several low-cost, essential tools that are rarely included in pre-packaged sets:
- Acid-Free Masking Tape: Used to tape down individual sheets of paper to a rigid backing board. This prevents warping and leaves you with a crisp, professional white border when peeled off.
- A Rigid Backing Board: A simple piece of acrylic, corrugated plastic, or sealed wood to support your paper.
- Sponges and Paper Towels: Crucial for blotting excess water from your brush and controlling your water-to-paint ratio.
Be skeptical of starter kits that pad their item counts with low-quality sketching pencils, tiny plastic rulers, flimsy palette knives, or miniature wooden easels. These are cheap gimmicks designed to make a set look comprehensive on a retail shelf, but they add zero value to your actual watercolour practice and often distract from the poor quality of the core paints and brushes.
How to Evaluate Pre-Packaged Watercolour Kits
If you decide to buy a pre-packaged, boxed watercolour kit from an art supply store or an online marketplace, you must evaluate the package cohesively rather than relying on marketing claims. Start by assessing the balance of the components. A red flag for a poor-quality kit is an uneven distribution of materials—for example, a set that boasts “50 pieces” but consists of 36 tiny paint pans, 10 identical low-grade plastic brushes, 3 sheets of thin paper, and a plastic pencil sharpener. A high-quality kit will focus its value on a smaller number of high-performing tools, such as 12 solid paint pans, 2 good synthetic brushes, and a pad of genuine 300gsm paper.
Brand verification is your safest shortcut to quality control. Look for established art supply manufacturers that are globally recognized for their professional lines but also offer dedicated student ranges. Brands such as Winsor & Newton (their Cotman range), Royal Talens (their Van Gogh range), Daler-Rowney (their Aquafine range), and Sennelier (their La Petite Aquarelle range) maintain strict quality control standards. They use reliable binders and finely ground pigments in their student lines, ensuring a smooth, predictable painting experience that cheaper, unbranded toy lines cannot match.
Take a close look at the packaging itself. A durable, reusable metal tin or a hard plastic travel box with an integrated folding mixing tray is highly valuable. These cases protect your dry paint pans from dust and physical damage, fit easily into a bag, and provide a reliable mixing surface wherever you go. Avoid kits packaged in disposable plastic blister packs or thin cardboard boxes, as you will have to purchase a separate storage container almost immediately.
Finally, always verify safety and compliance labels, especially if the set will be used by younger family members or in shared household spaces. Look for the Art and Creative Materials Institute (ACMI) “AP” (Approved Product) non-toxic seal, or compliance with European EN71 safety standards. This ensures the pigments do not contain harmful heavy metals, such as true cadmium or cobalt, which are replaced with safe organic “hues” in student-grade formulations.
Boxed Sets vs. Building Your Own Custom Beginner Kit
When starting out, you face a classic choice: buy a convenient, pre-packaged boxed set or build your own custom kit from individual components. Both paths have distinct advantages and trade-offs depending on your budget, commitment, and goals.
Pre-Packaged Boxed Sets
- The Pros: Boxed sets are incredibly convenient, highly giftable, and visually appealing. They offer a lower upfront cost, typically ranging from S$25 to S$50 for a reputable student-grade pocket box. They take the guesswork out of matching paints to a palette and often come in highly compact, portable formats.
- The Cons: To keep retail prices low, manufacturers almost always compromise on the quality of the included brushes and paper. The paper included in these sets is often too thin, and the brushes tend to shed or lose their points quickly, forcing you to replace them anyway.
Custom Beginner Kits
- The Pros: Building a custom kit allows you to allocate your budget exactly where it matters most. You can invest in a high-quality pad of 300gsm cellulose or cotton-blend paper (around S$15 to S$30) and two excellent, long-lasting synthetic round brushes (around S$8 to S$15 each). You can pair these with a basic, highly reliable 6-colour student paint set.
- The Cons: Assembling a custom kit requires more research, a slightly higher initial trip to the art store, and a marginally higher upfront cost (typically S$50 to S$80 overall).
The Decision Framework
If you are buying a gift, planning a travel trip, or simply want to try watercolour as a casual weekend hobby to see if you enjoy it, a pre-packaged student-grade boxed set from a reputable brand is an excellent, low-stress entry point. However, if you are serious about learning proper watercolour techniques, want to avoid the technical frustration of buckling paper, and want tools that will grow with your skills over several years, you should strongly consider building your own custom kit. Investing your budget into a proper 300gsm paper pad and two high-quality synthetic brushes will make your learning process infinitely smoother and more rewarding.
Frequently Asked Questions (FAQ)
Do I need to buy expensive professional watercolours to start?
No, you do not need to buy professional-grade paints to begin. Professional watercolours contain highly concentrated, pure pigments and minimal fillers, making them beautiful but expensive, often costing S$15 to S$30 per single tube. Student-grade paints from reputable brands are highly capable, cost-effective, and much more forgiving for beginners learning water control. They allow you to practice freely and make mistakes without feeling guilty about wasting expensive materials.
Why do my watercolours look chalky or muddy?
Chalkiness is typically caused by using low-quality, budget paints that contain heavy white fillers (like chalk or barium sulfate) to stretch the pigment, or by using cheap paper that lacks proper sizing, causing the pigment to sink deep into the fibers rather than sitting on the surface. Muddy colours occur when you mix too many pigments together—especially three or more warm and cool colours—or when you overwork a wet wash on your paper, lifting up the dry underlying layers and blending them into a dull, grey-brown mess.
Can I use regular drawing paper for watercolour painting?
No, regular drawing, sketch, or printer paper is completely unsuitable for watercolour painting. These papers are too thin (usually under 150gsm) and lack the internal and external sizing required to resist water. When exposed to wet washes, regular paper will instantly warp, buckle, and pill into tiny paper fiber balls. The paint will bleed uncontrollably through the thin fibers, and the surface will likely tear when you try to blend, making dedicated 300gsm watercolour paper a non-negotiable requirement.
Community discussion
Share your experience or ask a question. Comments are reviewed before publication.