
Starting your crochet journey is an exciting step into a world of tactile creativity, but the initial experience hinges heavily on the tools you hold in your hands. A poorly curated DIY crochet kit can quickly turn a relaxing hobby into a frustrating exercise of dropped stitches, split yarn, and hand cramps. For beginners, the secret to a successful first project lies in finding a kit that balances high-quality, ergonomic tools with forgiving, highly visible yarn. By understanding what makes a hook comfortable and a yarn easy to manipulate, you can confidently select a kit that sets you up for success.
When evaluating kits on e-commerce platforms or in local craft shops, it is easy to get distracted by cute finished designs like amigurumi animals or cozy coasters. However, the physical properties of the included components deserve your primary attention. A beginner-friendly kit should act as a gentle introduction, offering materials that minimize common learning hurdles such as tension control issues and hand fatigue.
Evaluating Crochet Hook Quality in Beginner Kits
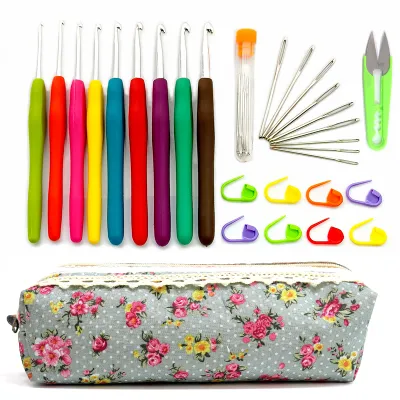
The crochet hook is the direct interface between your hands and your project, making its material, shape, and design critical to your learning curve. Beginner kits often include hooks made from aluminum, plastic, or bamboo, each offering distinct physical properties. Aluminum hooks are highly favored for their durability and exceptionally smooth surface, which allows yarn to glide effortlessly. However, they can feel cold to the touch initially and may slip out of hands easily if they lack a proper grip. Plastic hooks are lightweight and inexpensive, but they often suffer from manufacturing seams—tiny ridges left from the molding process that can snag delicate yarn fibers. Bamboo hooks offer a natural warmth and a slight surface friction, which is excellent for keeping slippery yarns from sliding off the hook prematurely, though they can drag on stickier fibers like acrylic.
Products mentioned in this guide
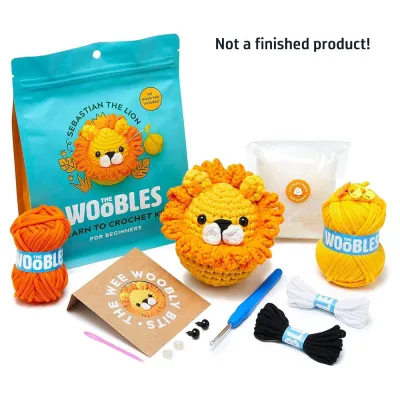
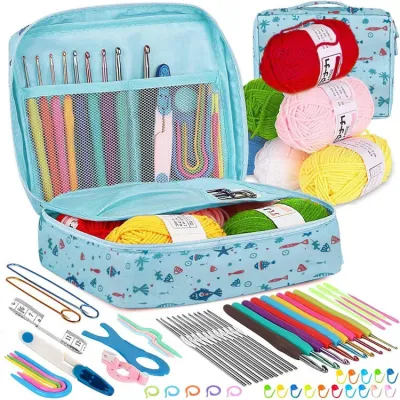
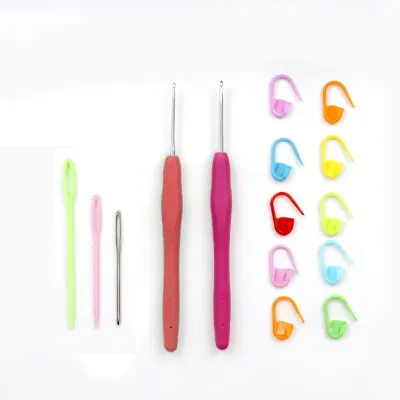
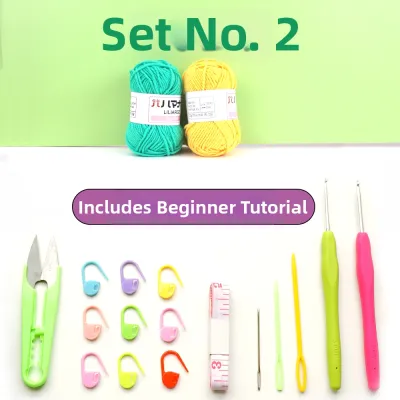
Prices are valid at publication and may change. Please refer to the product page for the latest price.
Beyond the material, the shape of the hook head and the design of the handle play a massive role in your comfort. Standard hooks are typically categorized as either inline or tapered. Inline hooks feature a deep, flat-bottomed throat and a sharp, pointed lip aligned with the shaft, which helps beginners grab the yarn securely but can sometimes split the strands if not handled carefully. Tapered hooks have a rounded head, a shallower throat, and a smoother transition, making them gentler on yarn but occasionally harder for beginners to hook consistently. To combat hand fatigue during long practice sessions, look for kits that feature ergonomic handles. These hooks are fitted with soft silicone, rubber, or molded plastic grips that widen the handle, allowing for a relaxed grip that reduces strain on the small muscles of your hand and wrist.
Finally, clear size markings are indispensable. A beginner-friendly kit must have the hook size clearly engraved, molded, or printed on the handle in millimeters (such as 4.0 mm or 5.0 mm) rather than just arbitrary letter codes. This ensures you can easily verify that the hook matches the specific requirements of the included pattern. If you decide to transition to other projects later, having a clearly labeled, high-quality hook in your collection provides a reliable tool you can use for years to come.
Identifying the Right Yarn Type for First Projects
The yarn included in your kit is just as influential as the hook when it comes to mastering your first stitches. For beginners, yarn weight—the thickness of the strand—is the first point of evaluation. Medium yarn weights, commonly classified as worsted, aran, or medium 4-ply (and sometimes double knitting or DK in lighter projects), are the standard for learning. These weights are thick enough to be easily held and manipulated, making your stitches highly visible without being so bulky that they become heavy and difficult to manage. Extremely thin yarns require precise finger coordination that can frustrate a novice, while ultra-bulky chenille or novelty yarns can obscure stitch definition entirely, making it nearly impossible to see where to insert your hook.

Fiber content is another critical factor that dictates how the yarn behaves under tension. Acrylic yarn is highly common in beginner kits because it is budget-friendly, widely available, and possesses a natural elasticity that helps even out uneven tension. However, low-grade acrylic can feel scratchy and split easily. Cotton yarn is highly structured and offers superb stitch definition, making it incredibly easy to see exactly where each loop lies. In warm, humid climates like Singapore, cotton or cotton-acrylic blends are particularly pleasant to work with because they do not trap heat or feel sticky against your fingers during long sessions. The trade-off is that pure cotton has very little stretch, which can make maintaining consistent tension slightly harder on your hands compared to a springy wool blend.
To ensure a smooth learning experience, perform a visual and tactile check of the yarn’s construction if you are shopping in person, or look for close-up photos in online listings. You want a yarn with a tight twist and multiple plies (individual strands twisted together). A loosely twisted yarn will split constantly as you try to pull the hook through, leading to messy stitches and immense frustration. Additionally, color choice is paramount: always opt for light, solid colors such as cream, pastel blue, or soft mint. Dark colors like black, navy, or deep forest green absorb light and make it incredibly difficult to distinguish individual stitches, especially when you are practicing in typical indoor lighting.
Assessing Kit Completeness and Pattern Clarity
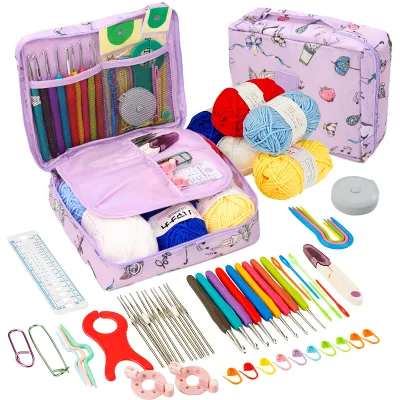
A truly comprehensive DIY crochet kit should contain everything you need to complete the project from start to finish without requiring an immediate trip to a local craft store. Beyond the hook and yarn, look for essential accessories that facilitate the learning process. Locking plastic stitch markers are absolutely vital for beginners; they clip directly into your stitches to mark the beginning of a round or highlight specific turning points, preventing your work from unraveling. A sturdy tapestry needle (either metal or high-quality plastic) with a large eye is necessary for weaving in loose yarn ends securely once your project is finished. Other helpful additions include a small pair of yarn snips and a row counter, which saves you from having to constantly recount your stitches on paper.
The quality of the instructional material is often what determines whether a beginner completes a kit or abandons it. Before purchasing, verify the format of the instructions. Written patterns can be incredibly confusing for someone who does not yet speak the “language” of crochet abbreviations (such as sc, dc, or inc). The most effective kits provide a multi-layered approach: a clear, printed booklet with step-by-step color photographs, accompanied by a link or QR code to high-definition video tutorials. These videos should ideally show the stitches being made slowly, from the crafter’s perspective, and offer separate demonstrations for both right-handed and left-handed makers.
Another often-overlooked detail is the quantity of yarn provided. A well-designed kit should include a generous yardage buffer—ideally 15% to 20% more yarn than the pattern strictly requires. This extra material allows you to practice basic stitches, create test swatches to find your natural tension, and accommodate the inevitable mistakes and unraveling that occur during your first few attempts. If a kit provides barely enough yarn to complete the design under tight tension conditions, any minor error or loose stitching could leave you running short before the project is finished.
Red Flags to Avoid When Buying Crochet Kits Online
Shopping for crochet kits online offers incredible variety, but it also requires a discerning eye to avoid low-quality products that hinder your progress. One of the most common red flags is a vague or incomplete product description. If a listing fails to specify the exact hook size, hook material, or yarn fiber content, it is highly likely the kit uses cheap, generic components that may not be suitable for beginners. Avoid listings that promise “random color” yarn or “assorted hook styles,” as these are often clearance items packaged together without any regard for how well the tools and materials actually work together.
Another warning sign is the complete absence of gauge information or finished project dimensions. Gauge refers to the number of stitches and rows per inch, which determines the final size of your creation. Without this information, or without a clear indication of how large the finished item should be, you have no way of knowing if the provided yarn will be sufficient or if your stitches are too loose or too tight. A reputable kit manufacturer will always state the expected dimensions of the finished project and provide a rough guide to matching the gauge.
Finally, make active use of customer reviews, paying close attention to the specific complaints raised by other buyers. Look for recurring mentions of yarn that splits easily, hooks that bend or break under normal tension, or instructions that are poorly translated and impossible to follow. If multiple reviews mention that the video tutorials are missing, silent, or too fast to comprehend, treat it as a clear sign to look elsewhere. Investing a few extra minutes to read through user feedback can save you from the disappointment of a poorly curated kit.
Frequently Asked Questions (FAQ)
Can I use a different hook size than the one recommended in the kit?
Yes, you can substitute the hook, but doing so will directly affect your stitch tension and the final size of your project. If you naturally crochet very tightly, switching to a slightly larger hook (for example, moving from a 4.0 mm to a 4.5 mm hook) can help loosen your stitches and make them easier to work. Conversely, if your stitches are loose and floppy, a slightly smaller hook can help you achieve a neater, more structured fabric. Keep in mind that using a larger hook will consume more yarn, which might cause you to run out if your kit does not include a generous yardage buffer.
What should I do if the yarn in my kit splits easily while crocheting?
If you encounter splitting yarn, first examine your hook. A hook with a very sharp point or a rough manufacturing seam can easily pierce the yarn strands instead of gliding over them; switching to a smoother, slightly more rounded tapered hook can help. Additionally, adjust your technique by slowing down your movements and ensuring you insert the hook fully into the center of the stitch space rather than catching the edges. Keeping your tension slightly relaxed can also prevent the individual plies of the yarn from separating under strain.
Are DIY crochet kits more cost-effective than buying supplies individually?
For absolute beginners, DIY crochet kits are generally highly cost-effective. While purchasing individual skeins of yarn, ergonomic hooks, stitch markers, and needles separately might seem cheaper per item, the total upfront cost can easily exceed S$30 to S$50, and you will often end up with far more yarn than you need for a single small project. A curated kit, typically priced between S$15 and S$40, provides the exact quantities required alongside tailored instructions, saving you money on excess materials while offering a convenient, all-in-one entry point into the hobby.

Community discussion
Share your experience or ask a question. Comments are reviewed before publication.