
Starting your crochet journey is an exciting step into a versatile and relaxing craft, but walking into a craft store or browsing online can quickly become overwhelming. A complete beginner’s crochet set does not need to contain dozens of specialized tools; instead, it should focus on a few high-quality essentials. To begin practicing and completing your first projects, you only need a small selection of mid-range crochet hooks (typically between 4.0 mm and 6.0 mm), a pack of blunt-tip yarn needles, several locking stitch markers, a pair of sharp fabric scissors, and a flexible measuring tape. By focusing on these core items, you can avoid spending money on unnecessary accessories and ensure your early crafting sessions are smooth, comfortable, and frustration-free.
Many beginners fall into the trap of purchasing massive, low-cost bundles containing thirty or forty pieces, only to find that most of the items remain unused or break during their first week of practice. When you are learning the basic stitches—such as the chain stitch, single crochet, and double crochet—your primary focus should be on how the yarn moves over the hook. Having too many tools can distract you from mastering this muscle memory. A curated, thoughtful starter set allows you to learn the mechanics of tension and stitch structure without unnecessary complications.
Whether you decide to purchase a pre-assembled starter kit or assemble your own custom set from a local specialty craft shop, understanding the function and quality of each tool is key. Investing in the right materials from day one prevents common beginner pain points, such as splitting yarn, hand fatigue, and dropped stitches. This guide will walk you through the essential components of a beginner’s crochet set, how to evaluate the quality of your tools, and how to make the best purchasing decisions for your budget and crafting goals.
Products mentioned in this guide
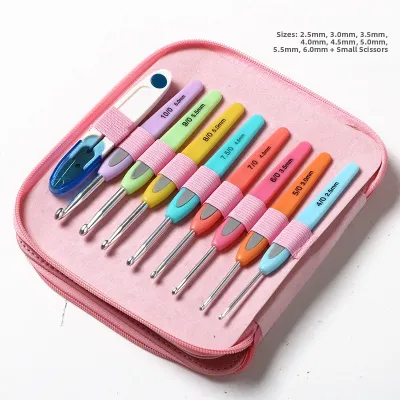
![🇸🇬 [In Stock]Adult Beginner Crochet Kits Knitting Starter Kits Kids Crochet Kits Wool Hooks and Knitting Accessories DIY Knitting Tools](https://img.lazcdn.com/g/p/985580b5e00451665da443451887f5a9.png_400x400q80.png_.webp)
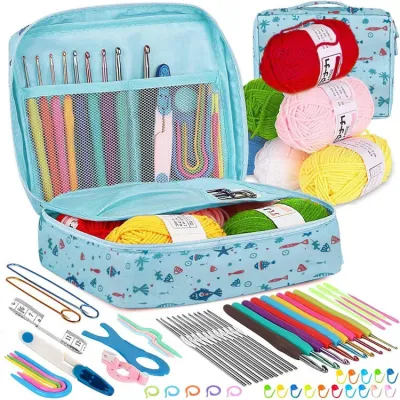
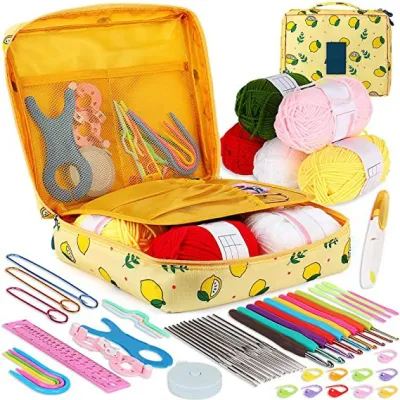
![[SG SELLER]100pcs Crochet Hooks Set Knitting Tool Accessories with Leather Case Aluminum Yarn Pin Knitting Set Weave Multicolor Craft Sewing Needles Yarn Multifunction Knitted Kit 22/52PCS Sets](https://img.lazcdn.com/g/p/9a318361e803988ef5d6c8fc1e86eb07.jpg_400x400q80.jpg_.webp)
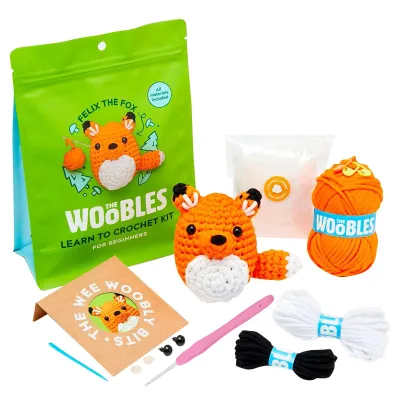
Prices are valid at publication and may change. Please refer to the product page for the latest price.
Core Crochet Hooks: Sizing and Material Basics
The crochet hook is the most critical tool in your kit, acting as an extension of your hand as you loop and pull yarn. For beginners, understanding how hooks are sized and what materials they are made of is essential for selecting the right tool for your first project. Crochet hooks are categorized by the diameter of their shaft, which determines the size of the stitches you create.
Sizing conventions can initially look confusing because manufacturers use different labeling systems depending on where the tools are produced. The most reliable and standardized system is the metric measurement, which lists the hook size in millimeters (mm). In contrast, the United States uses a letter and number system (such as H-8 or J-10), while the United Kingdom and Canada historically used a reverse numbering system where larger numbers indicated smaller hooks. When building your beginner set, always look for the metric size printed on the hook or packaging, as this remains consistent worldwide and eliminates any guesswork when matching your hook to a specific yarn.
For your very first projects, you should focus on mid-range hook sizes, specifically 4.0 mm (often labeled G-6), 5.0 mm (H-8), and 6.0 mm (J-10). These sizes are highly versatile because they pair perfectly with medium-weight yarns, such as worsted, aran, or 8-ply cotton. Working with a mid-range hook and matching yarn makes it much easier to see your stitches, count your rows, and identify mistakes. Extremely small hooks (under 3.0 mm) require thin, delicate threads that are difficult for beginners to tension, while jumbo hooks (above 8.0 mm) can be heavy and awkward to maneuver when your hands are still adapting to the movements.
The material of the hook also plays a significant role in how smoothly your yarn glides and how comfortable the tool feels in your hand. Aluminum hooks are the most popular choice for beginners and experienced crafters alike. They are incredibly durable, lightweight, and feature a very smooth surface that allows almost any type of yarn to glide effortlessly. However, because aluminum is highly conductive, these hooks can feel cold to the touch when you first pick them up, and some crafters find them too slippery when working with silky synthetic yarns.
Plastic or acrylic hooks are another common option, often found in budget-friendly starter sets. They are exceptionally lightweight and inexpensive, making them an attractive choice if you want to try the craft without a significant financial commitment. The downside is that cheap plastic hooks can sometimes have noticeable manufacturing seams along the shaft or throat. These rough edges can snag delicate yarn fibers, causing frustration and ruining your stitches. If you choose plastic, always run your fingers along the hook to ensure the surface is completely smooth.
Bamboo and wooden hooks offer a completely different tactile experience. They are warm to the touch, lightweight, and possess a natural, organic texture that provides a slight grip. This extra friction is incredibly helpful for beginners who struggle with their stitches slipping off the hook too quickly. Bamboo hooks help you maintain control over your tension as you learn. However, wooden hooks can warp or break if they are very thin, and they may drag slightly when used with grabby wool yarns, slowing down your rhythm once you become more proficient.
Must-Have Accessories for Your First Projects
While the hook does the heavy lifting, a handful of simple accessories are absolutely necessary to complete, measure, and secure your work. Without these supporting tools, you will find it difficult to finish projects neatly or keep track of your progress.

The first essential accessory is a pack of blunt-tip yarn needles, also known as tapestry or darning needles. Unlike standard sewing needles, which are sharp and have tiny eyes, yarn needles have a large eye to accommodate thick yarn strands and a blunt tip. The blunt tip is crucial because it allows you to weave your loose yarn ends into the finished fabric without splitting the existing stitches. Metal tapestry needles are generally preferred because they slide smoothly through the fibers and do not bend, though flexible plastic versions are also widely available and work well for thicker, bulkier yarns.
Stitch markers are another non-negotiable tool for anyone learning to crochet. When working in rows, beginners frequently struggle to identify the very first and very last stitches, which often leads to accidentally skipping stitches and creating uneven, triangular edges. When working in rounds—such as when making toys or hats—stitch markers are essential for identifying the start of a new round. Opt for locking stitch markers, which look like plastic safety pins. These can be easily opened, clipped directly into a stitch, and locked in place so they do not fall out while you work. Avoid split-ring markers or solid rings, as they are designed for knitting and can easily slip out of active crochet stitches.
A reliable pair of fabric scissors is also vital for your starter set. You do not need expensive professional shears, but you do need a dedicated, sharp pair of small scissors that can cut cleanly through yarn fibers. Dull household scissors will chew and fray the ends of your yarn, making it incredibly frustrating to thread the yarn through your tapestry needle. Keeping a small, dedicated pair of embroidery scissors in your crochet bag ensures you can make clean cuts every time.
Finally, a flexible measuring tape is necessary for checking your gauge and measuring the dimensions of your work. In crochet, ‘gauge’ refers to the number of stitches and rows per inch or centimeter. Checking your gauge ensures that a hat, glove, or sweater will actually fit the intended recipient. A flexible fiberglass or vinyl tape measure is ideal because it can easily wrap around curved surfaces and lies flat against your fabric without stretching, providing accurate measurements every time.
Evaluating Pre-Made Kits vs. Building Your Own Set
When shopping for your first crochet tools, you will generally face two choices: buying a pre-packaged beginner kit or purchasing your tools individually. Both approaches have distinct advantages and drawbacks, and the right choice depends on your budget, commitment level, and appreciation for quality.
Pre-packaged beginner kits are highly popular because of their convenience and low upfront cost. On local online marketplaces, you can easily find complete kits ranging from S$10 to S$25. These bundles typically include a wide range of hook sizes, a zippered storage case, stitch markers, plastic needles, and sometimes even small skeins of acrylic yarn. The primary advantage is that you get everything you need to start in a single purchase, and the included case keeps your tools organized. However, the quality of the components in these budget kits is often low. The hooks may have rough seams, the plastic accessories can be brittle and snap easily, and the included yarn is often thin, split-prone, and difficult for a beginner to work with.
Building your own set by sourcing individual tools allows you to prioritize quality where it matters most. Instead of buying ten cheap hooks you may never use, you can invest in one or two high-quality, ergonomic hooks in the specific sizes you need for your first project. A single premium hook from a reputable brand typically costs between S$5 and S$12 in Singapore specialty craft shops or stationery stores. When you pair this with a small pack of metal tapestry needles and durable locking stitch markers, your total investment might be similar to a cheap kit, but the user experience will be vastly superior. High-quality hooks glide more smoothly, reduce hand strain, and last a lifetime.
When evaluating pre-made kits, there are several red flags to watch out for. Be wary of kits that do not clearly state the metric sizes of the hooks, or those where the sizes are only printed in cheap ink on the surface of the handle, as this ink will quickly rub off with use. Inspect the product photos closely for rough, unpolished metal or plastic seams along the hook’s throat and head. Additionally, if a kit includes yarn, check the weight and fiber content; very thin, fuzzy, or multi-colored yarns are incredibly difficult for beginners to work with because they obscure stitch definition. If you do buy a kit, it is often wise to purchase a separate skein of smooth, light-colored, medium-weight yarn to practice with.
Ergonomic and Quality Checks Before You Buy
Before you finalize your purchase, whether buying a single hook or a complete set, performing a few quick quality and ergonomic checks will save you from discomfort and frustration down the road. Because crochet involves repetitive hand movements, the physical design of your tools directly impacts how long you can comfortably craft.
The first and most important check is the handle shape and grip texture. Standard straight aluminum hooks are very thin, which requires your fingers to pinch tightly to hold them. Over time, this tight grip can lead to hand cramps, wrist fatigue, and joint strain. Ergonomic hooks feature thickened handles made of soft rubber, silicone, or shaped plastic. These wider grips allow your hand to remain in a more relaxed, natural position. When choosing an ergonomic hook, look for a handle that has a slightly flattened thumb rest and a non-slip texture, which provides excellent control without requiring excessive grip force.
Next, verify how the hook size is marked on the tool. Because you will use different hook sizes for different projects, being able to identify the size quickly is essential. Avoid hooks where the size is merely painted on the surface, as the friction from your fingers and the natural oils in your skin will wear the paint away within a few weeks of active use. Instead, look for hooks where the size is deeply engraved into the metal, molded directly into the rubber handle, or stamped into the thumb rest. This ensures the marking remains legible for the entire lifespan of the tool.
Finally, carefully inspect the throat and head of the hook. The throat is the groove that catches the yarn, and the head is the pointed tip that enters the stitch. Run your finger over these areas to check for any rough spots, sharp edges, or manufacturing burrs. A high-quality hook will have a perfectly smooth, polished finish. If you are choosing between hook styles, you may encounter ‘inline’ hooks (which have a flat, pointed head and a deep, straight throat) and ‘tapered’ hooks (which have a rounded head and a shallower, curved throat). Tapered hooks are generally more forgiving for beginners because they slide in and out of stitches with less resistance, reducing the likelihood of catching and splitting the yarn fibers.
Frequently Asked Questions (FAQ)
Do I need different hooks for different types of yarn?
Yes, you must match your hook size to the thickness of your yarn to achieve the correct stitch tension and fabric structure. Every skein of yarn comes with a paper band that contains essential care instructions and recommended tool sizes. Look for the small icon of a crochet hook on the label, which will list a recommended metric size range (for example, a standard worsted weight yarn typically recommends a 5.0 mm to 6.0 mm hook).
As you gain experience, you can adjust your hook size slightly to change the characteristics of your finished fabric. If you find that your stitches are incredibly tight and stiff, switching to a slightly larger hook can help loosen your tension and create a softer, more flexible drape. Conversely, if your stitches are loose and floppy, or if you are making a stuffed toy where you want to prevent the stuffing from showing through, switching to a smaller hook will create a tighter, denser fabric.
Are ergonomic crochet hooks worth the extra cost for beginners?
For most beginners, investing in ergonomic crochet hooks is highly recommended and well worth the modest extra cost. The padded, wider handles significantly reduce the muscle tension in your hands and wrists, allowing you to practice for longer periods without experiencing cramping or fatigue. This is particularly beneficial for beginners, who tend to hold their tools with a very tight, tense grip as they struggle to control the yarn.
However, if you are on a very tight budget or are unsure if you will stick with the hobby, standard straight aluminum hooks are perfectly adequate for short, occasional practice sessions. They are highly durable and inexpensive, allowing you to learn the basic stitches without a significant upfront investment. If you do start with straight hooks and find that your hands begin to ache after fifteen or twenty minutes of crafting, upgrading to a single ergonomic hook in your most frequently used size is a cost-effective way to improve your comfort.
Community discussion
Share your experience or ask a question. Comments are reviewed before publication.