
To choose the right shipping label pouch, you must match the physical dimensions of your printed waybill with a pouch that offers a 10mm to 15mm margin on all sides. This extra clearance ensures quick insertion without folding, buckling, or tearing the paper. In Singapore’s fast-paced logistics landscape, selecting the correct pouch size prevents scanning delays at sorting hubs and keeps your packages moving smoothly to their destinations.
Using a pouch that is too small forces you to fold the label, which can obscure critical delivery details or crease the barcode. Conversely, an oversized pouch leaves excess plastic that can catch on conveyor belts, risking detachment during transit. Finding the exact balance protects your shipping documentation from moisture, dirt, and rough handling.
Matching Standard Label Sizes to Pouch Dimensions
Standard shipping labels typically follow international paper sizes. To ensure a seamless fit, you must account for both the physical dimensions of the paper and the internal clearance of the plastic pouch.
Products mentioned in this guide
![100pcs [A5 Size = 17cm x 25cm] Packing List Clear No Print Adhesive Packing List Envelopes / Plastic Poly Shipping labels Pouches Bag](https://img.lazcdn.com/g/p/c34146c5328151e860c8bdbc29e7358c.jpg_400x400q80.jpg_.webp)
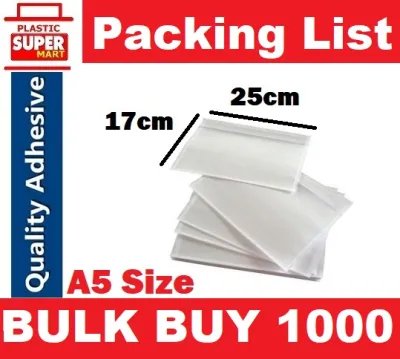
Prices are valid at publication and may change. Please refer to the product page for the latest price.
The standard dimensions for the most common paper sizes are:
- A4 Size: 210 mm x 297 mm
- A5 Size: 148 mm x 210 mm
- A6 Size: 105 mm x 148 mm
Applying the “add 10-15mm” rule to both the width and height of these dimensions ensures easy insertion. This margin accounts for the thickness of the paper—especially when using multi-page documents—and prevents the adhesive seal of the pouch from overlapping the edges of your label.
The table below maps these standard paper sizes to their ideal pouch dimensions:
| Label Size | Physical Paper Dimensions | Recommended Pouch Size (External) | Best Use Case |
|---|---|---|---|
| A4 | 210 x 297 mm | 230 x 320 mm to 240 x 330 mm | Full-page packing slips, commercial invoices, and international customs documents |
| A5 | 148 x 210 mm | 165 x 225 mm to 175 x 235 mm | Half-page logistics waybills and multi-part carbonless forms |
| A6 | 105 x 148 mm | 115 x 160 mm to 125 x 170 mm | Standard e-commerce shipping labels and local courier waybills |
If you are working with custom or non-standard label formats, measuring for the correct pouch is straightforward. Lay your printed label flat on a hard surface and measure the maximum width and height using a ruler. Add a minimum of 10mm to the width and 15mm to the height to find the required internal dimensions. Always check the manufacturer’s specifications to confirm the internal pouch dimensions, as the external dimensions include the sealed borders and adhesive strips.
Key Pouch Specifications Beyond Basic Dimensions
Selecting the right shipping label pouch involves evaluating several physical specifications that influence packing speed, durability, and barcode readability.

Loading Direction
The opening of the pouch determines how quickly you can slide a label inside during high-volume packing.
- Top-loading: The opening is located on the shorter edge of the pouch. This design keeps the label secure and is highly effective for portrait-oriented documents, preventing them from slipping out before the pouch is sealed.
- Side-loading: The opening runs along the longer edge. This wider opening allows for faster label insertion, making it the preferred choice for busy fulfillment centers where every second counts.
Adhesive Type
The backing of the pouch must bond securely to your specific packaging materials to prevent loss during transit.
- Permanent Self-Adhesive: These pouches feature a pressure-sensitive adhesive backing protected by a peel-off release liner. Once applied to corrugated cardboard, plastic poly mailers, or stretch wrap, the bond is permanent and cannot be removed without tearing the packaging.
- Non-Adhesive (Slip-in): These designs lack an adhesive backing and are typically used in specialized industrial racks, reusable shipping crates, or wire baskets. They rely on external slots or clips to stay in place.
Material Thickness
Pouch thickness is measured in microns or mils, directly affecting the protection and clarity of the document.
- Light Duty (30 to 40 microns): Highly flexible and cost-effective. These are ideal for short-distance local deliveries where exposure to moisture and friction is minimal.
- Heavy Duty (50 to 60+ microns): Offers superior tear resistance and rigidity. The thicker plastic keeps the pouch flat, preventing wrinkles that can distort barcodes and interfere with optical scanners.
For high-volume e-commerce operations, a side-loading, self-adhesive pouch with a medium thickness of 40 to 45 microns provides the best balance of packing speed, cost efficiency, and barcode readability. For occasional home shippers or low-volume businesses, standard top-loading pouches offer maximum security without requiring specialized packing setups.
Sizing for E-commerce and Courier Waybills
The rise of digital logistics has standardized shipping documentation across online marketplaces and local courier networks. In Singapore, the standard 4×6 inch (approximately 100x150mm) thermal label is the benchmark for most domestic deliveries.
To accommodate a standard 4×6 inch thermal waybill, a pouch measuring 115x165mm or 120x170mm provides a flush, professional fit. This size prevents the label from sliding around inside the pocket, ensuring that the barcode remains perfectly flat and visible to courier sorting sensors.
Multi-part waybills, such as A5 or A4 multi-copy carbonless forms, present a different challenge due to their thickness. Because these documents consist of multiple sheets bonded together, they require a pouch with a slightly wider margin—ideally 15mm to 20mm larger than the paper size. Opting for a top-loading pouch made from highly flexible plastic ensures the seams do not split when inserting these thicker document packets.
Integrated labels combine the shipping label and the packing slip on a single A4 sheet. If your operational workflow requires inserting the entire intact sheet, you must use a full A4-sized pouch (230x320mm). However, if your packing team folds the sheet in half to only display the shipping address, you can transition to an A5-sized pouch (165x225mm), which reduces material costs and minimizes the physical footprint on smaller shipping boxes.
How to Test and Verify the Fit Before Buying
Before purchasing shipping label pouches in bulk, conducting a few simple, low-risk tests will save time and prevent material waste.
First, perform a physical fit test. Print a sample waybill using your standard printer and paper stock. Slide the label into the pouch and check for any resistance. The paper should glide in smoothly. Look closely at the corners; if you notice any edge curling, buckling, or tight spots, the pouch is too small. Ensure the adhesive sealing strip folds over and seals completely without overlapping any printed text or barcodes.
Second, conduct a scanner readability test. Insert a printed label into the pouch, seal it, and attempt to scan the barcode using a standard handheld scanner or a smartphone logistics application. Test this under different lighting conditions to ensure that glare from the plastic material does not delay or block the scan. If the scanner struggles to read the barcode through the plastic, you may need to source pouches with a matte finish or a slightly lower thickness.
Finally, test the adhesive strength on your primary packaging materials. Apply a sample pouch to your standard corrugated cardboard box or plastic poly mailer. Press firmly across the entire surface and let it cure for five minutes. Attempt to peel the pouch off from one corner. A high-quality permanent adhesive should tear the paper fibers of the cardboard or stretch and distort the plastic of the poly mailer. If the pouch peels off cleanly without damaging the package surface, the adhesive is insufficient for secure transit.
Frequently Asked Questions (FAQ)
Can I use a larger pouch for a smaller label?
Yes, but only within a strict tolerance. A slightly larger pouch—with up to 20mm of excess space—is acceptable if you center the label. However, excessive empty space allows the label to shift during transit, which can hide critical delivery details or barcodes. Oversized pouches also leave loose plastic edges that can catch on automated sorting machinery, risking tearing the entire pouch off the box.
Do I need a label pouch for direct thermal printed labels?
Direct thermal labels are sensitive to heat, friction, moisture, and UV light, which can cause the print to fade or turn black. While many thermal labels feature their own adhesive backing, placing them inside a protective shipping pouch is highly recommended for long transit times, international shipping, or exposure to outdoor conditions. The pouch provides a vital barrier against rain, oil, and physical abrasions.
How do I remove a self-adhesive label pouch without damaging the box?
To remove a misplaced pouch from a cardboard box without tearing the paper fibers, apply mild heat using a hair dryer on a low setting for 10 to 15 seconds. This softens the adhesive backing. Gently lift one corner with a blunt plastic scraper and peel the pouch back slowly at a sharp angle. Avoid using harsh chemical solvents, as they can weaken the structural integrity of the cardboard and leave toxic residues.

Community discussion
Share your experience or ask a question. Comments are reviewed before publication.