
Preparing a child for the primary school journey in Singapore is an exciting milestone, but it also comes with a significant logistical challenge. Misplaced school items are a common headache for parents, with school lost-and-found bins regularly overflowing with identical water bottles, uniform jackets, and stationery sets. A systematic labeling strategy not only saves families the cost of frequent replacements but also helps young students develop a sense of personal responsibility over their belongings. This grade-by-grade checklist outlines exactly which items require name stickers at each stage of primary school, helping you prepare efficiently for the upcoming school year.
Establish Baseline Rules for School Labeling
Before purchasing name stickers in bulk, it is helpful to establish a clear framework for what actually requires a label. Not every item that goes into a school bag needs to be individually marked, and over-labeling can lead to unnecessary waste.
The primary distinction lies between personal daily items and shared classroom resources. Personal items that your child uses exclusively, such as pencil cases, lunch boxes, and jackets, must be clearly marked. Conversely, communal supplies that are pooled together for classroom use, such as boxes of tissues or shared art paper, do not require individual labels.
Products mentioned in this guide
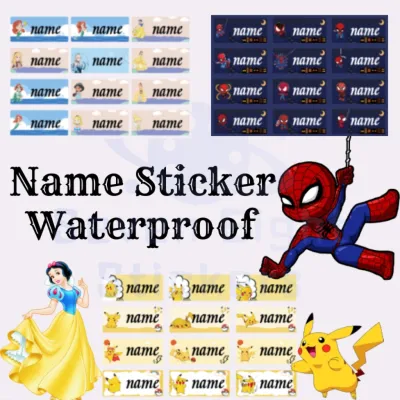
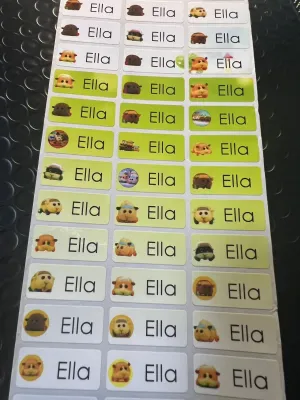
Prices are valid at publication and may change. Please refer to the product page for the latest price.
Focus your labeling efforts on high-risk categories for loss. Small stationery items, reusable food containers, and removable outerwear are the most frequently misplaced items in primary schools. Items like cardigans or PE jackets are often taken off during physical activities or in air-conditioned computer labs and easily left behind.
Always review your child’s school-specific parent handbook or orientation materials before printing or ordering labels. Some schools mandate specific labeling formats, such as including the child’s class or register number, while others restrict decorative cartoon characters on academic materials.
Consider privacy boundaries when designing your stickers. For items frequently carried outside school premises, such as school bags, umbrellas, or public transport card holders, use first names or initials rather than full names to protect your child’s identity in public spaces.
Build a Lower Primary (Primary 1 to 3) Labeling Checklist
Lower primary students are still developing the executive functioning skills needed to track their personal belongings throughout a busy school day. For Primary 1 to 3 students, the rule of thumb is to label almost everything that enters the classroom to prevent accidental mix-ups.

Core daily stationery requires meticulous labeling. This includes individual woodcase pencils, erasers, sharpeners, rulers, pencil cases, and plastic reading folders. Because young children frequently drop or swap these items during group work, a clear name sticker prevents disputes and helps teachers return lost items to the correct owner.
Personal care and mealtime items are highly susceptible to being left behind in the school canteen. Ensure water bottles, lunch boxes, reusable utensils, and personal hand sanitizer bottles are labeled with durable, water-resistant stickers. These items undergo daily washing, so the labels must withstand moisture and friction.
Apparel and physical education (PE) gear are another major category for loss, especially on days when students change out of their school uniforms. Label the inner tags of uniforms, PE shirts, shorts, socks, and school shoes. Lanyards holding student smart cards or EZ-Link cards also require clear identification, as these are essential for daily attendance and transit.
Art and craft supplies are frequently spread across shared tables during lessons. Color pencils, crayons, glue sticks, and safety scissors should all bear your child’s name. If individual labeling of every single crayon is too tedious, focus on the storage tin or box, but consider labeling individual high-use colors like black, blue, and red.
Build an Upper Primary (Primary 4 to 6) Labeling Checklist
As students transition into Primary 4, 5, and 6, their daily school kit changes significantly, shifting from basic art supplies to specialized academic tools and personal electronics. While older students generally have better ownership habits, the items they carry are often more expensive and harder to replace.
Advanced academic tools require precise labeling. This includes mechanical pencils, high-quality fountain pens, geometry sets (including compasses and protractors), and scientific calculators. Since scientific calculators are mandatory for upper primary mathematics and look virtually identical, a secure name sticker is vital to prevent disputes during exams.
Technology and electronics become a daily staple in upper primary classrooms due to personal learning device initiatives. School-issued or personal tablets, laptops, charging cables, power adapters, and permitted earphones must be clearly labeled. When labeling chargers and cables, verify device compatibility and port alignment to ensure the sticker does not interfere with the connection or block ventilation ports.
Co-Curricular Activity (CCA) gear represents a significant investment and is easily mixed up during practice sessions. Label specialized sports equipment (like badminton rackets or table tennis bats), musical instruments, and performance attire.
Reference materials brought from home should also be marked. This includes student planners, bilingual dictionaries, and external assessment books. Labeling the outer spine or front cover makes it easy for teachers to return misplaced books.
Select and Apply Durable Name Stickers
Choosing the right sticker material is just as important as deciding what to label. For items exposed to moisture and frequent washing, such as water bottles and lunch boxes, opt for waterproof vinyl stickers. For books, notebooks, and dry stationery, laminated paper stickers provide a cost-effective and durable solution that resists smudging from sweaty hands.
Because water resistance and adhesive durability depend on the exact material combination of the sticker and the item’s surface, perform a simple trial. Apply a single sticker to a test surface, submerge it in water, and check for peeling or ink bleeding before labeling the entire batch. Smooth plastics and metals hold adhesives exceptionally well, but textured surfaces may require stronger, high-tack adhesives.
To apply stickers for maximum longevity, follow a systematic process. First, clean the surface thoroughly with rubbing alcohol or mild soapy water to remove oils and dust. Ensure the surface is completely dry before application. Press the sticker down firmly from the center outward to eliminate air bubbles, and allow the adhesive to cure for at least 24 hours before exposing the item to water or heavy handling.
Always check manufacturer care labels before applying stickers to delicate surfaces. For high-end electronic casings or specialized fabrics, strong adhesives or iron-on heat applications can cause permanent damage. If in doubt, apply the label to a removable protective case or an inconspicuous inner seam.
Frequently Asked Questions (FAQ)
Do I need to label every single colored pencil or crayon?
Labeling every single piece can be incredibly time-consuming, but it is highly recommended for lower primary students who frequently drop individual pencils. If you choose not to label every piece, ensure the main storage container is clearly marked and teach your child to pack up completely after art class. For older students, labeling just the container is usually sufficient unless the school specifies otherwise.
What is the best way to label fabric items like uniforms and PE shirts?
For textiles, standard adhesive stickers will quickly peel off in the wash. Iron-on name labels offer excellent durability and fuse directly with the fabric fibers, making them ideal for uniforms and PE attire. Alternatively, fabric stamp inks or traditional hand-stitching provide permanent solutions. Always check the garment’s care label to ensure it can withstand the heat of an iron before applying iron-on labels.
How do I remove old name stickers without damaging the item?
To remove old stickers from hard surfaces, gently warm the adhesive with a hair dryer on a low setting to soften it, then peel it off slowly. Any remaining sticky residue can often be rubbed away with a small amount of cooking oil or eucalyptus oil on a microfiber cloth. When using a hair dryer or mild household solvents to remove residue, ensure adult supervision, work in a well-ventilated area, and keep heat sources away from flammable materials or delicate plastics.

Community discussion
Share your experience or ask a question. Comments are reviewed before publication.