
Selecting the correct shipping label pouch is a critical yet frequently overlooked step in the e-commerce fulfillment workflow. If a pouch is too small, you risk folding or trimming the label, which can cut off essential tracking details or barcode elements. Conversely, an oversized pouch leaves excess plastic that can wrinkle, trap air, and prevent courier scanners from reading the shipping information. In Singapore’s humid climate, where sudden rain showers can easily smudge unprotected paper, a secure, water-resistant shipping label pouch is indispensable for protecting your shipping documents. To find the ideal fit, you must look beyond the advertised dimensions and match your specific label format to the usable inner capacity of the pouch.
Understanding Label Pouch Dimensions: Outer vs. Inner Size
The most common mistake when purchasing shipping label pouches is confusing the manufacturer’s listed outer dimensions with the actual usable inner space. Manufacturers almost always advertise the outer dimensions of the pouch, which represent the absolute exterior edges of the plastic sleeve. However, the physical construction of the pouch significantly reduces the space available for your printed label.
This reduction occurs due to three main design features:
Products mentioned in this guide
![100pcs [A5 Size = 17cm x 25cm] Packing List Clear No Print Adhesive Packing List Envelopes / Plastic Poly Shipping labels Pouches Bag](https://img.lazcdn.com/g/p/c34146c5328151e860c8bdbc29e7358c.jpg_400x400q80.jpg_.webp)
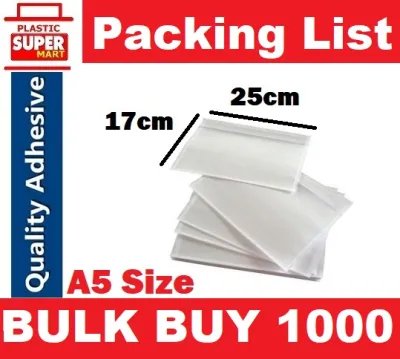
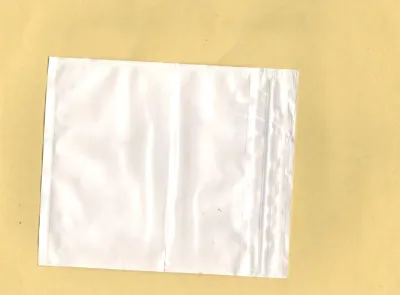
Prices are valid at publication and may change. Please refer to the product page for the latest price.
- Side Welds: The left and right edges of the pouch are heat-sealed to hold the plastic layers together. These side welds typically consume 3 to 5 mm of space on each side.
- Adhesive Borders: The pressure-sensitive adhesive backing often does not extend to the absolute edge, or conversely, requires a border to prevent the adhesive from oozing out during storage.
- Sealing Flaps: The top opening usually features a fold-over flap with a release liner. This flap requires clearance to fold over and seal flat against the package.
As a general rule of thumb, the usable inner area of a shipping label pouch is approximately 5 to 10 mm smaller on each side than the stated outer dimensions. For example, a pouch advertised with outer dimensions of 110 x 150 mm will typically only accommodate a label that is 100 x 140 mm or smaller. Attempting to force a label of the exact same size as the outer dimensions will cause the paper to buckle, preventing the pouch from sealing flat and leaving it vulnerable to moisture.
Matching Common Label Formats to Pouch Sizes
To select the right pouch, you must first identify your label format. Shipping labels generally fall into two main categories: traditional paper sizes printed on standard office copiers, and modern direct-thermal labels generated by specialized roll or fanfold printers. Each category demands a different sizing strategy to ensure a seamless fit.

Standard A-Series Labels (A4, A5, A6)
Traditional paper labels are widely used by businesses that print packing slips, invoices, or multi-part customs declarations directly from standard office printers. Because these are printed on standard paper, they often require folding to fit into standard pouch sizes.
- A4 Labels (210 x 297 mm): This is the largest standard format, often used for detailed packing lists or international freight documents. To display an unfolded A4 sheet, you need a large packing list envelope. Standard A4 pouches are specifically sized with outer dimensions of approximately 235 x 325 mm to fit these sheets perfectly without any folding.
- A5 (148 x 210 mm) and A6 (105 x 148 mm) Labels: These sizes are highly common for medium and small parcels. A6 labels are particularly popular for commercial invoices in cross-border e-commerce shipping. An A6 label maps perfectly to a small pouch with outer dimensions of roughly 120 x 165 mm, providing a safe margin that prevents the edges of the paper from catching or tearing during insertion.
Common Thermal Printer Labels (4×6, 4×4 inches)
E-commerce fulfillment centers and local courier networks rely heavily on direct-thermal printers. These printers use heat-sensitive media to produce smudge-resistant labels without ink or toner.
- 4×6 Inch Labels (approx. 100 x 150 mm): This is the undisputed industry standard for courier shipping labels used by major logistics providers. While the printed area is exactly 100 x 150 mm, the label is often attached to a slightly wider silicone release liner. For 4×6 labels, a shipping label pouch with outer dimensions of 110 x 160 mm or 120 x 170 mm is ideal. This extra space ensures that you do not have to struggle to align the sticky backing liner when inserting it into the pouch.
- 4×4 Inch Labels (approx. 100 x 100 mm): Often used for smaller parcels or specific carrier formats, these square labels require compact rectangular or square pouches. A pouch with outer dimensions of at least 115 x 115 mm is recommended to ensure the label slides in easily and remains flat.
Accounting for Adhesive and Insertion Margins
The physical design of the shipping label pouch—specifically whether it is a self-adhesive pocket or an open-top insertion sleeve—directly impacts the size you need to buy and how you apply it to your packages.
Self-adhesive pouches feature a pressure-sensitive adhesive backing covered by a peel-off paper liner. When applying these, the adhesive strip at the opening must seal directly against the package surface, not the label itself. If your label is too large and creeps into the sealing zone, the pouch will fail to close flat, allowing humidity or dirt to enter during transit.
In contrast, open-top or non-adhesive pouches, which are often taped down manually, require extra length at the top. This extra material allows you to fold the plastic flap over securely before applying packaging tape. If you do not leave a sufficient margin at the top of an open-top pouch, the label can easily slide out when the package is handled by courier sorters. Always check the dimensions of the peel-off liner and the placement of the double-sided tape on the pouch to ensure your final package profile remains flat and professional.
Quick Sizing Checklist Before You Buy
To avoid ordering thousands of unusable plastic sleeves, follow this practical checklist before purchasing your shipping label pouch inventory:
- Measure the actual printed label: Do not rely solely on the digital file settings. Use a physical ruler to measure the width and height of the label after it has been printed, including any non-printable margins or perforated edges.
- Calculate the inner capacity requirements: Add a buffer of 5 to 10 mm to both the width and height of your physical measurement. This represents the minimum inner capacity your pouch must have.
- Verify the manufacturer's specifications: Check the outer dimensions listed by the supplier and confirm whether they have provided the corresponding inner dimensions. If not, apply the 10 mm reduction rule.
- Order a sample pack first: Before committing to a bulk purchase, obtain a single sample pouch. Test it with your actual printer output to ensure the barcode remains perfectly flat, wrinkle-free, and fully scannable.
Frequently Asked Questions (FAQ)
Real-world packaging conditions often require slight adjustments to standard sizing rules. Here are answers to common queries regarding shipping label pouch selection.
Can I use a slightly larger pouch for a smaller label?
While a smaller label will physically fit into a larger pouch, doing so is generally not recommended. The excess plastic surrounding the label can easily fold over, create air pockets, or wrinkle during transit. These wrinkles can reflect light and interfere with the optical scanners used by courier services, leading to manual sorting delays. Additionally, loose, oversized pouches look unprofessional and can collect dust or moisture.
Does the pouch size need to change for curved packages?
Yes. When you apply a shipping label pouch to a highly curved surface, such as a mailing tube, a small cylinder, or a poly mailer stuffed tightly with soft goods, the plastic is subjected to lateral tension. This tension causes the pouch to contract slightly, which can buckle the label inside or cause the adhesive edges of the pouch to lift. For curved packages, always select a pouch that is 10 to 15 mm larger than your standard flat-surface recommendation to allow the label to bend naturally without creasing.

Community discussion
Share your experience or ask a question. Comments are reviewed before publication.