
Selecting the right adhesive board for teaching with magnetic letters requires looking beyond simple “magnetic” labels to understand the underlying materials. The most effective adhesive boards for educational settings are those engineered with a true ferromagnetic layer—such as iron-infused rubber or steel-backed sheets—which provides a strong, reliable hold for plastic or foam letters. Standard vinyl whiteboard stickers lack this metallic core and cannot support magnetic accessories on their own. By matching the physical properties of the board to your specific wall surface and the weight of your learning tools, you can create an interactive, durable display that enhances spelling, phonics, and reading lessons at home or in the classroom.
When setting up a dedicated learning space, the choice of adhesive board directly impacts how smoothly lessons run. A board with weak magnetic receptivity leads to sliding letters, interrupted activities, and student frustration. Conversely, a high-quality, properly installed board serves as a seamless backdrop for daily literacy exercises, sentence building, and interactive play. Understanding the technical differences between various adhesive boards ensures that your investment remains securely on the wall and fully functional for years to come.
Core Requirements for Magnetic Letter Compatibility
To select a board that works flawlessly with educational letters, you must first understand the physics of magnetic receptivity. A common point of confusion is the difference between a magnet and a magnetic-receptive surface. Magnetic letters contain small permanent magnets, typically made of ferrite or rubber-neodymium composites. The board itself does not need to be a magnet; in fact, a fully magnetized board can sometimes repel letters if the poles are misaligned. Instead, the board should be magnetic-receptive, meaning it contains a high concentration of ferromagnetic materials, such as iron or steel, which naturally attract the magnets in the letters.
Products mentioned in this guide
Prices are valid at publication and may change. Please refer to the product page for the latest price.
Weight capacity is another critical factor that depends on the specific letters you plan to use. Lightweight foam letters with full-surface magnetic backings require very little magnetic pull to stay in place, making them compatible with thinner, lighter adhesive sheets. In contrast, heavy plastic letters with small, recessed ceramic magnets require a much stronger ferromagnetic layer to prevent them from sliding down the wall. Before purchasing a board, check the weight and magnet type of your letters to ensure the board’s metal content is sufficient to hold them securely.
Surface smoothness is equally vital for maintaining a strong magnetic hold. Because magnetic force decreases exponentially as the distance between the magnet and the metal surface increases, even a tiny gap can cause a letter to fall. If the adhesive board is applied over a textured wall, or if air bubbles are trapped during installation, the resulting bumps will prevent the letters from sitting flush. Choosing a board with a thick, rigid core helps bridge minor wall imperfections, ensuring a flat, high-contact surface that maximizes magnetic grip.
Comparing Adhesive Board Types for Educational Use
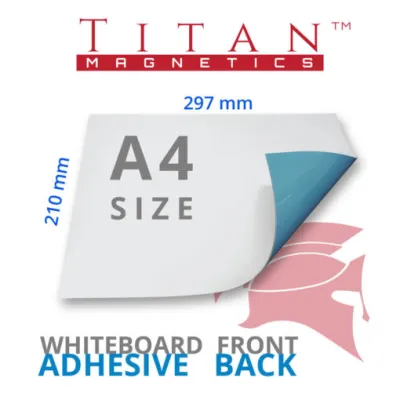
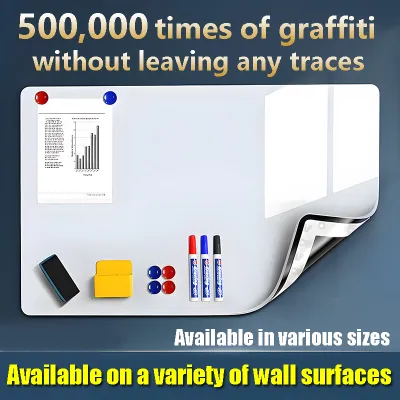
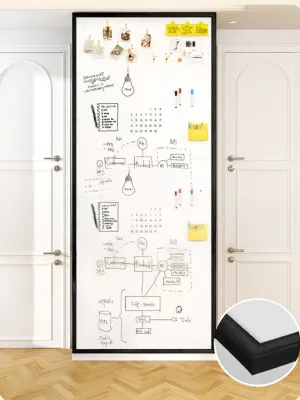
Magnetic whiteboard adhesives are the most popular choice for modern classrooms and home study areas. These dual-purpose sheets feature a glossy dry-erase top layer bonded to a flexible steel or iron-powder core. This design allows teachers and parents to write guide lines, phonics rules, or sentence frames directly next to the magnetic letters. Students can practice writing the letters they have just spelled, combining tactile letter placement with handwriting practice. When selecting these boards, look for high-quality PET or polymer coatings that resist ghosting and staining over repeated use.

For a more traditional or sensory-rich learning environment, magnetic chalkboard adhesives offer an excellent alternative. These sheets feature a matte, textured surface infused with iron particles, designed for use with traditional chalk or liquid chalk markers. The dark, high-contrast background of a chalkboard makes bright, multi-colored magnetic letters stand out vividly, which can be highly beneficial for children with visual processing needs. Additionally, the slight resistance of writing on a chalkboard provides valuable sensory feedback that helps young learners develop fine motor skills and letter-formation memory.
It is crucial to distinguish these magnetic-receptive options from standard non-magnetic dry-erase films. Many budget-friendly “whiteboard stickers” or contact papers are made of simple PVC or PET plastic without any metallic backing. While these films are excellent for writing and drawing, they have zero magnetic receptivity. Placing a magnetic letter on them will result in it sliding off instantly. To use these for magnetic letters, they must be applied over an existing sheet metal surface or a specialized magnetic paint base.
Sizing and Layout Strategies for Learning Spaces
Designing an effective learning space requires careful consideration of ergonomics and physical reach. In home environments, such as compact apartments where floor space is limited, utilizing vertical surfaces like the side of a wardrobe, a hallway wall, or the back of a door is highly efficient. For young children, the board must be mounted low enough that they can comfortably reach the top row of letters without stretching, typically between 30 to 90 centimeters from the floor. In a classroom setting, a wider horizontal layout is preferable, as it allows multiple students to work side-by-side during group activities without crowding each other.
When planning the dimensions of your board, you must choose between modular panels and continuous rolls. Continuous rolls allow you to create seamless, custom-sized learning zones along an entire wall, which is ideal for large classrooms or dedicated playrooms. However, installing a long, heavy roll of adhesive-backed steel sheet can be physically challenging and usually requires multiple people to prevent wrinkling. Modular panels, which are pre-cut squares or rectangles, are much easier for a single person to align and install, though they will display fine seams where the panels meet.
Workspace integration is the final layout consideration. A well-organized board should have designated zones to prevent cognitive overload for young learners. Consider dividing the board into a “storage zone” at the bottom or side, where the alphabet is arranged in alphabetical order, and a “working zone” in the center for active word building. Leaving adequate margins around the magnetic area also allows you to frame the workspace with physical borders, write daily instructions, or display student work without cluttering the active learning area.
Surface Preparation and Installation Checklist
Proper surface preparation is the single most important factor in preventing your adhesive board from peeling, bubbling, or falling off the wall. Before beginning the installation, conduct a thorough wall assessment. Smooth, painted drywall, sealed wood, and metal surfaces are ideal substrates. In humid tropical climates, concrete walls painted with standard emulsion paint can sometimes harbor subtle moisture or develop a powdery chalk residue. If the paint is old, peeling, or poorly bonded, the heavy weight of a magnetic-receptive board can pull the paint layer right off the wall over time.
Once you have verified the wall’s suitability, follow a strict cleaning protocol to ensure maximum adhesive bonding. Dust, grease, and fingerprints will severely compromise the adhesive’s ability to grip the wall. Wipe the surface thoroughly with a damp microfiber cloth and a mild cleaning solution, or a 50/50 mixture of isopropyl alcohol and water. Allow the wall to dry completely for at least 24 hours. Trapping even a small amount of moisture behind the non-porous adhesive sheet can lead to mold growth and premature adhesive failure.
When you are ready to apply the board, use a systematic application technique to eliminate air bubbles. Do not peel off the entire backing paper at once. Instead, peel back only the top five to ten centimeters and align the edge carefully using a spirit level. Slowly peel the backing downward with one hand while using a felt-edged squeegee, a clean wallpaper roller, or a soft cloth in the other hand to press the sheet onto the wall. Always work from the center outward to push any trapped air to the edges.
After the board is successfully mounted, respect the required curing time before using it. The adhesive backing needs time to form a secure, stable bond with the wall surface. Avoid attaching heavy magnetic letters, writing on the board, or applying any pulling force for at least 24 to 48 hours. This waiting period ensures that the adhesive fully sets, preventing the corners from curling or lifting under the weight of your teaching materials.
Building Your Shortlist: Pre-Purchase Verification
Before purchasing an adhesive board, compile a checklist to verify manufacturer claims and technical specifications. First, look for explicit terms such as “ferromagnetic,” “iron-infused,” or “steel-backed” in the product description. Avoid products labeled vaguely as “magnetic sheets” unless they specify that they are designed to attract external magnets. Some “magnetic sheets” are actually flexible magnets themselves, which are meant to stick to refrigerators and may not have the correct magnetic alignment or strength to hold individual magnetic letters.
Next, evaluate the thickness and rigidity of the material. High-quality magnetic-receptive sheets typically range from 0.5mm to 1.2mm in thickness. Thicker sheets contain more iron or steel, providing a significantly stronger magnetic hold for heavy plastic letters. They are also more rigid, which helps mask minor wall textures and prevents the board from wrinkling during installation. However, keep in mind that thicker sheets are heavier, meaning they require a high-performance adhesive backing to stay securely mounted on vertical surfaces.
Consider the adhesive type based on your long-term plans for the space. Permanent adhesives offer the most secure hold and are ideal for dedicated classrooms or permanent home study rooms, but they will likely damage drywall or lift paint when removed. If you are renting your home or need a temporary setup in a shared school space, look for boards with removable or repositionable adhesives. While these are safer for walls, they may have a lower weight capacity, requiring you to use lightweight foam letters to prevent the board from sliding.
Finally, prioritize safety and environmental certifications, especially since children will have close, daily contact with the board. Look for products certified for low chemical emissions, such as GREENGUARD Gold, or those explicitly labeled as non-toxic, lead-free, and phthalate-free. Ensuring the board meets these safety standards provides peace of mind, allowing you to focus entirely on creating an engaging, interactive, and safe learning environment for your students or children.
Frequently Asked Questions (FAQ)
Can I use standard whiteboard contact paper for magnetic letters?
No, standard whiteboard contact paper or vinyl stickers cannot hold magnetic letters. These products are made of simple plastic films designed solely for writing with dry-erase markers and lack any metallic content. To support magnetic letters, you must use a specialized adhesive board that features a ferromagnetic core, such as a steel-backed or iron-infused sheet, which provides the necessary metal surface for magnets to attract.
Will adhesive magnetic boards damage painted walls when removed?
It depends on the adhesive strength and the condition of your wall. Permanent adhesives are designed for long-term stability and will likely peel paint or damage drywall paper upon removal. Removable adhesives are gentler but can still lift loose or poorly bonded paint. To minimize damage during removal, use a hairdryer to gently warm the adhesive, which softens the bond, and slowly peel the sheet back at a sharp 180-degree angle.
How do I clean an adhesive magnetic whiteboard without ruining the surface?
To preserve the dry-erase coating, always use a soft microfiber cloth or a felt eraser for daily cleaning. Avoid abrasive sponges, scrub pads, or harsh chemical solvents like acetone, which can permanently scratch or strip the glossy writing surface. For stubborn ink residue or ghosting, apply a specialized dry-erase board cleaner or wipe the surface with a damp cloth and a small drop of mild dish soap, then dry it thoroughly.

Community discussion
Share your experience or ask a question. Comments are reviewed before publication.