
Quick Answer: Choosing the Right Magnetic Board for Early Literacy
The ideal magnetic board for teaching the alphabet at home must feature strong magnetic receptivity, a smooth and non-porous dry-erase surface for effortless cleaning, and a design that matches your child’s physical reach. A high-quality board serves as a blank canvas where toddlers and preschoolers can physically manipulate letters, bridging the gap between tactile play and phonics recognition.
Because every home environment is different, the best board is one that fits your available space and aligns with how your child learns. Active learners often thrive with a freestanding easel that allows them to stand and move, while those with limited space or smaller rooms benefit from portable lap boards or wall-mounted options. To make the right choice, you should evaluate your physical space, select the most suitable board format, and verify the safety features and surface durability before purchasing.
Essential Features for Alphabet Learning and Magnetic Letter Compatibility
Magnetic Strength and Core Material
When choosing a board for educational purposes, understanding the backing material is critical. A magnetic board is not actually a magnet itself; rather, it is a magnetically receptive surface. The level of magnetic pull depends entirely on the thickness and composition of the steel layer beneath the writing surface.
Products mentioned in this guide
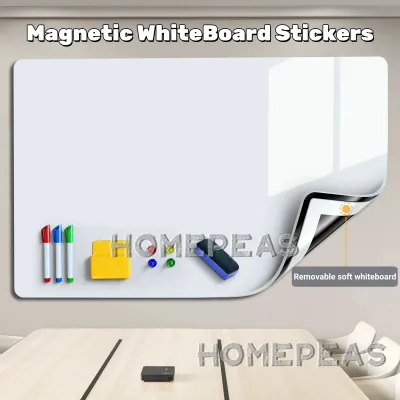
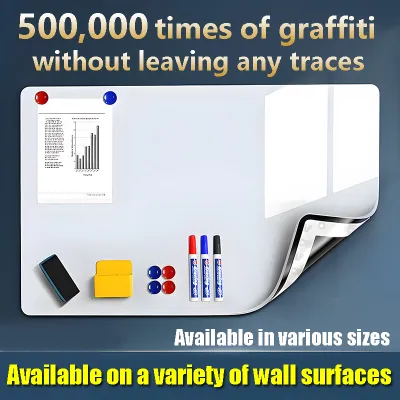
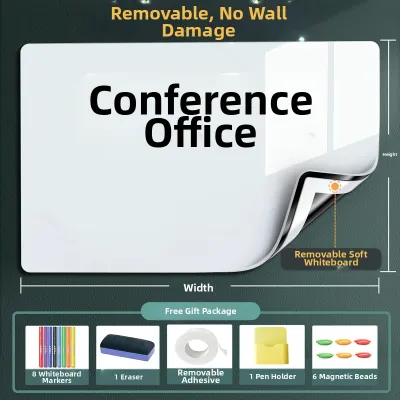
Prices are valid at publication and may change. Please refer to the product page for the latest price.

Cheap boards often use thin, laminated foil backings that offer weak magnetic attraction. This causes heavier wooden alphabet magnets or thick plastic letters to slide down the board, frustrating young learners who are trying to spell words. For the best results, look for boards constructed with a solid steel backing—such as painted steel or porcelain-on-steel—which provides a reliable hold for all types of educational magnets.
Surface Quality and Erasability
To maximize the utility of your board, the writing surface must be durable enough to withstand frequent use and constant cleaning. Children’s alphabet activities often combine magnetic letters with dry-erase drawing, meaning the surface will regularly interact with marker ink.
- Porcelain (Ceramic) Steel: This is the gold standard for durability. It features a ceramic layer baked onto a steel sheet, making it incredibly smooth, scratch-resistant, and highly resistant to "ghosting" (the faint, permanent residue left behind by markers). It is highly recommended for heavy daily use.
- Painted Steel: A more budget-friendly option that offers excellent magnetic strength. While highly functional, the painted surface is slightly more porous than ceramic, meaning it requires regular maintenance to prevent marker stains over time.
- Melamine: These lightweight boards use a plastic coating over a wood or cardboard core. They are generally non-magnetic unless specifically paired with a metal sheet, and they wear out quickly, leading to severe ghosting and staining within a few months of active use.
To verify the erasability of a board before committing to daily lessons, perform a simple trial. Draw a small stroke with a low-odor dry-erase marker, leave it on the surface for 24 hours, and then attempt to wipe it off with a dry felt eraser. A high-quality surface will clear completely without leaving a shadow.
Grid or Lined Options
While a completely blank board offers unlimited freedom for creative play and large letter placement, older toddlers and preschoolers preparing for primary school can benefit from faint guidelines. Some boards feature subtle grid patterns or primary school ruling lines.
These lines assist children in learning letter alignment, spacing, and the relationship between uppercase and lowercase heights. If you want a versatile option, consider a double-sided board that features a blank surface on one side for freeform alphabet play and a lined surface on the reverse side for structured handwriting practice.
Frame and Edge Design
Because young children will be working closely with the board, the physical frame must be designed with safety in mind. Commercial office boards often feature sharp, extruded aluminum frames with pointed corners that can cause scratches or bruises during active play.
For a home learning environment, prioritize frames made of smooth, rounded wood or high-density plastic. If you do purchase an aluminum-framed board, ensure it includes rounded plastic corner caps that cover any sharp metal joints. The frame should also be securely bonded to the core to prevent the edges of the steel sheet from lifting or chipping over time.
Recommended Magnetic Board Types for Different Home Setups
Because specific product availability and stock levels can change, the most reliable strategy is to identify the best structural format for your home and your child’s developmental stage. Magnetic boards generally fall into three main categories, each serving a distinct learning style and spatial layout.
Wall-Mounted Magnetic Whiteboards
Best For: Creating a permanent, dedicated “learning station” in a child’s bedroom, playroom, or home study area.
Wall-mounted boards offer a large, uninterrupted canvas that is perfect for expansive learning activities. Because they are fixed securely to the wall, they do not take up valuable floor space, making them an excellent choice for keeping high-traffic play areas clear. The generous surface area allows you to leave spelling words, visual schedules, or alphabet charts on display for several days without interrupting daily activities.
However, wall-mounted boards require permanent installation, which involves drilling into walls or using heavy-duty mounting hardware. This can be a challenge in rental properties or on solid concrete walls. Additionally, because the board is fixed, you must mount it at your child’s current eye level. As your child grows, you will eventually need to unmount and reinstall the board at a higher position to maintain proper ergonomics.
Freestanding Magnetic Easel Boards
Best For: Active toddlers and preschoolers who prefer to stand, move around, and engage in physical, multi-sensory learning.
Freestanding easels are highly interactive tools that cater to a child’s natural urge to move. Standing while learning encourages gross motor development, improves core strength, and keeps energetic children engaged for longer periods. Most educational easels are double-sided, featuring a magnetic whiteboard on one side and a traditional chalkboard or a paper roll dispenser on the other, allowing you to easily switch between paint, chalk, and magnetic letters.
On the downside, easels have a large physical footprint and can quickly clutter a room. When choosing an easel, you must carefully evaluate its structural stability. Look for models with wide, non-slip rubber feet, a secure locking hinge to prevent accidental folding, and a low center of gravity to ensure the frame will not tip over if a child leans on it during play.
Portable and Lap Magnetic Boards
Best For: Compact apartments, travel, or flexible, casual learning sessions at the dining table, on the living room rug, or on the couch.
Portable lap boards are incredibly versatile and easy to integrate into daily routines. They can be pulled out for a quick ten-minute phonics session and then stored away in a drawer, on a bookshelf, or behind a cabinet when not in use. Many portable models feature built-in handles, folding kickstands, or integrated storage trays that keep magnetic letters and dry-erase markers organized in one convenient place.
The primary limitation of portable boards is their restricted surface area. Because they are small, they cannot hold a large number of magnetic letters simultaneously. This makes them ideal for early letter recognition, matching uppercase to lowercase, or building short consonant-vowel-consonant (CVC) words like “cat” or “map,” but impractical for spelling out full sentences or displaying large alphabet layouts.
Comparison Table: Matching Board Types to Your Child's Learning Style
To help you decide which format best fits your home and educational goals, use this quick-reference matrix comparing the three primary magnetic board types.
| Board Type | Best Use Case | Space Required | Ideal Age Group | Key Limitation |
|---|---|---|---|---|
| Wall-Mounted | Permanent learning stations, sentence building, long-term displays | Minimal floor space; requires dedicated wall area | 3 to 7 years | Requires permanent mounting; height must be adjusted as the child grows |
| Freestanding Easel | Active, multi-sensory play; switching between chalk, paint, and magnets | Significant floor space; needs room to stand around | 2 to 5 years | Can be bulky; potential tipping hazard if the base is not sufficiently stable |
| Portable Lap | Small-space living, table-top work, travel, quick lessons | Extremely low; easily stored in a drawer or shelf | 2 to 6 years | Small surface area limits the number of letters and complex spelling exercises |
Sizing, Placement, and Space Planning for Apartments
Height and Ergonomics
To prevent physical fatigue and keep your child comfortable during learning sessions, proper ergonomics are essential. When installing a wall-mounted board or adjusting a freestanding easel, the active learning area should be positioned relative to your child’s height.
As a general rule, the top of the active writing and letter-placement zone should sit just slightly above your child’s eye level. The bottom of the board should align roughly with their waist. This allows your child to reach the entire functional surface easily without having to stretch, stand on tiptoe, or bend uncomfortably, all of which can cause muscle strain and shorten their attention span.
Proportions and Scale in Compact Homes
In typical compact living spaces, such as Singapore HDB flats or condominiums, balancing the size of the board with the room’s proportions is a key consideration. A board that is too large can visually overwhelm a small bedroom and leave little room for other essential furniture. Conversely, a board that is too small will restrict your child’s ability to line up the entire alphabet or practice writing full words.
For a standard child’s bedroom or study corner, a wall-mounted board measuring approximately 60 cm by 90 cm offers an excellent balance. This size provides ample room for spelling exercises and drawing while fitting comfortably on most standard walls. If you choose a portable board, a size of 30 cm by 40 cm is ideal for easy handling by small hands while still offering enough space for basic word-building games.
Lighting and Glare
Proper lighting is often overlooked but plays a massive role in a child’s comfort. High-gloss whiteboards are highly reflective and can bounce light directly into a child’s eyes, causing glare that leads to eye strain, headaches, and difficulty reading letters.
Avoid placing the magnetic board directly opposite large balcony windows or directly beneath harsh, unshielded overhead lights. Instead, position the board at a 90-degree angle to natural light sources, or use diffused, indirect LED lighting. If glare remains an issue, consider choosing a board with a matte or semi-matte dry-erase finish, which diffuses light reflections while maintaining excellent magnetic properties.
Safety, Edge Protection, and Child-Friendly Materials
Choking and Pinch Hazards
While magnetic letters themselves present the most common safety concern, the construction of the board must also be thoroughly inspected. Ensure the board does not feature any small, easily detachable components, such as loose plastic corner caps, weak magnetic strips glued to the back of frame accessories, or poorly secured marker trays that can be pulled off and broken.
If you select a folding easel or an adjustable-height board, inspect the hinges and locking mechanisms carefully. Ensure there are no open pinch points where small fingers could get caught when the board is folded, adjusted, or moved. High-quality children’s easels often feature safety brackets that lock the frame securely in the open position.
Material Safety and Certifications
Young children frequently touch their faces, mouths, and toys during play, making material safety a top priority. When shopping for magnetic boards and matching accessories, read the manufacturer’s labels to verify that all materials are non-toxic.
Look for products that carry recognized safety certifications, such as ASTM D-4236 (which certifies that art materials have been evaluated for chronic hazards) or EN71 (the European standard for toy safety). Ensure that the dry-erase surface, the frame coatings, and any included markers or magnetic letters are free from BPA, phthalates, lead, and heavy metals.
Mounting Security for Wall Boards
If you decide on a wall-mounted board, secure installation is absolutely critical to prevent accidents. Children will naturally lean on, pull, or push against the board during play, meaning simple adhesive strips or lightweight picture hooks are not sufficient.
- Concrete or Brick Walls: These are common in structural walls of concrete buildings. You must use a masonry drill bit, plastic wall plugs (anchors), and sturdy metal screws to secure the mounting brackets directly into the wall.
- Drywall or Partition Walls: If mounting on a plasterboard partition wall, try to locate the wooden or metal studs behind the drywall and screw directly into them. If a stud is not available, you must use heavy-duty toggle bolts or expansion anchors designed specifically for hollow walls.
Always follow the manufacturer’s mounting instructions precisely. Once installed, apply firm downward pressure to the board to verify that it is completely stable and cannot be easily dislodged before letting your child use it.
Maintenance: Keeping the Magnetic Surface Clean and Functional
Daily and Weekly Cleaning
To preserve the smooth finish of your magnetic board and prevent ink from staining, establish a simple cleaning routine. After each learning session, wipe the board clean using a dry, high-density microfiber cloth or a clean felt eraser. Leaving dry-erase marker ink on the board for weeks at a time can cause the pigments to bond with the surface, making them difficult to remove.
For weekly deep cleaning, wipe the surface down with a soft cloth slightly dampened with clean water or a specialized, non-toxic whiteboard cleaning spray. Avoid using abrasive scrubbing sponges, steel wool, magic erasers, or harsh household chemicals like bleach or window cleaners. These abrasive materials will strip away the glossy, non-porous protective top coat of the board, leaving the underlying surface permanently porous and prone to staining.
Removing Ghosting and Stains
If a dry-erase marker has left a stubborn stain or “ghost” outline on the board, there is a simple, chemical-free trick to restore the surface. Color directly over the old stain using a fresh, dark-colored dry-erase marker. The solvents present in the fresh wet ink will naturally dissolve the dried, bonded pigments underneath.
Immediately wipe the area clean with a dry microfiber cloth before the new ink dries. For particularly stubborn stains, pour a small amount of isopropyl alcohol (rubbing alcohol) onto a soft cotton pad and gently wipe the affected area. Once the stain is gone, wipe the surface with a damp water-dipped cloth to remove any remaining alcohol residue, then dry it completely with a clean towel.
Caring for Magnetic Letters
Maintaining your learning tools is just as important as caring for the board itself. Over time, the magnetic backings of plastic or wooden letters can collect household dust, pet hair, and small debris. When children slide these dirty magnets across the board, the trapped grit can act like sandpaper, leaving fine scratches on the dry-erase surface.
To prevent this, store your magnetic letters in a dedicated plastic tray, a zippered storage bag, or a lidded bin when they are not in use. Periodically inspect the back of the letters and wipe them down with a damp microfiber cloth to remove any accumulated dust. Keeping the magnets clean ensures they slide smoothly across the board without causing unsightly scratches or reducing the life of your board’s surface.
Frequently Asked Questions (FAQ)
Can I use regular fridge magnets on a magnetic whiteboard?
Yes, standard fridge magnets will stick to a steel-backed magnetic whiteboard. However, because fridge magnets are often designed with small, heavy ceramic or neodymium discs, they may slide down the smooth whiteboard surface if they are too heavy. Additionally, exposed hard magnets can easily scratch the delicate dry-erase coating of the board when dragged across it. For safety and surface protection, it is highly recommended to use lightweight, fully sheet-magnetized foam or plastic letters designed specifically for educational whiteboards.
At what age should I introduce a magnetic board for alphabet learning?
Children can begin using a magnetic board as early as 18 to 24 months for sensory and fine-motor play, such as gripping, pulling, and sticking large magnetic shapes. However, structured alphabet and phonics learning typically begins around ages 3 to 4. At this stage, children develop the cognitive ability to recognize letter shapes and associate them with sounds. Always ensure that any magnetic letters used by children under the age of 3 are large enough to prevent choking hazards and do not contain small, loose magnets.
How do I fix a magnetic board that is no longer erasing cleanly?
If your board has lost its erasability, the protective glossy coating has likely been damaged or worn away. You can try applying a specialized whiteboard conditioner or restorer fluid to temporarily fill in microscopic pores and improve erasability. If the surface is permanently damaged or heavily scratched, a cost-effective and highly reliable solution is to purchase a self-adhesive dry-erase whiteboard film. You can apply this high-quality film directly over the existing damaged board, instantly restoring a smooth, clean, and fully functional writing surface.
Community discussion
Share your experience or ask a question. Comments are reviewed before publication.