
Selecting an LED drawing board for architectural drafting in Singapore requires moving beyond basic hobbyist light boxes to find a tool that offers absolute dimensional stability, uniform illumination, and precise sizing. Architectural plans demand rigorous accuracy where a fraction of a millimeter matters, meaning any surface flexing or uneven lighting can lead to errors in scale. By evaluating your specific workflow, paper sizes, and workspace constraints, you can select a professional-grade light pad that integrates seamlessly with your drafting table and tools.
In the professional architectural landscape, drawings serve as legal and technical blueprints. Whether you are drafting detailed section drawings, overlaying structural grids, or tracing site plans, the clarity of your workspace directly influences the precision of your output. A high-quality LED drawing board acts as an essential foundation, illuminating multiple layers of vellum or tracing paper without distorting lines or causing visual fatigue during extended design sessions.
To make an informed investment, you must understand how technical specifications translate to real-world drafting performance. This guide outlines the critical parameters of light uniformity, structural rigidity, and paper format compatibility, helping you establish a reliable decision framework. By focusing on observable quality indicators and manufacturer specifications, you can confidently choose a drawing board that meets the demanding standards of architectural practice.
Products mentioned in this guide
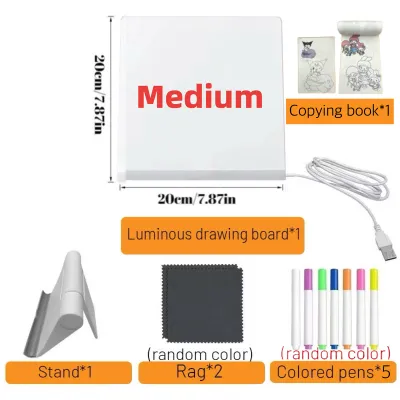
![[SG STOCK] Reusable LED Drawing Board DIY Luminous Acrylic Message Memo Note Pad Night Light Kids Writing Gift发光画板](https://img.lazcdn.com/g/p/b5a434f8ce7e510e5ec2b794e067b1f7.png_400x400q80.png_.webp)
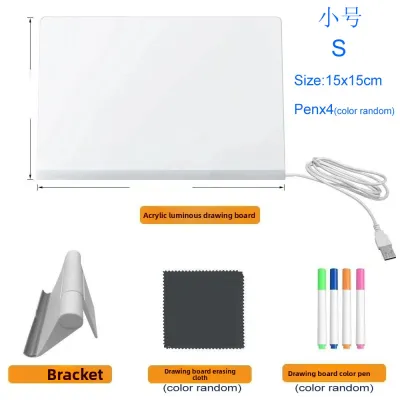
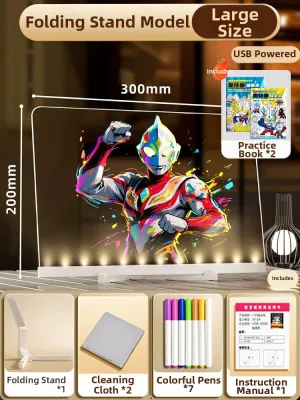
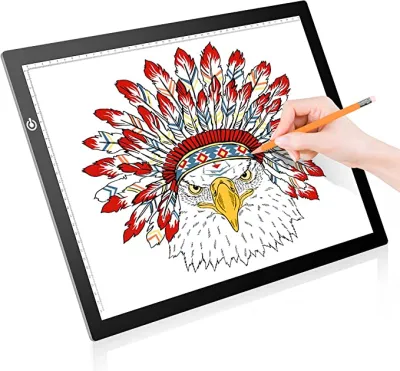
Prices are valid at publication and may change. Please refer to the product page for the latest price.
Identifying Your Architectural Drafting Requirements
Casual tracing and professional architectural drafting represent two entirely different levels of technical demand. While a hobbyist might use a light box for simple illustrations where minor scale variations are inconsequential, an architect relies on absolute geometric precision. When overlaying structural, mechanical, and electrical plans, even a minor shift in paper alignment or a slight curve in the drawing surface can result in misaligned columns or incorrect spatial clearances. Therefore, a professional-grade LED drawing board must provide a perfectly flat, unyielding surface that maintains its integrity under the pressure of drafting instruments.
Uniform light distribution is another critical requirement that separates professional equipment from generic alternatives. When working on large-format drawings, such as A2 or A1 sheets, your eyes must constantly scan across a wide surface area. If the light source is uneven, featuring bright hotspots near the edges and dim zones in the center, your perception of line weights can become distorted. This variation forces your eyes to adjust continuously, leading to rapid fatigue and increasing the likelihood of drafting errors. A professional board utilizes advanced light guide plates to distribute illumination evenly across every square centimeter of the active area.
Furthermore, the physical rigidity of the drawing board is paramount. When you press down with a technical pen, a compass, or a heavy parallel ruler, the surface must not bow or flex. Any downward deflection, however minor, alters the contact angle of your drawing tools, leading to inconsistent line widths or slipping straightedges. In Singapore’s humid climate, paper can also absorb moisture and expand slightly; a perfectly flat, rigid board helps keep the paper taut and stable when secured. Investing in a board with a reinforced chassis—often constructed with an aluminum alloy frame or high-density composite backing—ensures that your drawing plane remains perfectly flat under all working conditions.
Key Features to Evaluate in an LED Drawing Board
When evaluating potential LED drawing boards, brightness and adjustability should be at the top of your checklist. Architectural drafting often requires working with varying paper thicknesses, from lightweight tracing paper to heavy vellum or even bond paper. A board with step-less dimming or multiple calibrated brightness levels allows you to fine-tune the illumination to match the opacity of your media. This adjustability is also crucial for managing eye strain; working with a board that is too bright in a dimly lit room can cause glare, while a board that is too dim forces you to squint to see underlying details.

To verify light uniformity before committing to a purchase, you can perform a simple visual check if viewing the board in person at a local stationery supplier. Turn the board to its maximum brightness setting and place a single sheet of clean, white 80 gsm paper over the surface. Scan the surface carefully for any visible banding, dark patches, or localized bright spots. A high-quality board will display a completely seamless, milky-white glow across the entire active area, indicating that the internal light guide plate is functioning correctly and will not distort your line work.
The choice of surface material significantly impacts both the durability and the usability of the drawing board. Acrylic is the most common material used in modern light pads; it is lightweight, shatterproof, and highly portable. However, acrylic is susceptible to scratching from metal drafting tools, such as the sharp points of compasses or the edges of steel rulers. If you opt for an acrylic board, look for models that specify a scratch-resistant hard coating. Alternatively, tempered glass surfaces offer superior scratch resistance and exceptional rigidity, though they are heavier and require more careful handling to prevent accidental breakage.
Power options also dictate how easily the board integrates into your studio or home office setup. Many compact drawing boards are powered via USB, which offers excellent flexibility as you can run them directly from a laptop, a wall adapter, or a portable power bank. This is highly convenient for hot-desking or moving between a home office and a university studio. However, larger format boards (such as A2 or A1) require significantly more power to achieve uniform brightness across their expansive surfaces. These larger models typically rely on a dedicated AC power adapter, which provides a stable, high-voltage current but limits your mobility to areas near wall outlets.
Matching Board Size to Architectural Paper Formats
Selecting the correct board size requires a clear understanding of standard architectural paper formats and how they align with the active illuminated area of the device. In Singapore, architectural drawings typically follow the ISO 216 paper size standard, with A3, A2, and A1 being the most frequently used formats for detailed plans and construction documents. An A3 sheet measures 297 x 420 mm, an A2 sheet measures 420 x 594 mm, and an A1 sheet measures 594 x 841 mm. Your chosen drawing board must accommodate these dimensions without forcing you to fold or constantly reposition your drawings.
It is vital to distinguish between the overall physical dimensions of the drawing board and its actual active illuminated area. Manufacturers often advertise a board as an “A3 light pad” based on its external frame size, but the actual lit area where you can trace may be slightly smaller. Always consult the detailed specification sheet to verify that the active illuminated area is equal to or larger than the paper format you intend to use. If the illuminated area is too small, the edges of your drawing will fall into darkness, making it impossible to draft continuous border lines or read title blocks clearly.
Additionally, you must factor in adequate margin space around your paper for securing it to the board. When drafting, you will need to tape down your vellum or tracing paper using low-tack drafting tape or drafting dots. If the active illuminated area matches your paper size exactly, you will be forced to apply tape over the illuminated zone, which can block light and create shadows near the edges of your work. Ideally, choose a board that offers an active area slightly larger than your standard paper size, or one with a wide, flat border frame that allows you to tape down the paper securely without obstructing the light path or creating a raised bump under your straightedge.
Building Your Purchase Shortlist and Verification Checklist
To build a reliable purchase shortlist without relying on unverified online rankings, you should establish a strict set of minimum technical specifications. For professional architectural use, look for a board that specifies a color temperature between 5000K and 6500K. This range mimics natural daylight, providing clean, neutral white light that accurately renders line colors and reduces eye strain during long working hours. Avoid boards with a high blue-light output, which can disrupt your sleep patterns and cause rapid visual fatigue.
When purchasing a drawing board in Singapore, verifying the warranty terms and local support is essential for protecting your investment. Ensure the manufacturer or local distributor offers a clear warranty period—ideally at least 12 months—covering LED failure, power supply defects, and touch-control malfunctions. Keep a checklist when comparing suppliers: confirm if they stock replacement power adapters, check their return policy for dead pixels or uneven lighting out of the box, and verify if they have a physical service center or return address in Singapore to avoid expensive international shipping fees.
Finally, cross-reference the manufacturer’s user manual or technical specifications to determine the maximum paper thickness penetration limit. This is often expressed in terms of paper weight (gsm) or maximum light output measured in lux. For architectural drafting, where you may need to trace through a layer of 90 gsm vellum over a 120 gsm base plan, the board should deliver at least 3000 lux of brightness at its maximum setting. Verifying these specifications beforehand ensures that the light pad will successfully penetrate your preferred drafting media without requiring you to switch to thinner, less durable papers.
Workspace Setup, Ergonomics, and Surface Care
Integrating an LED drawing board into your workspace requires careful attention to ergonomics to prevent physical strain. Placing a flat light pad directly on a standard horizontal desk forces you to hunch over your work, putting significant pressure on your neck, shoulders, and lower back. To maintain a healthy posture, use an adjustable drafting stand or a tilted drawing table to angle the board between 15 and 30 degrees. This elevation brings the drawing surface closer to your natural line of sight, allowing you to maintain a neutral spine and work comfortably for longer periods.
Maintaining the optical clarity of your drawing board is crucial for long-term usability. Over time, graphite dust, ink residue, and oils from your hands will accumulate on the surface, scattering the light and reducing contrast. To clean the board safely, always turn off and unplug the device first. Use a soft, dry microfiber cloth to gently wipe away loose dust. For stubborn smudges, slightly dampen the cloth with water or a manufacturer-approved, non-abrasive plastic cleaner. Never use harsh household solvents, glass cleaners containing ammonia, or alcohol-based wipes on acrylic surfaces, as these chemicals can cause micro-cracking or permanent clouding.
Cable management is another important aspect of workspace safety and equipment longevity. Because drawing boards are often moved or adjusted, their power cables are susceptible to tension and wear. Route the power cord cleanly along the frame of your drafting table, securing it with cable clips or hook-and-loop ties to prevent it from hanging loose. A dangling cable poses a tripping hazard and can easily lead to the board being pulled off the desk, resulting in costly damage. Ensure there is enough slack in the cable to accommodate adjustments to the board’s angle without straining the power port connection.
Frequently Asked Questions (FAQ)
Can I use a standard A4 LED light pad for small architectural details?
Yes, an A4 LED light pad is highly suitable for drafting isolated architectural details, such as structural connection nodes, material callouts, or small-scale section drawings. Its compact size makes it exceptionally portable, allowing you to easily slip it into a laptop bag for site visits or client meetings. However, for comprehensive floor plans, elevations, or site layouts, an A4 board is insufficient. Attempting to draft large plans on a small board requires constantly shifting and re-aligning your paper, which introduces a high risk of scaling errors and line misalignment.
Does the LED light affect the longevity of sensitive drafting vellum?
Modern LED drawing boards are highly safe for sensitive drafting papers, including vellum and tracing paper, because they emit virtually no ultraviolet (UV) radiation and generate minimal heat. Older fluorescent light boxes often produced significant heat, which could cause vellum to dry out, warp, or become brittle over time. LEDs run cool and provide a stable light source that will not degrade or discolor archival-grade drafting media. To be absolutely certain, you can check the manufacturer’s product specifications to confirm that the device is certified as UV-free.
How do I prevent my tracing paper from slipping on a smooth LED board?
The smoothest way to secure your tracing paper on an LED drawing board is by using low-tack drafting tape or specialized drafting dots. Apply the tape to the corners of your paper, securing them directly to the board’s outer frame or the non-illuminated border. Avoid using standard masking tape or heavy-duty adhesives, as these can leave a sticky residue on the acrylic surface that attracts dust and ruins the optical clarity. For added stability, ensure your drawing board itself is placed on a non-slip silicone mat or has rubber feet attached to its base to prevent the entire unit from sliding across your desk.

Community discussion
Share your experience or ask a question. Comments are reviewed before publication.