
An LED drawing board is an indispensable tool for architectural drafting, allowing you to trace, overlay, and refine complex technical drawings with high precision. Unlike standard light pads designed for casual sketching or animation, a professional architectural light board must meet demanding specifications to handle thick drafting media and heavy physical tools. When selecting the ideal board, you should prioritize high light penetration, exceptional display uniformity, a highly durable and scratch-resistant surface, and a format size that matches standard architectural paper dimensions.
Identifying the Unique Demands of Architectural Drafting
Architectural drafting involves unique workflows that differ significantly from general illustration. Professionals and students frequently overlay multiple sheets of high-density paper, such as heavy vellum, tracing paper, or blueprint stock, to coordinate structural, electrical, and plumbing layouts. This layering process requires a light source capable of projecting sharp, clear lines through several sheets simultaneously without distorting the underlying details.
The primary workflow steps in an architectural studio include tracing base plans, detailing structural connections, and reviewing large-format technical drawings. During these tasks, any minor misalignment or visual distortion can lead to critical errors in scale or spatial coordination. Therefore, a professional-grade drafting tool must provide a perfectly flat, stable, and evenly illuminated surface that remains reliable under continuous physical pressure.
Products mentioned in this guide
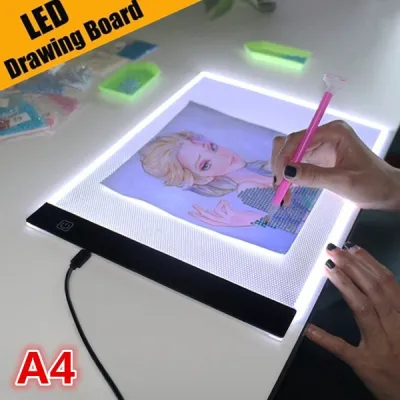
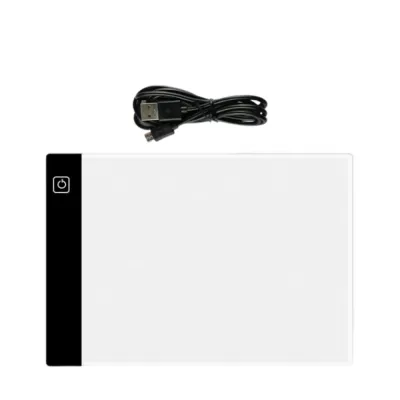
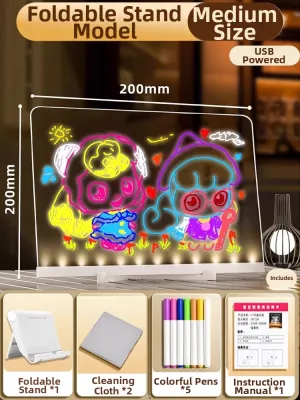
Prices are valid at publication and may change. Please refer to the product page for the latest price.
Hobbyist light pads often fall short in professional environments because they lack the structural rigidity and illumination power required for heavy-duty drafting. While a basic light pad may suffice for tracing a simple pencil sketch on thin paper, it often flexes under the weight of heavy drafting tools or fails to penetrate thick technical media. Investing in a dedicated LED drawing board designed for technical work ensures that your lines remain true and your overlays are perfectly aligned.
Evaluating Light Penetration and Display Uniformity
To ensure your LED drawing board can handle the diverse media used in architectural offices, you must carefully evaluate its light penetration capabilities. Instead of relying solely on manufacturer-stated lumen or lux ratings, which can be inconsistent across brands, you can perform a simple visual test. Place a sheet of heavy vellum or a double-layered blueprint over the active area to verify if the light clearly defines the finest pencil or ink lines beneath.

Display uniformity is equally critical for maintaining accuracy across the entire drawing surface. When inspecting a light board, look closely at the active area for any visible dark spots, edge dimming, or bright LED hotspots. Uneven illumination can cause optical illusions, making straight lines appear curved or causing you to misjudge line weights during tracing. A high-quality board utilizes advanced light guide plates to distribute illumination evenly from edge to edge.
Color temperature plays a vital role in managing eye strain during long, intensive drafting sessions. A neutral white light, typically ranging between 5000K and 6500K, closely mimics natural daylight and provides the best contrast for black ink and graphite lines. Avoid boards that emit a harsh blue tint, as this spectrum is known to accelerate eye fatigue and disrupt focus. Adjustable color temperature settings are highly beneficial, allowing you to switch to warmer tones when working in low-light studio environments.
Matching Board Size, Surface Durability, and Build Quality
Selecting the correct board size is a fundamental decision that directly impacts your drafting efficiency. For architectural applications, standard paper sizes like A3 and A2 are the most common baselines. Ensure the active illuminated area of the board is slightly larger than your paper size to provide adequate margin space for securing sheets with drafting tape and aligning parallel rulers or T-squares.
The durability of the drawing surface is paramount when working with sharp drafting instruments. Architectural drafting involves the repetitive use of compass points, dividers, metal scales, and hard graphite pencils, all of which can easily scratch a low-quality acrylic surface. Look for boards featuring tempered glass or high-grade, scratch-resistant acrylic panels. You can verify surface resilience by checking if the material resists minor abrasions when a hard eraser or plastic scale is dragged across it with moderate pressure.
Frame rigidity and overall build quality prevent the board from flexing or warping during use. When you apply physical pressure to draw a line or erase a detail, the board must remain perfectly flat. Inspect the frame construction, looking for reinforced edges and a solid backing material that prevents any twisting or bending. A rigid frame is especially important if you plan to use the board on an angled drafting table, where gravity and hand pressure can combine to stress the board’s structure.
Assessing Power Stability, Controls, and Ergonomics
A smooth drafting workflow relies heavily on intuitive controls and stable power delivery. Look for boards equipped with stepless dimming controls, which allow you to adjust the brightness smoothly to match the exact opacity of your paper layers. Multi-level dimming with pre-set steps can sometimes be too bright or too dim, whereas stepless adjustment lets you fine-tune the illumination to the precise level that eliminates glare while maintaining clear visibility.
Power delivery must be stable and consistent to prevent flickering, which can cause severe eye strain and headaches over time. Verify that the power adapter and cable connection are robust, with a secure port that does not wiggle or disconnect when the board is moved. Additionally, pay attention to heat dissipation; high-quality LED boards should remain cool to the touch even after hours of continuous operation, protecting both your hands and your delicate drafting paper from heat damage.
When choosing between a highly portable, ultra-thin light pad and a heavier, desk-anchored drawing board, consider your primary working environment. In space-constrained Singapore apartments or shared studio spaces, a slim, lightweight board that can be easily stored in a drawer or carried in a portfolio is highly advantageous. However, if the board will remain permanently on a dedicated drafting table, a heavier, rubber-footed model offers superior stability and prevents the board from sliding around while you work.
Determining Cross-Scenario Versatility for Mixed Workflows
An LED drawing board is a significant investment, so it is worth considering how well it can adapt to mixed design workflows. Beyond technical tracing, a versatile board can support conceptual sketching, watercolor transfer, calligraphy, and even scale model template tracing. If you regularly transition between precise technical drafting and freehand artistic rendering, look for a board that accommodates both styles without compromising on surface flatness.
Certain features designed for general crafting can actually limit a board’s usefulness for professional architectural work. For instance, permanently printed grid lines on the acrylic surface can interfere with your custom architectural scales or clash with the grid lines of your base plans. Similarly, thick, raised bezels can obstruct the smooth movement of T-squares and parallel rulers across the drawing surface. Opt for a flush, bezel-free design to ensure maximum compatibility with your existing drafting tools.
Deciding whether to purchase a dedicated large-format board or a smaller, multi-purpose light pad depends on your project scale. If your work primarily involves detailed residential floor plans or small-scale structural details, a compact A3 board offers excellent versatility and ease of handling. For large-scale site plans and commercial elevations, investing in a dedicated A2 or larger board is essential to avoid the constant, frustrating need to reposition your drawings.
Optimizing Workspace Setup and Long-Term Maintenance
Creating an ergonomic workspace setup is essential for maximizing the benefits of your LED drawing board. Position the board to balance the ambient room light with the board’s backlight, which helps minimize screen glare and distracting reflections. Avoid placing the board directly under harsh overhead lights or opposite bright windows, as this contrast can make it difficult to see the illuminated lines clearly and lead to rapid eye fatigue.
Proper surface care is crucial for maintaining the clarity and smoothness of your drawing board over the long term. Architectural drafting generates a significant amount of graphite dust, ink smudges, and adhesive residue from drafting tape. Clean the surface regularly using a soft, non-abrasive microfiber cloth slightly dampened with water or a mild, alcohol-free glass cleaner. Never use abrasive pads or harsh chemical solvents, as these can cloud the acrylic or damage the protective coatings.
When the board is not in active use, store it properly to protect it from dust accumulation, moisture, and physical impact. In humid climates like Singapore, keeping the board in a protective sleeve or a dedicated drawer prevents moisture from affecting the internal electronics or causing dust to stick to the surface. Always store the board flat or securely upright in a position where it cannot be accidentally knocked over or subjected to heavy objects stacked on top of it.
Frequently Asked Questions (FAQ)
Can I use a standard A4 light box for small architectural floor plans?
While a standard A4 light box can be useful for quick detail sketches or small-scale residential layouts, it is generally too restrictive for professional architectural drafting. The limited surface area forces you to constantly shift and reposition your drawings, which can lead to alignment errors and disrupt your workflow. For most technical drafting tasks, an A3 board is considered the minimum practical size to accommodate standard paper formats and drafting tools.
Do I need a drawing board with a built-in grid for architectural drafting?
A built-in grid is rarely necessary for professional architectural drafting and can often be more of a hindrance than a help. Professional architects rely on external precision tools, such as T-squares, triangles, parallel rulers, and dedicated architectural scales, to ensure absolute accuracy. A permanently printed grid on the board’s surface can create visual clutter, making it difficult to read your own drawing lines and scale overlays.
Community discussion
Share your experience or ask a question. Comments are reviewed before publication.