
Wrapping goodie bag gifts beautifully transforms a simple gesture into a memorable experience. Whether you are preparing party favors for a birthday, corporate gifts for colleagues, or festive treats for a holiday gathering, a neatly wrapped package shows care and attention to detail. By combining the structured lines of quality wrapping paper with the elegant drape of a well-tied ribbon, you can elevate any standard goodie bag into a stunning presentation.
Achieving a professional finish does not require advanced crafting skills. It relies on precise measurements, the right choice of materials, and a systematic folding technique. This guide walks you through the entire process, from selecting your tools to troubleshooting common wrapping mishaps, ensuring your gifts look polished and pristine.
Gather Your Wrapping Materials and Tools
Selecting the right materials is the foundation of a successful wrapping project. The weight and texture of your wrapping paper play a critical role in how easily it folds and how well it holds its shape. For small to medium goodie bags, a medium-weight paper (around 80 to 100 gsm) is ideal. Extremely thin paper tears easily at the corners, while overly thick paper resists folding and can create bulky, untidy seams. Consider the scale of the pattern as well; small, repeating motifs work best on compact goodie bags, whereas large patterns may get lost in the folds. Before starting, verify the dimensions of your wrapping paper roll to ensure it is wide enough to cover the entire height of your goodie bag.
Products mentioned in this guide
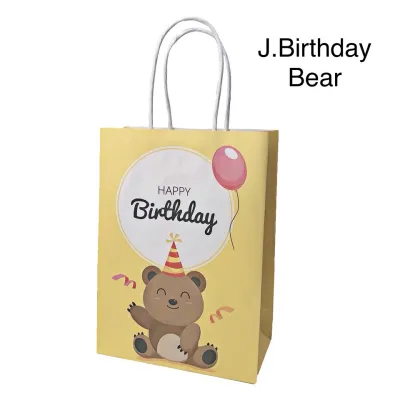
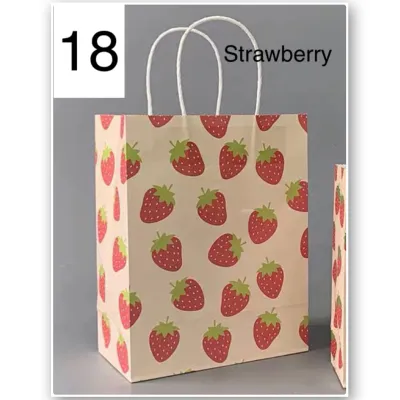

Prices are valid at publication and may change. Please refer to the product page for the latest price.
Your choice of ribbon should complement both the paper design and the physical weight of the gift. Satin, grosgrain, and organza are popular options that offer different textures. A lightweight organza ribbon adds a delicate, airy touch, while a heavy grosgrain ribbon provides a rustic, structured look. For most standard goodie bags, a ribbon width of 1.5 to 2.5 centimeters strikes the perfect balance between visibility and ease of tying. Ensure the ribbon color contrasts or harmonizes beautifully with your wrapping paper to create a cohesive visual theme.
Having the correct tools on hand prevents frustration and ensures clean lines. You will need a pair of exceptionally sharp scissors to prevent jagged edges on your paper and frayed ends on your ribbon. A long ruler is indispensable for drawing straight cutting lines and measuring dimensions accurately. For securing the folds, high-quality double-sided tape is highly recommended because it remains completely hidden, though standard clear tape with a matte finish can also work well if applied discreetly. It is also wise to test a small piece of your chosen tape on a scrap of wrapping paper to check its adhesive strength and ensure it does not tear the paper fibers upon contact.
Measure and Cut the Wrapping Paper Accurately
Accurate measurement is the secret to avoiding wasted paper and bulky, uneven folds. Before making any cuts, place your goodie bag on a flat, clean surface like a dining table or a spacious desk. To determine the width of the paper needed, wrap the paper loosely around the entire circumference of the bag. You want the paper to overlap by approximately 3 to 5 centimeters along the main seam, which provides enough surface area to secure the tape without creating an awkward bulge.

To calculate the height of the paper, you must account for the bottom and top of the goodie bag. For the bottom fold, the paper should extend slightly more than half the depth of the bag’s base from the bottom edge. For the top opening, the allowance depends on your chosen finishing style. If you plan to fold the top flat, the paper should extend past the top edge by about three-quarters of the bag’s depth. If you prefer a decorative cuff, add an extra 5 to 8 centimeters to the top measurement.
Once you have determined the correct dimensions, use your ruler to mark the cutting lines lightly on the reverse side of the wrapping paper. Many high-quality wrapping papers feature a printed grid on the back, which simplifies this step immensely. Always cut slowly and smoothly, keeping your scissors flat against the table surface to maintain a perfectly straight line. Taking an extra minute to ensure your cuts are precise will make the folding process significantly easier.
Wrap the Goodie Bag Step-by-Step
Begin by placing the cut wrapping paper design-side down on your workspace. Position the goodie bag face-down in the center of the paper. Pull one of the long vertical edges of the paper over the back of the bag, aligning it so the seam will sit directly in the middle of the bag’s rear panel. Secure this edge to the bag with a small piece of tape. Pull the opposite side of the paper tightly across, fold the raw edge under by 1 centimeter to create a clean hem, and secure it over the first edge using double-sided tape.
Next, address the bottom of the goodie bag. Push the short sides of the paper inward to create two neat, triangular flaps on the left and right. Crease these side flaps sharply against the base of the bag. Fold the top flap down tightly over the base, followed by the bottom flap folding upward. To ensure a crisp finish, fold the raw edge of the bottom flap under slightly before taping it down securely. This envelope-style fold keeps the base flat, allowing the wrapped bag to stand upright on its own.
For the top of the bag, you can create a clean, professional cuff. Gently press the front and back panels of the paper together at the top opening. Fold the top edge down by about 2 centimeters, crease it firmly, and then fold it down a second time. This double-fold hides the raw paper edge and creates a sturdy, reinforced band across the top of the gift. If your goodie bag has handles, you can carefully cut small slits in the cuffed paper to let the handles slide through, or simply fold the cuff over the handles if they are flexible.
Throughout the entire folding process, use your fingers to smooth out the paper and press along the edges of the bag. Creating sharp, defined creases is what distinguishes a professional wrap from a rushed one. Work slowly, maintaining consistent tension on the paper so it hugs the contours of the goodie bag tightly without warping or tearing.
Add and Tie the Ribbon for a Polished Finish
A beautifully tied ribbon serves as the focal point of your gift presentation. To estimate the amount of ribbon you need without wasting material, wrap the ribbon around the bag once horizontally and once vertically, then add about 30 centimeters to accommodate the knot and bow. For a standard-sized goodie bag, a total length of 1 to 1.2 meters is usually sufficient. Cutting the ribbon from the spool only after you have measured ensures you do not end up with a piece that is too short to tie comfortably.
To execute a classic cross-tie, place the center of your ribbon across the front of the wrapped bag. Bring both ends to the back, cross them over each other to form a ninety-degree angle, and pull them vertically back to the front of the bag. Thread one end under the original horizontal ribbon segment at the front, pulling both ends taut. This technique locks the ribbon in place and ensures it lies completely flat against the paper without sliding or twisting.
Tie a secure square knot at the center of the front panel, making sure it is tight enough to hold its shape but not so tight that it pinches or crushes the paper underneath. Form a neat bow with even loops. If you are using satin ribbon, ensure the shiny side faces outward on both loops for maximum visual impact. Take your time to adjust the size of the loops and the length of the tails until the bow looks perfectly symmetrical and proportional to the size of the bag.
Finish the presentation by trimming the ribbon tails. Avoid cutting them straight across, as this can look unfinished and lead to fraying. Instead, fold the end of the ribbon tail in half vertically and cut upward at a forty-five-degree angle from the folded edge to the outer edge to create a classic swallowtail or V-cut. Alternatively, a simple, clean diagonal cut at a sharp angle works beautifully for a modern, minimalist aesthetic.
Troubleshooting Common Wrapping Mistakes
Even with careful preparation, wrapping mistakes can happen, especially when dealing with unique bag shapes or humid environments like Singapore’s, where moisture in the air can soften paper or weaken tape adhesive. If you notice the wrapping paper looks wrinkled or loose after taping, do not try to smooth it down forcefully. Instead, carefully peel back the tape, pull the paper taut from the opposite side, and re-secure it. If the paper has already creased permanently, you can cover the blemish strategically by positioning your ribbon or a decorative gift tag directly over the wrinkled area.
Visible tape can quickly detract from a polished look. If you must use standard clear tape, ensure it is a matte or invisible variety that does not reflect light. To hide tape entirely, always opt for double-sided tape placed on the underside of your folds. If you have already applied visible tape and want to conceal it, you can slide a decorative band of contrasting paper or a wide piece of ribbon over the seam to hide the tape while adding an elegant layer to your design.
Crooked ribbons and lopsided bows are another common issue. If your ribbon keeps sliding off center, secure it to the bottom or back of the wrapped bag with a tiny dot of double-sided tape or glue. When tying your bow, if one loop consistently turns out larger or twisted, untie the bow back to the initial knot and hold the center firmly with one finger while looping the ribbon with your other hand. Adjusting the tension slowly as you pull the loops tight will help maintain symmetry.
Frequently Asked Questions (FAQ)
Can I use double-sided tape instead of regular tape?
Yes, double-sided tape is highly recommended for gift wrapping because it creates a seamless, professional finish with no visible adhesive on the outside of the paper. To apply it cleanly, place the tape along the inner edge of your fold while the paper is flat, peel off the protective backing, and then press the seam down firmly. This prevents the tape from sticking to the paper prematurely or creating accidental wrinkles during assembly.
How do I wrap a goodie bag with an awkward or bulky shape?
If your goodie bag contains bulky, irregular items that make the paper bulge awkwardly, it is best to place the bag inside a rigid cardboard gift box first, then wrap the box. This provides flat surfaces and sharp corners for a clean wrap. If you must wrap the bag directly, choose a thicker, textured paper or a flexible kraft paper that resists tearing, and increase your paper allowances by 3 to 5 centimeters to accommodate the extra depth of the wide gussets.

Community discussion
Share your experience or ask a question. Comments are reviewed before publication.