
Wrapping a gift beautifully sets a welcoming tone before the recipient even opens it. Using a clear bag made of premium cellophane is one of the most elegant, efficient, and visually striking ways to present gifts of all shapes and sizes. Whether you are assembling a festive hamper, packaging handmade cookies, or preparing corporate door gifts, a transparent presentation showcases the thoughtful curation of your items while keeping them clean and secure. Achieving a professional, boutique-worthy finish requires more than just dropping an item into a plastic pouch. By mastering the right folding, gathering, and ribbon-tying techniques, you can transform a simple transparent sleeve into an exquisite, structured gift package that stands out on any display table.
Essential Materials and Tools for Clear Bag Wrapping
To achieve a polished look, gathering high-quality materials beforehand is essential. The right tools prevent frustration and ensure the finished package remains structurally sound during transport.
- Clear Cellophane Bags: The foundation of your presentation is the clear bag itself. Cellophane bags come in various sizes, shapes (such as flat, gusseted, or block-bottom), and thicknesses. For most gifts, a thickness of 30 to 40 microns is ideal; it offers a crisp, crinkly texture that holds its shape well without being too stiff to gather or so thin that it tears easily at the seams. When selecting a bag, always measure your gift's height, width, and depth. Choose a bag that is at least 5 to 10 centimeters wider than your item and leaves at least 15 to 20 centimeters of empty space at the top. This extra clearance is crucial for gathering the material and tying a generous bow.
- Ribbons: The ribbon serves as both a functional closure and the primary visual accent. Different ribbon types yield distinct styles. Wired ribbon is excellent for beginners and large displays because the thin wire embedded along the edges allows you to sculpt voluminous, structured loops that hold their shape indefinitely. Satin ribbon provides a classic, luxurious sheen with a soft drape, making it perfect for elegant, minimalist presentations. Cotton or grosgrain ribbons offer a rustic, matte texture that pairs beautifully with organic gifts like artisanal soaps or baked goods. For whimsical or festive touches, curling ribbon can be layered underneath a main bow and curled with scissors to add playful texture.
- Decorative Finishes: Elevate your presentation by incorporating decorative elements that complement the gift's theme. Shredded crinkle paper or fine metallic confetti can be placed inside the bag to act as a supportive cushion and add color. Externally, you can attach personalized gift tags, dried floral sprigs (such as lavender, eucalyptus, or baby's breath), cinnamon sticks, or small pinecones. These small details show meticulous attention to detail and add a tactile, multi-dimensional quality to the package.
- Basic Tools: Keep a pair of ultra-sharp fabric or ribbon scissors nearby to ensure clean, fray-free cuts. Standard household scissors can chew through delicate satin or wired edges, leaving unsightly frayed threads. Additionally, high-quality double-sided tape is invaluable for securing loose folds, anchoring lightweight items to a base insert, or keeping the bottom corners of the bag neatly tucked away.
Step-by-Step Guide to Prepping and Folding the Clear Bag
Structuring a transparent package requires a methodical approach, as every layer, fold, and seam is fully visible to the recipient. Follow these steps to prepare, fill, and fold your bag with professional precision.
Products mentioned in this guide
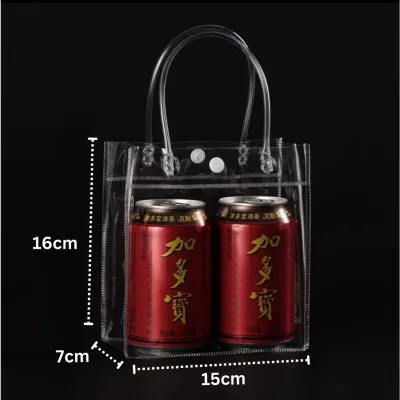
![💯 [SG STOCK] Clear Carrier bag | Translucent Bag | Transparent Plastic Carrier Bag | Food Carrier Bag | Takeaway plastic](https://img.lazcdn.com/g/p/20b02603641cd58677532b75da1dd963.png_400x400q80.png_.webp)
Prices are valid at publication and may change. Please refer to the product page for the latest price.

- Prepping the Base: Start by creating a stable foundation at the bottom of the bag. If you are using a flat cellophane bag, the bottom seam can sometimes look awkward or cause the bag to tilt when filled. To solve this, fold a piece of stiff cardboard to fit the bottom dimensions, wrap it in coordinating tissue paper, and slide it into the base. Alternatively, add a generous handful of shredded paper filler or crinkle paper. This filler acts as a cushion, hides the bottom seam, provides structural stability so the package can stand upright, and elevates smaller items so they are fully visible. In humid climates, ensure your paper fillers are stored in a dry environment beforehand so they remain bouncy and do not lose their loft.
- Placing the Gift: Carefully lower your gift into the center of the bag, resting it securely on your prepared base. If you are wrapping multiple small items, arrange them so the tallest items are at the back and the smaller pieces face forward. Ensure the weight is evenly distributed so the bag does not tip over. Take a moment to inspect the arrangement from all angles; because the bag is completely transparent, the back and sides should look just as neat and organized as the front.
- Gathering the Excess Cellophane: Once the items are perfectly positioned, slide your hands down the outer sides of the bag, smoothing the cellophane upward to release any trapped air. Bring your hands together at the neck of the bag—typically 2 to 5 centimeters above the tallest item. Slowly gather the cellophane in your fingers, working from the outer edges toward the center. As you gather, pull the plastic upward slightly to keep the front of the bag taut and wrinkle-free, ensuring a crystal-clear view of the gift inside.
- Folding Techniques for a Tailored Look: For a highly structured, professional appearance, you can create neat pleats instead of a simple bunched gather. To do this, fold the left and right sides of the bag inward toward the center back, creating clean accordion-style pleats. Press these pleats flat with your fingers as you bring them together at the neck. This technique works exceptionally well for flat, rectangular items like books, chocolate bars, or boxed sets, giving the package a tailored, envelope-like finish. For round or irregularly shaped items, a classic gathered pouch is often more practical; simply gather the material tightly and evenly around the neck to create a flared, fan-like collar at the top.
- Securing the Neck: Trying to hold the gathered cellophane tight while simultaneously tying a perfect bow can be challenging. To make the process stress-free, temporarily secure the gathered neck. You can use a vinyl-coated twist tie, a small piece of clear floral tape, or a temporary elastic band. Wrap it tightly around the gathered point. This holds the pleats firmly in place, leaving both of your hands free to focus entirely on measuring, wrapping, and styling your decorative ribbon.
How to Tie a Secure and Elegant Ribbon Bow
The bow is the focal point of your clear bag presentation. A well-tied bow not only keeps the package securely closed but also adds a professional flourish that elevates the entire gift.
- Measuring the Ribbon: Avoid the frustration of running out of ribbon mid-tie by measuring generously. A good rule of thumb is to cut a length of ribbon that is approximately four times the width of your gathered bag's neck, plus an additional 30 centimeters for the tails. If you plan to create an elaborate, multi-looped bow, you may need up to six times the width. It is always better to have excess ribbon that you can trim later than to end up with stubby, uneven loops.
- Tying the Base Knot: Place the center of your cut ribbon against the front of the gathered neck, covering your temporary twist tie or tape. Wrap the ribbon ends around to the back, cross them, and bring them back to the front. Tie a firm, tight double knot. Because cellophane has a very smooth, slippery surface, a loose knot will inevitably slide down, causing the gathered top to sag. Pull the knot tight enough to compress the cellophane slightly, ensuring it grips the plastic securely.
- Forming the Bow: To tie a classic bow, create two even loops (often called "bunny ears") with the ribbon ends. Cross the left loop over the right loop, tuck it under, and pull it through the central opening. Adjust the size of the loops and the length of the tails by gently pulling the loops while holding the center knot firm. If you are using wired ribbon, you can expand on this by creating a multi-looped bow: fold the ribbon back and forth to create four to six overlapping loops, secure the center tightly with a thin wire, and then attach this pre-made bow directly to the base knot on your bag, fluffing out each loop to create a gorgeous, spherical shape.
- Finishing the Tails: The way you finish the ribbon tails can make or break the presentation. For a clean, modern look, fold the ribbon tail in half vertically and cut upward at a 45-degree angle from the open edge to the folded crease; this creates a perfect swallowtail or chevron finish. Alternatively, perform a single, crisp diagonal cut across the ribbon end. If you are using synthetic curling ribbon as an accent layer, hold the ribbon firmly near the knot, press the dull edge of your scissors against the ribbon, and pull quickly outward to create tight, bouncy spirals that cascade down the sides of the bag.
Adding Decorative Finishes for a Polished Presentation
Once your bag is secured and the primary bow is tied, you can apply creative styling touches to customize the presentation for your recipient or the specific occasion.
- Tucking in Accents: Natural accents add organic texture and visual interest. Slide a small sprig of dried lavender, a stem of preserved eucalyptus, or a fragrant cinnamon stick directly underneath the front knot of your ribbon. The tension of the tight knot should hold the stem securely. If the stem is delicate, you can secure it to the ribbon with a tiny dab of hot glue or tie it in place using a thin piece of natural jute twine before tying your main bow.
- Attaching Gift Tags: A gift tag provides space for a personal message and completes the look. Thread the string of your gift tag through one of the ribbon loops before tightening the bow so it hangs gracefully at the front. For a modern, minimalist aesthetic, use a miniature wooden clothespin to clip the gift tag directly to the gathered collar at the top of the bag, or stick a personalized label flat onto the lower front of the cellophane.
- Internal Decorations: You can enhance the interior environment of the bag by mixing decorative elements directly with your filler. Sprinkling a handful of metallic star confetti, dried flower petals, or mini foam snowballs inside the bag creates a playful, snow-globe effect. Be mindful to keep these lightweight decorations near the bottom or sides of the bag so they do not settle directly on top of your main gift and block it from view.
- External Seals: If your clear bag features an adhesive top flap instead of a gathered neck, fold the flap neatly over the back of the bag. Secure it with a decorative foil sticker, a custom printed label, or a real wax seal. To apply a wax seal safely to cellophane, melt the wax onto a non-stick baking sheet first, stamp it, let it cool completely, peel it off, and then use double-sided adhesive tape to attach the finished wax medallion to the bag. Applying hot wax directly to thin cellophane can melt or warp the plastic.
Common Clear Bag Wrapping Mistakes and How to Avoid Them
Even with high-quality materials, small errors in technique can make a clear bag look messy or unprofessional. Keep these common pitfalls in mind to ensure your packaging remains flawless.
- Bag Sizing Errors: Using a bag that is too small forces the seams to stretch, which often leads to splitting during transport. Conversely, a bag that is far too large results in an excessive amount of bunched, bulky plastic at the neck, which looks cluttered and obscures the gift. Always opt for a bag that allows the gift to slide in easily with a few centimeters of breathing room on each side.
- Wrinkled Cellophane: Cellophane is highly prone to showing creases and wrinkles. Avoid crumpling the bag while inserting your gift. If the bag becomes heavily creased, it will lose its crystal-clear clarity. To prevent this, keep your hands flat against the outside of the bag when smoothing it upward, and always store your unused cellophane bags flat inside a protective folder or box to prevent accidental bending.
- Ribbon Slipping: Because cellophane is incredibly slick, standard satin or organza ribbons can easily slide down the neck of the bag if the base knot isn't tight. To prevent this, always use a temporary twist tie or floral tape to create a textured, non-slip collar first. You can also choose ribbons with a textured backing, such as grosgrain or cotton, which naturally grip the plastic much better than smooth satin.
- Overcrowding the Design: The primary appeal of a clear bag is the transparency that showcases the gift inside. Avoid over-packing the bag with too much shredded filler, oversized floral accents, or massive bows. Every decorative element should frame and highlight the gift, not compete with it. Keep your color palette cohesive—limiting yourself to two or three coordinating colors—to maintain an elegant, sophisticated aesthetic.
Frequently Asked Questions (FAQ)
How do you prevent static cling inside a clear cellophane bag?
Static electricity can cause lightweight paper fillers, hair, or dust to stick awkwardly to the inside walls of your clear bag, obscuring the view of your gift. To prevent this, gently wipe the interior and exterior of the bag with a clean, dry microfiber cloth before assembly. For persistent static, lightly slide an unscented laundry dryer sheet over the outside of the bag. Alternatively, spray a tiny mist of anti-static spray onto a cloth and wipe the exterior surface. This neutralizes the electrical charge and ensures your paper shred and confetti settle neatly at the bottom of the bag rather than clinging to the sides.
Can clear cellophane bags be reused for gift wrapping?
Yes, clear cellophane bags can absolutely be reused if they are still in good condition. Before deciding to reuse a bag, inspect it thoroughly for any deep creases, punctures, or sticky residue from old tape or labels. If the bag is structurally sound, gently wipe the inside with a dry, lint-free cloth to remove any dust or crumbs. Store the bags completely flat between two sheets of heavy cardboard or inside a drawer in a cool, dry place. Avoid folding or creasing them during storage, as these fold lines are permanent and will detract from the clean, professional look of your next gift presentation.

Community discussion
Share your experience or ask a question. Comments are reviewed before publication.