
Using a small mesh bag to wrap gifts is an elegant, efficient, and highly customizable packaging method. Unlike traditional wrapping paper, which is often discarded after a single use, a mesh bag offers a reusable and tactile alternative that immediately elevates the presentation. Whether you are preparing favors for a wedding, packaging handmade soaps, or presenting delicate jewelry, the sheer texture of mesh allows a beautiful glimpse of what lies inside while keeping the contents secure. By mastering the art of layering ribbons, selecting structural supports, and adding thoughtful finishing touches, you can transform a simple utility pouch into a stunning, professional-grade gift presentation.
Materials and Tools You Will Need
To achieve a polished and cohesive look, you must first gather the appropriate materials and tools. The foundation of your presentation is the small mesh bag itself. These bags come in various materials, including soft organza, stiff nylon, and metallic-threaded mesh. When selecting your bag, consider the weight and shape of your gift. A soft organza bag drapes beautifully over rounded items, while a stiffer nylon mesh provides better structural support for items with defined edges. Pay close attention to the drawstring; some bags feature simple polyester cords, while others use satin ribbons or metallic threads.
Next, select ribbons that complement the texture of the mesh. Layering different ribbon types creates visual depth. For instance, pairing a wide, structured grosgrain ribbon with a thin, delicate satin ribbon adds a sophisticated contrast. You can also incorporate natural elements like jute twine for a rustic aesthetic or metallic ribbons for festive occasions. Gift tags and embellishments, such as dried flower sprigs, small wooden charms, or personalized cardstock tags, provide the perfect opportunity to customize the presentation for the recipient.
Products mentioned in this guide
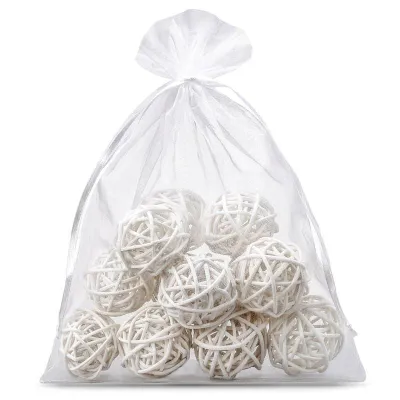
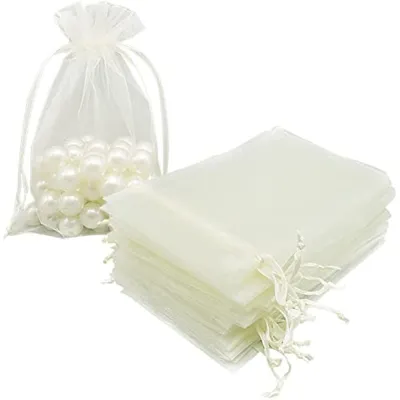
Prices are valid at publication and may change. Please refer to the product page for the latest price.
Finally, assemble your basic wrapping tools. You will need a pair of exceptionally sharp fabric scissors to ensure clean, fray-free ribbon cuts. Double-sided tape can be useful for securing loose elements or keeping inner wrapping in place. Additionally, high-quality tissue paper is essential; it acts as a color-coordinated backdrop inside the mesh bag, providing both structural volume and a layer of mystery for the gift inside.
Preparing the Gift and the Mesh Bag
Before placing any item into a mesh bag, proper preparation is essential to ensure the final presentation looks intentional and pristine. Because mesh is a sheer, open-weave fabric, any loose threads, sharp corners, or awkward shapes will be immediately visible and can easily snag the delicate fibers. If your gift has sharp edges—such as the corners of a small notebook, a metal keychain, or a plastic accessory—wrap it gently in a sheet of color-coordinated tissue paper first. Alternatively, you can place the item inside a small, sturdy inner box before sliding it into the mesh bag. This protects the mesh from tearing and provides a clean, geometric shape that makes the bag sit upright.

Before assembly, inspect each mesh bag thoroughly. Look for manufacturing defects such as uneven stitching along the seams, loose threads near the drawstring channel, or small snags in the weave. Trim any loose threads carefully with your scissors, taking care not to cut the structural seams. If the bag has been folded or compressed during storage, you can gently smooth it out with your fingers. For stubborn creases in nylon or organza bags, a quick pass with a handheld garment steamer on a low setting can restore the fabric’s natural drape, though you must avoid direct contact with high heat to prevent melting the synthetic fibers.
If you are gifting multiple small items, such as a collection of skincare samples, gourmet candies, or stationery accessories, do not simply drop them into the bag in a cluttered pile. Instead, arrange them strategically. Place the largest or heaviest item at the back to act as a spine, and layer the smaller items in front. If the items tend to shift or slide around, use a small piece of double-sided tape to secure them to a backing card or to each other. This ensures that when the recipient receives the gift, the items remain beautifully arranged and face forward.
Step-by-Step Guide to Wrapping the Gift
With your materials prepared, you can begin the wrapping process. Start by opening the mesh bag fully, using your fingers to expand the bottom corners so the bag can accommodate the volume of the gift. Gently slide your prepared gift or inner box into the center of the bag. Ensure that the gift is centered and resting flat against the bottom seam. If you are using tissue paper, make sure the folded edges face the back of the bag, leaving a smooth, seamless surface visible through the front mesh.
Once the gift is positioned, gather the top opening of the bag. If your mesh bag features a built-in drawstring, pull both strings slowly and evenly in opposite directions. Do not yank the drawstrings forcefully, as this can tear the delicate channel stitching or snap the cord. As you pull, use your other hand to guide the mesh, gathering the fabric into neat, uniform pleats around the neck of the bag. If your bag does not have a drawstring, gather the top edge manually, pinching the fabric tightly together about two centimeters below the top rim to create a flared, decorative ruffle.
After securing the initial closure, tie a simple temporary knot with the drawstrings to keep the bag closed while you work. Now, take a moment to adjust the presentation from the outside. Gently press and shift the contents so the most attractive side of the gift faces directly forward. If the bag looks lopsided, gently pull on the corners of the mesh to align the seams. Ensure the bag sits flat on a table; if it tips over, you may need to reposition the weight of the inner contents or add a small piece of heavy cardstock to the bottom of the bag to act as a stable base.
Adding Ribbons and Finishing Touches
The key to transforming a basic mesh bag into an extraordinary gift presentation lies in the finishing touches. While the built-in drawstring secures the bag, it rarely looks decorative on its own. To elevate the look, select a premium ribbon that is at least twice the width of the drawstring. Tie this ribbon directly over the gathered drawstring area, concealing the utility cord completely. A classic bow is always elegant, but you can also opt for a neat flat knot with angled, swallowtail cuts at the ribbon ends for a modern, minimalist aesthetic.
To add visual depth, experiment with layering different ribbon textures. Start by tying a wider base ribbon, such as a rich satin or a structured grosgrain, in a neutral tone. Over this base, layer a thinner, contrasting ribbon—perhaps a metallic cord, a delicate organza ribbon, or a rustic piece of twine. When tying the second layer, ensure the loops of the bows align beautifully, creating a multi-dimensional effect. This layering technique is particularly effective for festive gifts, where a touch of gold or silver ribbon can instantly make the package feel celebratory.
Before tightening your final knot, slide your decorative embellishments onto the ribbon. A personalized gift tag is a classic addition; choose a tag made from heavy cardstock that matches your color scheme, and write a neat, handwritten message. For a sensory touch, tuck a small sprig of dried lavender, a dehydrated citrus slice, or a small stem of baby’s breath into the knot. These natural accents look beautiful against the mesh texture and add a subtle, pleasant aroma. If you are preparing gifts for a specific holiday, you can also thread a small ornament, a wooden charm, or a tiny bell onto the ribbon for a playful, interactive element.
Troubleshooting Common Mesh Bag Wrapping Issues
Working with sheer, lightweight mesh can occasionally present challenges, but most issues are easily resolved with a few simple adjustments. One common problem is that tiny or oddly shaped items can shift, look messy, or even slip through the gaps of wider mesh weaves. If you notice your items sliding around, the best solution is to create an inner barrier. Wrapping the items in a small piece of tissue paper or placing them inside a secondary, tightly woven organza pouch before putting them in the outer mesh bag will keep everything secure and neatly aligned.
Another frequent issue is a drawstring that gets stuck, frays, or breaks during the tying process. This often happens when the drawstring channel is stitched too tightly or when the cord material is of lower quality. If a drawstring becomes stuck, do not force it. Gently wiggle the fabric along the channel to release the tension. If a drawstring snaps entirely, you do not need to discard the bag. Simply use a pair of sharp scissors to cut away the broken cord, and thread a new ribbon through the channel using a small safety pin as a guide, or bypass the channel entirely by gathering the neck of the bag and tying it shut with an external ribbon.
Finally, synthetic mesh materials can sometimes suffer from static cling or excessive stiffness, causing the bag to stick to the gift awkwardly or flare out in an unflattering shape. To combat static cling, you can lightly mist the bag with a static guard spray or gently wipe it with a dryer sheet before assembly. If the mesh is too stiff and refuses to drape naturally, gently massage the fabric between your hands to soften the fibers, or use a low-temperature steam treatment to relax the weave, ensuring the bag contours beautifully around your gift.
Frequently Asked Questions (FAQ)
Can I use a mesh bag for fragile items?
Yes, you can use a mesh bag for fragile items, but the mesh itself provides virtually no physical protection against impacts or pressure. To safely package delicate items like glass vials, ceramic ornaments, or fragile confectionery, you must use a secondary layer of protection. Wrap the fragile item securely in bubble wrap, thick tissue paper, or a protective inner box before placing it inside the mesh bag. This ensures the item remains safe during transit while still allowing you to enjoy the beautiful, textured aesthetic of the outer mesh packaging.
How do I prevent small items from falling through the mesh?
To prevent tiny items like beads, earrings, or small candies from slipping through the holes of a mesh bag, always check the weave density before wrapping. If the mesh has a wide or open weave, use a physical barrier inside the bag. You can wrap the items in a sheet of folded tissue paper, place them inside a small cardboard jewelry box, or use a secondary, ultra-fine organza pouch. This double-layering technique keeps your tiny gifts perfectly secure while maintaining a clean, professional presentation.

Community discussion
Share your experience or ask a question. Comments are reviewed before publication.