
To wrap a gift beautifully, you need precise measurements, crisp folds, and the right materials. Achieving a professional, clean finish does not require expert design skills; rather, it relies on a systematic approach of measuring accurately, cutting cleanly, folding with tension, and concealing the adhesive. By mastering a few fundamental techniques, you can transform any standard roll of gift wrapping paper into a polished presentation that shows care and attention to detail.
The presentation of a gift is the very first thing a recipient notices, setting the tone for the entire exchange. A neatly wrapped package conveys thoughtfulness and effort, elevating even the simplest of items. Whether you are preparing for a festive holiday, a birthday celebration, or a formal event, learning how to handle paper, manage corners, and apply finishing touches will ensure your gifts always look pristine and inviting.
Gather the Right Tools and Wrapping Paper
Before cutting into your paper, assembling the proper tools is essential for a smooth, frustration-free wrapping process. Having everything within arm’s reach prevents you from losing your grip on folded paper while searching for tape or scissors. The basic toolkit for high-quality gift wrapping includes sharp scissors, double-sided tape or matte-finish clear tape, a ruler or measuring tape, and decorative elements like ribbons and gift tags.
Products mentioned in this guide
![[Best Seller] Clearance sale! Cute Unicorn/Flamingos/Panda/Space/Cartoon/Childrens favorite style DIY Gift Wrapping Paper](https://img.lazcdn.com/g/p/23fd53f34e81efc7800377f72ba9ea74.jpg_400x400q80.jpg_.webp)

Prices are valid at publication and may change. Please refer to the product page for the latest price.
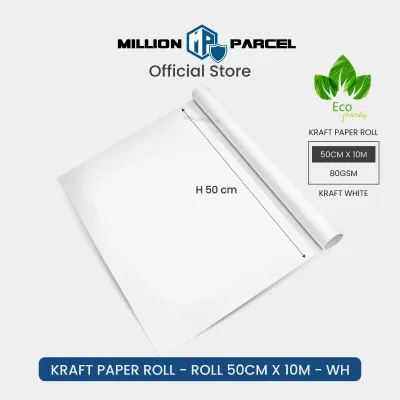
The choice of gift wrapping paper plays a significant role in the ease of the wrapping process and the final appearance of the package. Wrapping paper comes in various weights, typically measured in grams per square meter (gsm). Very thin paper, often found in budget rolls, tears easily when pulled over sharp box corners and can allow the design of the inner box to show through. Conversely, extremely thick paper, such as heavy kraft paper or cardstock-weight sheets, resists folding, springs back easily, and requires strong adhesive to stay in place. A medium-weight paper, ideally between 80 and 90 gsm, offers the perfect balance of flexibility, opacity, and durability.
Pattern scale and orientation are also important considerations when selecting your paper. Large, bold patterns or highly directional prints work best on spacious, flat surfaces where the design can be fully appreciated. For smaller items, opt for miniature patterns, geometric prints, or solid colors to ensure the design is not lost in the folds. If you are wrapping multiple gifts of different sizes, choosing a cohesive color palette with varying pattern scales creates a beautiful, coordinated display.
Finally, prepare a clean, flat, and dry workspace. A large dining table, a clean desk, or a hard floor provides the necessary resistance for making sharp, crisp creases. Avoid wrapping on soft surfaces like carpets or beds, as these surfaces absorb pressure, making it difficult to fold the paper tightly and increasing the risk of accidental punctures or tears from your scissors.
Measure and Cut the Wrapping Paper Accurately
One of the most common mistakes in gift wrapping is using too much paper, which leads to bulky, uneven edges and wasted material. Conversely, using too little paper leaves gaps that are difficult to patch neatly. Accurate measurement is the foundation of a clean, professional wrap, ensuring that the paper fits the box like a custom glove.

To measure the paper using the roll-and-measure technique, place your gift box face down on the unrolled paper. To determine the width of paper needed to wrap around the box, roll the box along its four sides—from the bottom, to the side, to the top, and to the other side. Mark this point on the paper, and then add an extra 2 to 3 centimeters of overlap. This extra margin ensures that the paper can be pulled taut and secured with a clean, overlapping seam.
Next, measure the overhang needed for the ends of the box. The paper extending from the open ends of the box should be slightly more than half the depth of the box on each side. If the overhang is too long, the paper will overlap excessively when folded, creating a bulky, messy triangle at the ends. If it is too short, the box will not be fully covered. You can use a ruler to verify these measurements before making any cuts, or simply fold the paper over the side of the box to visually check the length.
When you are ready to cut, focus on achieving straight, clean lines. Dull scissors will chew through the paper, leaving jagged edges that are difficult to fold neatly. If you are using high-quality wrapping paper, it may feature a grid pattern printed on the reverse side, which serves as an excellent guide for straight cuts. If your paper does not have a grid, you can fold the paper along your measurement mark to create a sharp crease, then slide your scissors along that crease for a perfectly straight edge.
Wrap a Standard Box With Crisp, Clean Edges
With your paper measured and cut, you can begin the wrapping process. The goal is to keep the paper taut against the box at every step, which prevents sagging and ensures the corners remain sharp. Start by placing the box face down in the center of your cut paper, ensuring that the top of the gift will be free of visible seams.
Pull one side of the paper over the center of the box, aligning it so it covers slightly more than half of the box’s bottom surface. Secure this edge to the box with a small piece of tape to keep it from shifting. Next, pull the opposite side of the paper tightly over the first side. To create a professional, seamless finish, fold the raw edge of this top layer under by about 1 centimeter before taping it down. This simple fold hides the cut edge of the paper and creates a clean, straight seam. Secure this seam with double-sided tape placed underneath the fold for an invisible finish.
Now, turn your attention to the open ends of the box. To create crisp, professional corners, use the classic envelope fold, also known as the hospital corner technique. Start on one side by pushing the top flap of paper down against the side of the box. This action will naturally create two diagonal wings of paper on the left and right sides. Press these wings flat against the box, creasing the diagonal edges firmly with your thumb and index finger to establish sharp lines.
Next, fold the left and right diagonal wings inward, pressing them tightly against the side of the box. This leaves a single, clean triangle of paper pointing upward from the bottom. Fold the raw edge of this bottom triangle inward by about 1 centimeter to create a clean hem, just as you did with the main seam. Pull this bottom flap up tightly against the side of the box and secure it with double-sided tape. Repeat this entire process on the other side of the box, ensuring the paper remains taut throughout.
Adapt Techniques for Irregularly Shaped Gifts
Not every gift comes in a convenient, rectangular box. Wrapping irregularly shaped items—such as spheres, cylinders, soft toys, or clothing—requires a different approach to avoid unsightly wrinkles, tears, and awkward bulges. With a few adjustments, you can achieve a presentation that is just as polished as a standard box.
For soft or highly irregular items, the most straightforward solution is to place them inside a sturdy cardboard gift box or a simple shirt box before wrapping. This instantly provides the flat surfaces and sharp corners needed for standard wrapping techniques. If a box is not available, you can wrap the item in several layers of tissue paper first. The tissue paper cushions the item, smoothing out sharp protrusions and creating a more uniform, rounded shape that is easier to wrap in standard paper.
If you are wrapping a cylindrical item, such as a poster tube or a bottle, the candy wrapper method is highly effective. Roll the wrapping paper around the cylinder, leaving a generous amount of overhang on both ends. Secure the main seam along the length of the cylinder with tape. Next, gently twist the excess paper at each end, securing the twists with decorative ribbon or twine. This creates a classic, festive look that accommodates the round shape without requiring complex folds.
For items that are simply too heavy, sharp, or awkwardly shaped for paper, consider alternative wrapping mediums. Fabric wrapping uses reusable cloth wraps to cover items of any shape beautifully. Fabric conforms naturally to curves and odd angles without tearing or creasing. Alternatively, a high-quality gift bag lined with coordinating tissue paper offers a quick, elegant solution that keeps the presentation looking professional.
Add Finishing Touches for a Professional Look
Once your gift is neatly wrapped, adding the finishing touches elevates the presentation from simple to spectacular. Ribbons, bows, and tags not only secure the package but also allow you to express your personal style and match the occasion.
To tie a classic ribbon, measure out a length of ribbon that is roughly five times the length of your box. Place the center of the ribbon on top of the box, wrap it around to the bottom, cross the ends over each other at a 90-degree angle, and bring them back up to the top. Thread the ends under the original center loop, pull them snug, and tie a secure knot before forming your bow. This technique ensures the ribbon lies flat on the bottom of the box, preventing the gift from wobbling when placed on a flat surface.
Personalized gift tags and small embellishments add a thoughtful, custom feel to your package. You can slide a simple cardstock tag onto the ribbon before tying the final bow, writing a brief message or the recipient’s name in neat handwriting. For a modern, organic look, tuck a small sprig of dried lavender, eucalyptus, or a pinecone under the ribbon. Ensure these embellishments complement the colors and patterns of your wrapping paper without overwhelming the design.
Before presenting your gift, conduct a quick final inspection. Look for any loose edges, visible tape residue, or accidental wrinkles in the paper. If you spot a loose corner, secure it discreetly with a small piece of double-sided tape. Smooth out any minor creases with the flat of your hand. Taking these extra moments to refine the details ensures your gift looks flawless and ready to impress.
Frequently Asked Questions (FAQ)
How do I prevent wrapping paper from tearing while folding?
To prevent wrapping paper from tearing, choose a medium-weight paper (around 80 to 90 gsm) that offers both flexibility and strength. When wrapping boxes with sharp corners, avoid pulling the paper too tightly, which puts excessive stress on the fibers. You can also lightly score your fold lines with a fingernail or a bone folder before making the final crease, which guides the paper into place smoothly without causing rips.
What is the best way to hide tape on a wrapped gift?
The most effective way to hide tape is to use double-sided tape, which sits entirely between the overlapping layers of paper, leaving no visible adhesive on the exterior. If you only have standard clear tape, choose a matte or satin finish tape rather than a glossy one, as it blends much better with the texture of the paper. Additionally, place your tape strategically under decorative ribbons, bows, or within the folded seams where it is naturally concealed from view.
How much wrapping paper do I need for a large gift?
To determine the paper needed for a large gift, measure the item’s height, width, and depth. The width of your paper sheet must equal the width of the gift plus twice its depth, while the length of the sheet must be long enough to wrap completely around the gift with an additional 3 to 5 centimeters of overlap. If the gift is larger than a standard roll of paper, you can join two sheets together using double-sided tape along a neat, straight seam before beginning the wrapping process.

Community discussion
Share your experience or ask a question. Comments are reviewed before publication.