
Wrapping homemade cookies beautifully is more than just a presentation choice; it is a way to preserve your hard work and show genuine care. By combining a reliable food-safe inner barrier with elegant outer decorative paper and a well-tied ribbon, you can transform simple baked goods into a stunning, professional-looking gift. The key lies in protecting the cookies from moisture and grease while using precise folding and tying techniques to create a secure, visually balanced package.
Whether you are preparing a festive holiday treat, a birthday surprise, or a simple thank-you gesture, mastering the art of cookie packaging ensures your gifts arrive intact, fresh, and visually delightful. This step-by-step guide walks you through selecting the right materials, preparing your cookies to prevent grease stains, folding the paper with crisp edges, and tying a secure ribbon knot. With a few simple tools and a little patience, you can create beautiful, artisanal cookie packages that look beautiful and taste delicious.
Essential Materials and Tools for Cookie Packaging
Before you begin wrapping, gathering the right materials is essential for both the aesthetic appeal and the structural integrity of your gift. A critical component of cookie packaging is the food-safe inner barrier. Because decorative wrapping papers are rarely food-grade and can absorb oils or transfer chemical dyes, you must always place a protective layer between the cookies and the outer paper. Common options include food-grade cellophane bags, greaseproof glassine bags, unbleached parchment paper, or heat-sealable poly bags. These materials keep the cookies fresh, lock in moisture, and prevent unsightly grease spots from seeping through to your beautiful outer wrap.
Products mentioned in this guide
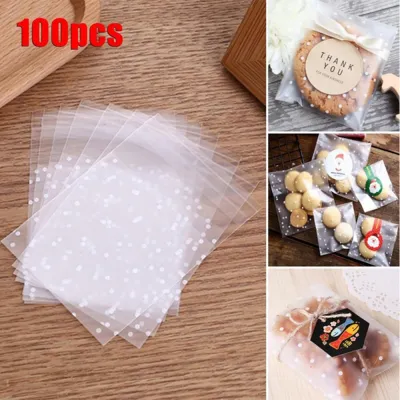
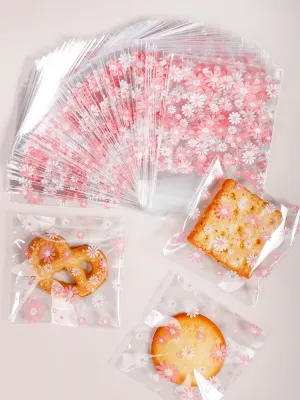
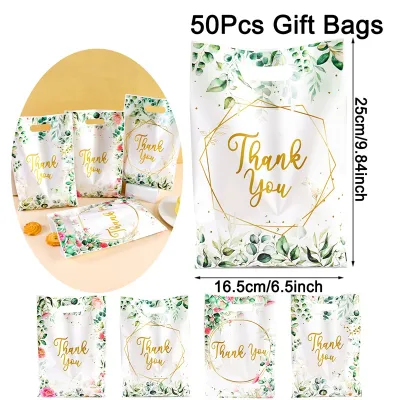
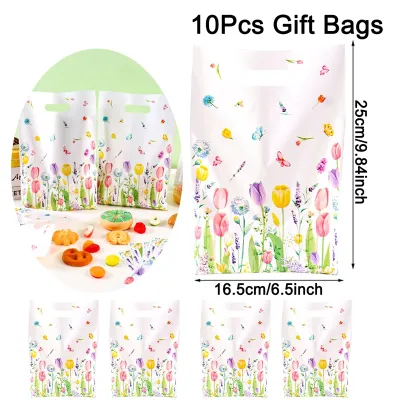
Prices are valid at publication and may change. Please refer to the product page for the latest price.
Once the protective layer is established, you can select your decorative outer paper. A medium-weight wrapping paper (around 80 to 100 gsm) offers a practical balance, providing enough structure to hold crisp folds without being so stiff that it crushes the contents. For a rustic, artisanal look, brown kraft paper is highly durable and pairs beautifully with natural accents. If you prefer a more refined presentation, look for high-quality matte or textured papers with subtle patterns that complement the occasion.
The ribbon you choose adds the final touch of elegance and helps secure the entire package. Select a ribbon width that is proportional to the size of your cookie bundle; a 1.5-centimetre to 2.5-centimetre ribbon generally works well for standard gift sizes. Cotton ribbon, linen cord, and natural raffia offer a charming, tactile feel that suits rustic themes. For a more luxurious or formal presentation, double-sided satin or grosgrain ribbons provide a beautiful sheen and hold their shape exceptionally well when tied into bows.
Finally, assemble your basic wrapping tools to ensure a smooth, frustration-free process. You will need a pair of very sharp scissors to make clean cuts without fraying the ribbon or tearing the paper. Double-sided tape is highly recommended for securing paper folds invisibly, keeping the focus entirely on your beautiful wrapping. You may also want to have decorative stickers, paper seals, or a roll of washi tape on hand to add quick, secure closures and extra visual interest to your finished package.
Step 1: Preparing and Protecting the Cookies
A successful cookie gift begins long before you cut the wrapping paper. The first rule of cookie packaging is to allow your baked goods to cool completely to room temperature. Wrapping cookies while they are even slightly warm traps residual heat inside the packaging, creating condensation. This trapped moisture will quickly turn your crisp cookies soggy, ruin any delicate icing or chocolate decorations, and compromise the structural integrity of your outer paper. Allow your cookies to rest on a wire cooling rack for at least two hours to ensure they are completely cool and set.

Once cooled, plan your grouping strategy based on the shape, size, and fragility of the cookies. Sturdy, uniform bakes like shortbread, chocolate chip cookies, or gingerbread can be stacked neatly in columns to create a compact, stable bundle. For highly decorated cookies, delicate macarons, or thin tuiles, it is much safer to lay them flat in a single layer or separate them with small sheets of parchment paper to prevent them from rubbing against each other and breaking. Grouping your cookies logically not only protects them from damage during transport but also makes the outer wrapping process much more predictable.
Next, place your grouped cookies into your chosen food-safe inner barrier. If you are using cellophane or glassine bags, slide the cookies in gently, taking care not to smudge any icing or leave crumbs along the top edge of the bag. Fold the top of the bag over tightly to expel excess air, which helps maintain freshness. Secure the opening using a simple twist tie, a small piece of clear tape, or a heat sealer if you are using heat-sealable bags. If you are wrapping a stack of cookies in parchment paper, fold the paper snugly around the stack like a cracker wrapper and twist or tie the ends to keep the bundle secure.
Always double-check that the inner barrier is completely sealed and that no part of the cookies can come into direct contact with the outer decorative paper. This step is vital because even a tiny gap can allow butter or oils to migrate, resulting in dark grease spots on your beautiful wrapping paper. A secure inner seal also locks in the distinct aromas of your cookies, ensuring that when the recipient finally opens the gift, they are greeted with a wonderful burst of fresh-baked fragrance.
Step 2: Cutting and Folding the Decorative Paper
With your cookies safely sealed in their inner packaging, you can now measure and cut your decorative paper. To determine the correct dimensions, place your cookie bundle in the center of the paper. A reliable rule of thumb is to ensure the paper is wide enough to wrap completely around the bundle with an overlap of at least 5 centimetres. For the length, the paper should extend past the top and bottom of the bundle by slightly more than half of the bundle’s depth. This ensures you have enough paper to cover the ends neatly without creating bulky, awkward folds that are difficult to secure.
The way you cut and fold your paper will depend on whether you are wrapping a flat layout or a tall, stacked bundle. For flat layouts, such as a single decorated cookie on a cardboard backing, a classic envelope fold works beautifully. Place the cookie face down in the center of the paper, fold the left and right sides inward so they meet and overlap slightly, and secure them with a small piece of double-sided tape. Then, fold the bottom flap up and the top flap down, creasing the edges sharply to create a clean, professional envelope shape.
For stacked cookie bundles or small boxes, a traditional box wrap is highly effective. Wrap the paper around the width of the bundle, pull it taut, and secure the seam with double-sided tape. To fold the ends, gently push the top flap of paper downward against the side of the bundle, creating two neat triangular flaps on the sides. Fold these side flaps inward, crease them firmly, and then fold the remaining bottom flap upward. Secure the final fold with a small piece of double-sided tape hidden underneath the flap for a seamless look.
Regardless of the shape, the key to professional-looking gift wrapping is making sharp, deliberate creases. Run your fingernail or a bone folder along every fold to ensure the paper hugs the cookie bundle snugly. Loose, rounded folds can make the package look untidy and allow the cookies to shift inside, increasing the risk of breakage. By using double-sided tape discreetly inside the folds rather than standard clear tape on the outside, you keep the focus entirely on the beautiful pattern of your paper.
Step 3: Securing the Package and Tying the Ribbon
The ribbon serves a dual purpose: it adds a beautiful, festive contrast to your decorative paper and provides essential structural support to keep the wrapped package secure. Depending on the shape of your package, you can choose from a few different wrapping methods. For long, rectangular packages or tall stacks, a classic cross-wrap is highly effective. Center the ribbon across the top of the package, wrap it around to the back, cross the ends over each other at a right angle, and bring them back to the front. This method secures the package along both axes, preventing the paper folds from opening.
If you are wrapping a smaller, flatter package, a simple single band or a diagonal wrap can look incredibly chic. For a single band, simply wrap the ribbon around the center of the package and tie it securely on top. For a diagonal wrap, thread the ribbon across opposite corners of the package, crossing them underneath and tying them on the front. Whichever method you choose, make sure to adjust the tension of the ribbon carefully. It should be snug enough to hold the paper firmly in place and prevent slipping, but not so tight that it pinches the paper or crushes the delicate cookies inside.
When it comes to tying the knot, a classic bow is timeless and elegant. To tie a neat bow that sits straight, start with a simple square knot to anchor the ribbon. Create two equal-sized loops with the ends, cross them over, and pull one loop through the center space. Adjust the loops and tails until they are symmetrical and proportional to the size of the package. If you prefer a more rustic look, a simple double-knot with long, flowing tails can look wonderfully minimalist, especially when using natural materials like cotton cord or raffia.
Once your bow or knot is tied, take a moment to trim the ribbon ends cleanly. Frayed ribbon edges can instantly make a beautifully wrapped gift look messy. Use your sharpest scissors to cut the ends at a clean 45-degree angle, or fold the ribbon end in half vertically and cut diagonally upward from the fold to create a classic, elegant inverted V-shape. This simple detail prevents the ribbon from fraying and adds a polished, professional finish to your cookie gift.
Step 4: Adding Final Touches and Personalization
The final step in wrapping your cookie gift is adding small, thoughtful embellishments that reflect your personal style and the occasion. A custom gift tag is a wonderful way to add a personal message, identify the type of cookies inside, or list any potential allergens for safety. You can write a heartfelt handwritten note on a small piece of high-quality cardstock, punch a hole in the corner, and thread it onto the ribbon before tying the final bow. Alternatively, you can use a custom rubber stamp to print a festive greeting directly onto the wrapping paper before you begin folding.
Incorporating natural, seasonal accents under the ribbon knot is another fantastic way to elevate your presentation. For a rustic or winter-themed gift, tuck a small sprig of fresh rosemary, a dried orange slice, a cinnamon stick, or a tiny pinecone under the bow. For spring or summer gifts, a small pressed flower or a sprig of dried lavender adds a delicate, fragrant touch. These natural elements not only look beautiful but also provide a wonderful tactile and sensory experience for the recipient.
If you want to add a touch of old-world charm, consider using a wax seal to secure the overlapping edges of your paper or to anchor the ribbon ends. Melt a small amount of sealing wax onto the paper and press a decorative metal stamp into it, leaving a beautiful, raised design. If wax sealing feels too complex, high-quality decorative stickers, metallic foil seals, or patterned washi tape can achieve a similar securing effect while adding a pop of color and personality to the package.
Before you set the gift aside, perform a quick visual and structural check. Gently lift the package to ensure the cookies do not slide around excessively inside. Check that all tape is hidden, the ribbon is secure and centered, and the folds are crisp and clean. Taking these few extra moments to inspect your work ensures that your beautifully wrapped cookies will survive the journey to their destination and bring a genuine smile to the face of whoever is lucky enough to receive them.
Troubleshooting Common Cookie Wrapping Issues
Even with careful preparation, wrapping cookies can sometimes present unexpected challenges. One of the most common issues is the appearance of dark, unsightly grease spots on the outer decorative paper. This happens when the inner food-safe barrier is either too thin, poorly sealed, or not greaseproof. If you notice grease spots forming, you will need to re-wrap the cookies. Upgrade your inner layer to a high-quality glassine bag or a thicker, greaseproof parchment paper, and ensure all seams are completely sealed before applying the outer decorative paper.
Another frequent problem is paper tearing or creasing during the folding process, which often occurs with very thin wrapping papers or when wrapping irregularly shaped cookie bundles. If your paper tears, do not panic; you do not necessarily have to start over. You can easily cover a small tear or crease by strategically placing a decorative sticker, a gift tag, or a wider band of ribbon over the damaged area. To prevent tears in the future, try using a slightly heavier paper or wrapping your cookies in a sturdy cardboard base or small gift box before applying the decorative paper.
Slippery ribbons, such as high-gloss satin or organza, can easily slide off the corners of your package, causing the wrapping to loosen. To secure a slippery ribbon, place a tiny dot of double-sided tape or a small dab of craft glue directly onto the wrapping paper where the ribbon crosses on the back and sides of the package. This invisible anchor keeps the ribbon firmly in place without affecting the overall look of the gift. Alternatively, switching to a ribbon with more surface texture, such as grosgrain, cotton, or raffia, will naturally prevent slipping.
Finally, wrapping unusually large, thick, or irregularly shaped cookies can make standard folding techniques difficult. If you are dealing with giant cookies or delicate, uneven shapes, avoid trying to force them into a tight, rectangular wrap. Instead, place the cookies on a sturdy piece of cardboard cut to size, wrap the entire assembly in a food-safe cellophane bag, and gather the excess bag at the top. Tie the gathered top tightly with your decorative ribbon to create a beautiful, classic pouch style that protects the cookies while showcasing their unique shapes.
Frequently Asked Questions (FAQ)
How far in advance can I wrap cookies before gifting them?
You should wrap your cookies as close to the gifting time as possible, ideally within 24 to 48 hours of baking, to ensure maximum freshness. Always wait until the cookies are completely cool before wrapping them to prevent condensation from softening them. The shelf life of your gift depends heavily on the quality of your inner food-safe barrier; airtight cellophane or heat-sealed bags will keep cookies fresh much longer than simple paper wraps. If you need to prepare the gifts further in advance, store the sealed, inner-wrapped cookies in an airtight container, and apply the outer decorative paper and ribbon the day before gifting.
Can I reuse decorative paper and ribbons for cookie packaging?
You can reuse decorative paper and ribbons for cookie packaging, provided they are clean, structurally sound, and free of any lingering odors. Before reusing paper, inspect it carefully for any grease stains, tears, or deep creases that might compromise the look of your gift. Ribbons can often be refreshed by gently ironing them on a low heat setting to remove wrinkles. However, because these materials will be placed very close to food, ensure they have not been exposed to dust, moisture, or household chemicals, and always use a brand-new, food-safe inner barrier to protect the cookies themselves.

Community discussion
Share your experience or ask a question. Comments are reviewed before publication.