
Designing a beautiful birthday goodies bag is a wonderful way to show appreciation to your party guests, transforming simple party favors into a memorable keepsake. The presentation of a gift often speaks as loudly as the contents inside. By mastering a few straightforward paper folding and ribbon tying techniques, you can elevate any standard favor bag into a custom work of art.
Whether you are preparing for a small, intimate gathering or a large-scale celebration, taking the time to hand-wrap and decorate your packaging adds a deeply personal touch. This guide will walk you through the essential tools, step-by-step wrapping methods, advanced ribbon techniques, and creative embellishments needed to achieve a flawless, professional finish.
Essential Tools and Materials for Goodie Bag Wrapping
Before beginning your wrapping project, gathering the correct supplies will ensure an efficient workflow and prevent unnecessary interruptions. The foundation of your birthday goodies bag project relies on choosing the right base materials and coordinating them with high-quality accents.
Products mentioned in this guide
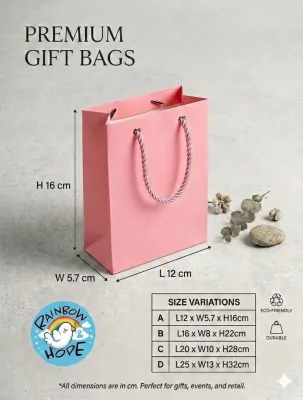


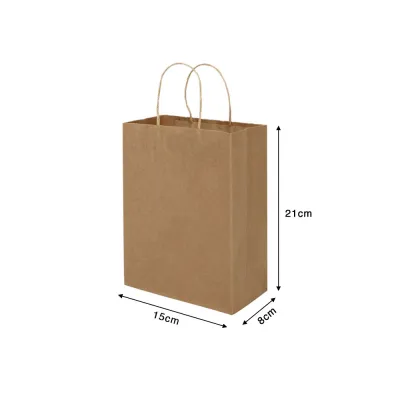
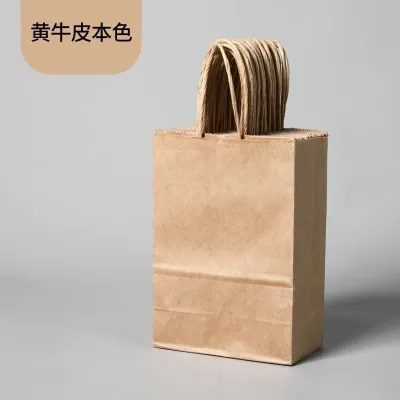
Prices are valid at publication and may change. Please refer to the product page for the latest price.
For your bag bases, you can select pre-made bags or create custom bags from scratch. Pre-made options typically include plain kraft paper bags, clear cellophane bags, or reusable canvas pouches. If you prefer to make custom bags, look for flat wrapping paper sheets. Sturdy kraft paper, vibrant patterned gift wrap, or delicate tissue paper for interior layering are excellent choices.
Your choice of ribbon will dictate the style and structure of your final bow. Satin ribbons offer a smooth, glossy finish that drapes elegantly, while grosgrain ribbons provide a ribbed texture that holds knots exceptionally well. For a rustic or natural aesthetic, burlap and raffia are ideal alternatives. Keep in mind that ribbon thickness affects your tying technique; wide ribbons (25mm to 38mm) are perfect for bold, simple knots, whereas narrower ribbons (6mm to 12mm) are better suited for intricate, multi-loop bows.
To assemble and decorate your bags, you will need a few standard crafting tools. Keep these items nearby:
- Sharp craft scissors: Essential for clean paper cuts and preventing ribbon edges from fraying.
- Double-sided tape: The secret to seamless, invisible joints without the mess of liquid glue.
- Glue dots: Perfect for securing heavy embellishments, tags, or ribbon loops instantly.
- A hole punch: Used to create clean openings for ribbon handles and gift tags.
- A ruler and pencil: Crucial for precise measurements and straight fold lines.
If children are helping you assemble these bags, ensure they use age-appropriate safety scissors and non-toxic, solvent-free adhesives. To minimize waste, always measure your paper and ribbon before cutting. A reliable formula for measuring ribbon is to wrap a scrap piece around your bag’s neck or handle area, add 30 centimetres to account for the bow loops and tails, and use that length as a template for the remaining spools.
Step-by-Step Guide to Wrapping the Birthday Goodies Bag
Depending on your budget, time constraints, and desired aesthetic, you can either enhance a pre-made bag or fold a custom bag from a flat sheet of wrapping paper. Both methods yield beautiful results when executed with precision and care.

Wrapping a Pre-Made Bag
Covering a plain, pre-made paper bag with high-quality wrapping paper is an excellent way to customize its appearance while utilizing the bag’s existing structural strength. This technique allows you to add vibrant patterns and themes to inexpensive, bulk-purchased bags.
- Step 1: Measure and cut the paper. Lay your pre-made bag flat on a clean working surface. Use your ruler to measure the width and height of the front panel, as well as the depth of the side gussets. Cut a piece of wrapping paper that is wide enough to wrap completely around the front and sides of the bag, leaving a 2-centimetre margin on the vertical edge for overlapping. Cut the height of the paper to match the bag's height, adding an extra 3 centimetres at both the top and bottom to fold inward.
- Step 2: Apply double-sided tape. Turn your cut wrapping paper face down. Apply a continuous strip of double-sided tape along the top and bottom margins of the paper, as well as down one of the vertical side edges. Press the tape down firmly to ensure strong adhesion, but do not peel off the protective backing just yet.
- Step 3: Wrap and align the paper. Peel the backing off the tape on the vertical edge. Carefully align the un-taped vertical edge of your wrapping paper with the back corner of your pre-made bag. Wrap the paper tightly around the front and sides of the bag, smoothing it flat with your hands as you go to prevent air bubbles. Overlap the taped vertical edge onto the back panel and press down firmly to secure the seam. Next, peel the backing off the top and bottom tape strips, fold the excess paper margins over the bag's top rim and bottom base, and press them flat against the interior and underside of the bag.
- Step 4: Reinforce the bottom folds. If your birthday goodies bag will hold heavier items like small toys, books, or glass jars, apply an extra strip of double-sided tape along the bottom folds. This reinforcement prevents the paper from lifting or tearing when the bag is lifted and carried.
Creating a Custom Bag from a Sheet of Wrapping Paper
If you want a truly bespoke size or want to utilize a specific pattern of thick wrapping paper, folding your own bag from a flat sheet is an incredibly rewarding crafting technique. This method works best with sturdy, heavyweight papers.
- Step 1: Cut and mark your sheet. Cut a large rectangular sheet of sturdy wrapping paper. For a medium-sized goodie bag, a sheet measuring 40 centimetres by 60 centimetres is ideal. Lay the paper face down on your workspace. Using a ruler and a light pencil, mark a fold line 3 centimetres down from the top long edge. This fold will eventually form the reinforced upper rim of your bag.
- Step 2: Fold the cylinder and secure the seam. Fold the top 3-centimetre margin down and crease it sharply. Next, fold the left and right short edges of the paper toward the center so they overlap by approximately 2 centimetres. Apply a strip of strong double-sided tape along this vertical overlap and press the seam together, creating a flat paper cylinder.
- Step 3: Fold and secure the base. To form the bottom of the bag, fold the bottom edge of the cylinder up by about 8 centimetres and crease it. Open this bottom fold and press the left and right outer corners inward, flattening them to create two neat triangular flaps on either side. Fold the top and bottom horizontal flaps of this base section toward the center, overlapping them slightly. Secure these flaps together with a generous amount of double-sided tape, ensuring the base is completely flat, sealed, and stable enough to stand upright on its own.
- Step 4: Reinforce the rim and punch holes. Gently open the bag by slipping your hand inside to expand the base and sides. Push the side panels inward along their center lines to create neat, professional gussets. Because the top rim was folded down twice in Step 1, it is now highly reinforced. Use your hole punch to create two evenly spaced holes on the front panel and two matching holes on the back panel, which will serve as the attachment points for your ribbon handles.
Ribbon Tying and Bow Techniques for a Polished Look
Once your bag is constructed, the ribbon you choose and the way you tie it will serve as the focal point of your design. Different tying techniques can convey styles ranging from modern minimalism to festive elegance.
Classic Bows and Simple Knots
A beautifully executed classic bow is timeless and works well on almost any style of birthday goodies bag. Achieving symmetry is the key to making a standard bow look professional rather than messy.
To tie a standard shoelace bow, thread your ribbon through the punched holes of your bag or wrap it around the cinched neck of a cellophane pouch. Cross the left tail over the right tail and tuck it under to create a secure starting knot. Form a neat loop with the left strand. Wrap the right strand around the base of this loop, and push it through the opening to form the second loop. Pull both loops gently while holding the center knot to adjust their size.
For a flat, modern look that suits wider grosgrain ribbons, opt for a square knot instead of a traditional bow. To tie a square knot, cross the left ribbon tail over the right tail and tuck it under. Then, cross the right tail over the left tail and tuck it under. Pull both ends outward horizontally to create a clean, square-shaped knot that lies completely flat against the bag.
When tightening any knot or bow, always place a finger on the base of the paper bag or handle hole to support the tension. Pulling the ribbon too forcefully without supporting the paper can easily tear the punched holes or crush the bag’s structure.
Decorative Multi-Loop Bows
For special milestone birthdays or premium gifts, a decorative multi-loop bow—often referred to as a pom-pom bow—adds a dramatic, three-dimensional element that instantly elevates the presentation.
To create a multi-loop bow using the finger-looping method, hold the end of a long piece of thin satin ribbon or raffia against your fingers. Wrap the ribbon around three or four fingers of your non-dominant hand approximately six to eight times, depending on how full you want the bow to be. Gently slide the coiled ribbon off your fingers, keeping the loops flat.
Fold the flat coil in half to locate the exact center. Using your sharp craft scissors, cut small V-shaped notches into both folded edges of the center, making sure not to cut all the way through the ribbon. Take a separate, thin 15-centimetre piece of ribbon or a short length of craft wire, wrap it tightly around the notched center, and tie a double knot to secure the loops.
To finish the bow, hold the secured center firmly and begin pulling the individual loops out from the inside of the coil one by one. Gently twist each loop forward or backward as you pull it to fluff the bow. This creates a balanced, spherical shape that can be attached to the front of your bag using a high-tack glue dot.
Incorporating Ribbon into Handles and Edges
Ribbons do not have to be limited to decorative bows; they can also function as structural handles or unique border decorations along the bag’s upper edges.
To create custom ribbon handles, cut two equal lengths of ribbon, each about 30 centimetres long. Thread one end of the ribbon from the outside of the bag to the inside through one of your punched holes. Tie a secure double knot on the inside of the bag. To prevent the knot from slipping back through the hole, ensure the knot is significantly larger than the punched opening, and press a glue dot over the knot to adhere it flat against the inner wall of the bag. Repeat this process for the other end of the ribbon and the adjacent hole.
For an incredibly unique, decorative edge, punch a series of small, evenly spaced holes (about 2 centimetres apart) along the entire top rim of your bag. Thread a narrow, coordinating ribbon through these holes in a running stitch or a criss-cross corset pattern. This weaving technique adds a beautiful, tailored border to plain paper bags. Always match your ribbon width to the size of your punched holes; using a ribbon that is too wide will cause it to bunch and fray, while a ribbon that is too thin may slip out of place.
Adding Finishing Touches and Personalized Decorations
With your bag wrapped and your ribbons tied, adding personalized finishing touches will make each birthday goodies bag feel like a custom gift designed specifically for the recipient.
Custom gift tags are an easy way to add a personal message or write the recipient’s name. Cut small rectangles or circles out of thick cardstock paper. Use a single hole punch to create a hole at the top of the tag, and thread a short piece of narrow ribbon through it to tie the tag directly to your main bag handle. Writing names in calligraphy or using high-quality ink pens prevents smudging and ensures a clean, elegant look.
To add texture and visual interest, consider incorporating small tactile elements into your ribbon knots. Slipping a small sprig of dried flowers (such as lavender or baby’s breath) or a small wooden charm onto the ribbon before tying the final bow creates a premium, organic feel. If you want a vintage or formal aesthetic, you can apply a wax seal. To do this safely without risking damage to your wrapping paper, melt and press your wax seal onto a non-stick silicone baking mat first. Once the wax has cooled and hardened, peel it off the mat and use a strong glue dot to adhere it directly onto the center of your ribbon knot.
If you are working with plain kraft paper, you can easily add themed patterns using custom rubber stamps and pigment-based ink pads. Stamping simple geometric shapes, stars, or birthday messages across the paper before folding the bag allows you to create custom-themed wrapping paper without overwhelming the overall design.
Once all your decorations are applied, perform a final quality check on each bag:
- Stability: Place the bag on a flat surface to verify that it stands upright without tipping over.
- Handle Security: Give the ribbon handles a gentle tug to ensure the knots are secure and will not slip through the punched holes.
- Accessibility: Check that your decorative bows, tags, and woven ribbons do not block or restrict the bag's opening, allowing your guests to easily access the treats inside.
Common Mistakes to Avoid When Wrapping Goodie Bags
Avoiding a few common crafting pitfalls will save you time and materials, ensuring your finished goodie bags look polished and professional.
One of the most frequent mistakes is using liquid school glue or hot glue guns on thin wrapping paper. Liquid glue contains water, which causes thin paper to warp, wrinkle, and bubble as it dries. Hot glue can melt thin plastics or leave thick, unsightly lumps under your paper. Always use high-quality double-sided tape or dry glue dots for a perfectly flat, seamless finish.
Another common error is cutting your ribbon too short before tying. When ribbon is cut too short, tying a symmetrical bow becomes incredibly difficult, often resulting in crushed bag handles and frayed ribbon ends as you struggle to pull the loops through. Always err on the side of caution and cut your ribbon slightly longer than you think you need; you can easily trim the excess tails at a sharp angle once the bow is completed.
If you find that your finished bows are consistently lopsided or asymmetrical, avoid the temptation to pull the hanging tails to tighten them. Pulling the tails will only distort the knot further. Instead, hold the center knot firmly between your thumb and forefinger, and gently pull the loops from the inside to adjust and balance their sizes.
Finally, never underestimate the weight of your party favors. Custom-folded paper bags have weight limits. If you plan to fill your bags with heavy items like metal toys, heavy stationery, or filled jars, always reinforce the bottom of the bag. Placing a piece of thick, pre-cut cardboard at the bottom of the bag distributes the weight evenly and prevents the paper base from bursting. Always test-lift one fully loaded bag over a soft surface before assembling the rest for your guests.
Frequently Asked Questions (FAQ)
What is the best paper weight for heavy goodie bags?
Standard thin wrapping paper (typically under 80 GSM) does not have the structural integrity required to hold heavy party favors and will easily tear at the seams or handles. For custom-folded bags that need to hold heavier items, it is highly recommended to use kraft paper, cardstock, or heavyweight patterned gift wrap with a thickness of 120 GSM or higher. Additionally, you should always reinforce the base of the bag with a custom-cut piece of thick cardboard and apply extra double-sided tape to the bottom folds and handle areas to ensure the bag remains secure.
How do I prevent ribbon ends from fraying?
Synthetic ribbons, such as satin and grosgrain, are highly prone to unraveling and fraying at the ends once cut. To prevent this, always use extremely sharp craft scissors and cut the ribbon ends at a sharp 45-degree angle or in a clean, inverted V-shape (also known as a chevron cut). For a permanent seal, you can apply a microscopic dab of clear nail polish or specialized fabric sealant to the very edge of the cut ribbon. Natural ribbons, such as burlap, jute, or raffia, are naturally meant to have a rustic, slightly frayed appearance and generally do not require any sealing.

Community discussion
Share your experience or ask a question. Comments are reviewed before publication.