
Transforming a plain paper bag or cardboard box into a stunning birthday goodie bag is an excellent way to add a personal, premium touch to any celebration. By wrapping the base container in high-quality decorative paper and securing it with a beautifully styled ribbon, you can create custom party favors that look professionally crafted. The process requires careful measuring, clean folding, and strategic filling to ensure the finished bag is both visually appealing and structurally sound.
Gather Your Wrapping Materials and Tools
To begin, select a sturdy base container. Plain kraft paper bags with flat bottoms, small cardboard boxes, or simple white gift boxes work best because they provide a rigid structure that holds its shape under the weight of gifts.
For the outer layer, choose a decorative wrapping paper with a thickness between 80 and 120 GSM (grams per square meter). Paper within this weight range is flexible enough to fold cleanly around sharp corners without cracking, yet durable enough to resist tearing during assembly.
Products mentioned in this guide
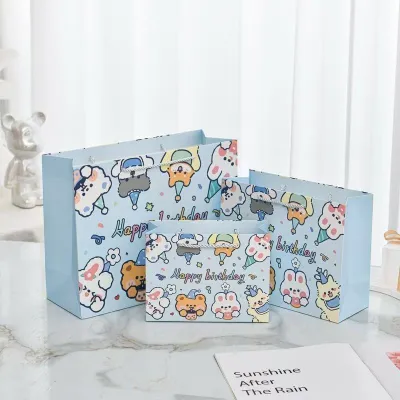
![[MQLITTLESHOP] 10PCS Set Paper Bag Gift Bags Birthday Party Bag Christmas Gift Bag Goodie Bag Kraft Paper Bag CNY Kids](https://img.lazcdn.com/g/p/c89aad5b030f1a3553f5950f93ec41a6.jpg_400x400q80.jpg_.webp)

Prices are valid at publication and may change. Please refer to the product page for the latest price.
Your tool kit should include a pair of sharp scissors, a metal ruler for precise measurements, and high-quality adhesives. Double-sided tape is highly recommended for a seamless finish, while a standard glue stick can be used for flat surfaces. Because adhesives behave differently depending on the paper’s coating, always perform a quick trial on a scrap piece of paper to verify the drying speed and ensure the adhesive does not bleed through or leave greasy marks.
When working with sharp scissors, always cut away from your body on a flat, stable surface. If you are assembling these bags with children, ensure you use child-safe, non-toxic craft adhesives and supervise any cutting steps closely.
Finally, select a ribbon that complements your paper design. Satin, grosgrain, or organza ribbons are excellent choices. As a general rule, match the ribbon width to the scale of the bag: use a 2.5-centimeter ribbon for medium to large bags, and a 1.2-centimeter ribbon for smaller favor boxes.
Wrap the Plain Bag or Box with Decorative Paper
Achieving a flawless, professional look starts with precise measurement. Lay your decorative paper flat on a clean work surface, pattern side down, and place your base container on top. Roll the container along the paper to measure all four sides, adding an extra 3 centimeters of overlap to create a clean vertical seam. For the top and bottom folds, ensure the paper extends past the edges by a distance equal to slightly more than half of the container’s depth. Cut the paper cleanly along these measured lines using your scissors and ruler as a guide.

Once cut, apply a strip of double-sided tape along one of the vertical edges of the paper. Wrap the paper tightly around the body of the container, pulling it taut to prevent any air pockets from forming. Align the edges carefully, then press the taped seam down firmly to secure it. Positioning this seam along the back or side of the container keeps the front face completely clean and visually uninterrupted.
To fold the bottom of the bag or box, push the shorter side flaps inward first, creating two neat, symmetrical triangles on the remaining flaps. Fold the top flap down and the bottom flap up over it. Secure these flaps tightly with double-sided tape, pressing from the inside of the container to ensure a strong, flat bond.
For the top rim of an open goodie bag, fold the excess paper inward by 2 to 3 centimeters. This creates a clean, reinforced border along the opening, hiding any raw cut edges and adding structural strength to the top of the bag where handles or ribbons will be attached.
Attach and Style the Ribbon Finishing Touches
Ribbons serve both a functional and decorative purpose, securing the bag’s contents while adding a touch of elegance. If your base bag already has handles, you can tie a decorative bow directly around the base of one handle. For bags without handles, fold the top rim down, punch two holes through the folded layers using a paper punch, and thread your ribbon through both holes from the back to the front.
To tie a classic, symmetrical bow, pull the ribbon ends even and cross them to tie a basic square knot. This initial knot holds the bag closed and maintains tension. Create two equal-sized loops with the ribbon ends, cross them over each other, and feed one loop through the central opening. Pull both loops gently to tighten the knot, then adjust the loop sizes and tail lengths until they are perfectly balanced.
To prevent the ribbon ends from fraying over time, cut the tails at a clean 45-degree angle or fold the ribbon vertically and cut diagonally to create a classic chevron shape. If you are using synthetic ribbons like polyester satin, you can carefully seal the cut edges by passing them quickly near a heat source, or apply a tiny dab of clear craft glue to the tips.
When coordinating colors, aim for contrast and balance. If your wrapping paper features a busy, colorful pattern, choose a solid-colored grosgrain ribbon that matches one of the accent colors in the print. For solid-colored or minimalist paper, a textured or metallic ribbon can provide a striking, sophisticated contrast.
Assemble and Fill the Birthday Goodie Bag
Properly packing your goodie bag is essential to maintain its shape and ensure it stands upright on the display table. Always begin by placing the heaviest items, such as small books, jars, or heavy toys, flat at the very bottom of the bag. This lowers the center of gravity, preventing the bag from tipping over or sagging when handled.
Next, add a layer of crinkle-cut paper or folded tissue paper over the heavy base. This filler acts as a protective cushion for lighter, fragile items like custom cookies, delicate stationery, or small treats, preventing them from shifting or getting crushed during transport.
Arrange the remaining items so that the tallest pieces are positioned toward the back of the bag and the shorter items are in the front. This thoughtful arrangement ensures that everything is immediately visible and beautifully presented when the guest looks inside.
Before finalizing your bags, lift each one by its handles or top rim to verify its structural integrity. If the bottom of the bag bows outward significantly under the weight, cut a small piece of thick cardboard to match the dimensions of the bag’s base and slide it inside to distribute the weight evenly.
Fix Common Wrapping and Assembly Issues
Even with careful planning, you may encounter a few common wrapping challenges. If you notice the decorative paper wrinkling or bubbling during application, it is usually due to uneven adhesive tension. To fix this, gently peel the paper back before the adhesive sets, apply consistent tension, and smooth the paper down gradually using a soft cloth or a plastic scraper.
In Singapore’s warm and humid climate, standard liquid glue sticks can take longer to dry and may cause thin paper to warp or ripple. Opting for high-tack double-sided tape ensures a strong, immediate bond that won’t slide or weaken in high humidity.
If you are working with thick, high-GSM decorative paper, you might find that it cracks or folds unevenly along the edges. To prevent this, use a bone folder or the dull back edge of a butter knife against a metal ruler to score a light indentation along your fold lines before making the actual crease. This pre-creasing guides the paper fibers and ensures a sharp, clean fold.
On high-gloss or laminated paper surfaces, ribbons have a tendency to slip out of position. To keep your ribbon secure, apply a small piece of double-sided tape or a clear glue dot directly onto the paper where the ribbon will sit, then press the ribbon firmly onto the adhesive to lock it in place.
Frequently Asked Questions (FAQ)
Can I use regular printer paper instead of decorative wrapping paper?
Standard printer paper, which typically ranges from 70 to 80 GSM, can be used for very small, lightweight goodie bags, but it lacks the tensile strength and flexibility of dedicated wrapping paper. It is highly prone to tearing at the corners when folded tightly around a box or bag. If you choose to use printer paper, reinforce the interior corners and base with clear tape, and avoid packing heavy or sharp-edged items inside.
How do I keep the ribbon bow from losing its shape?
To maintain a crisp, voluminous bow, opt for wired ribbon, which contains thin wire edges that can be easily reshaped if crushed. Alternatively, you can spray a light coat of fabric stiffener or starch onto fabric ribbons after tying them. When storing completed goodie bags before the party, stand them upright in a sturdy plastic bin with enough clearance so nothing presses down on the delicate bows.

Community discussion
Share your experience or ask a question. Comments are reviewed before publication.