
Wrapping a wedding box requires a blend of precision, high-quality materials, and structured techniques to achieve a flawless, professional finish. Whether you are preparing a gift for the newlyweds, assembling elegant wedding favors, or presenting a keepsake box, the presentation sets the tone before the box is even opened. By focusing on crisp folds, seamless taping, and a perfectly balanced ribbon bow, you can elevate a standard gift box into a memorable centerpiece.
To achieve a polished look, you must treat the wrapping process as a craft. Every fold should be deliberate, every cut clean, and every embellishment purposeful. This step-by-step guide will walk you through selecting the right materials, wrapping your box with razor-sharp edges, and tying a secure, beautiful ribbon that stays in place throughout the celebration.
Gather Your Wrapping Tools and Materials
Before you begin wrapping, assembling the correct tools and materials is essential for a seamless workflow. Having everything within arm’s reach prevents you from losing tension on the paper or ribbon mid-wrap, ensuring a much cleaner final product.
Products mentioned in this guide
![[SG]🧑🏻❤️🧑🏼💋Wedding Empty Box w/ Ribbon Wedding Souvenir Gift Box Candy Box Party Proposal](https://img.lazcdn.com/g/p/7e6c8abd2380eda8f874a24c79b1aa28.jpg_400x400q80.jpg_.webp)
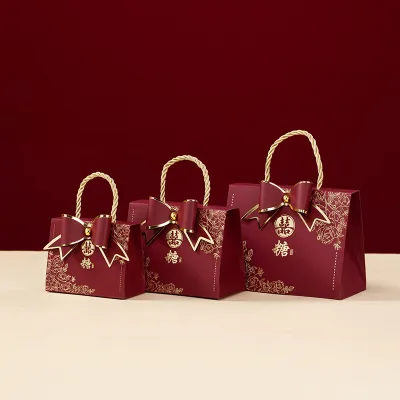
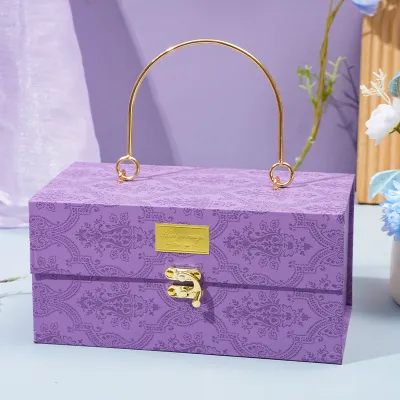
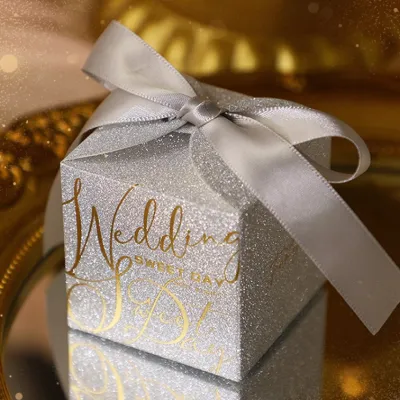
Prices are valid at publication and may change. Please refer to the product page for the latest price.
Selecting the Right Wrapping Paper
The foundation of a beautifully wrapped wedding box is the paper itself. Opt for a high-quality, heavyweight paper, ideally between 80 gsm and 120 gsm. Paper that is too thin tears easily when pulled taut over sharp box corners, while paper that is too thick resists folding and creates bulky, unmanageable seams. For a wedding, classic choices include matte finish papers, subtle metallic foils, or textured handmade papers. Consider the scale of the pattern relative to the box dimensions; small boxes look best with solid colors or micro-patterns, whereas larger boxes can accommodate grander, more intricate designs without looking cluttered.
Choosing Your Ribbon
The ribbon is the crowning detail of your wedding box, and the material you choose dictates the overall aesthetic. Double-faced satin ribbon offers a luxurious, high-gloss sheen on both sides, making it perfect for formal, elegant weddings. Grosgrain ribbon features a ribbed texture that provides excellent grip, making it incredibly easy to tie into structured, durable bows. Organza ribbon is sheer and lightweight, adding a soft, romantic touch that works beautifully when layered. Ensure the ribbon width is proportional to the box size, typically ranging from 1.5 cm for small favor boxes to 3.8 cm or wider for large gift boxes.
Essential Tools for Precision
To achieve professional-grade results, standard household scissors may not suffice. You will need a pair of dedicated, sharp fabric or paper shears to ensure clean, unfrayed cuts on both paper and ribbon. Double-sided tape is highly recommended, as it allows you to secure seams invisibly without unsightly shiny tape lines on the exterior of the box. Finally, a bone folder or a rigid plastic ruler is an invaluable tool for scoring paper and flattening creases, allowing you to achieve the razor-sharp edges characteristic of professional gift wrapping.
Wrap the Box with Clean, Crisp Edges
Achieving clean, crisp edges is the secret to making a wrapped box look like it was prepared by a professional boutique. The key lies in precise measurements and maintaining consistent tension throughout the wrapping process.

Measuring and Cutting the Paper
Place your wedding box face down on the unrolled wrapping paper. To determine the correct width, roll the paper around the box until the two ends overlap by approximately 3 to 5 cm; this ensures a secure seam without excess bulk. To measure the height for the end flaps, the paper on each side should extend slightly more than half the depth of the box. Use a pencil and a ruler to mark straight cutting lines on the back of the paper, then cut carefully along these lines using your sharp shears.
Executing the Main Wrap
With the box still face down on the cut paper, pull one side of the paper tightly over the bottom of the box and secure it temporarily with a small piece of double-sided tape. Next, pull the opposite side of the paper taut. Before taping it down, fold the raw edge of this side under by about 1 cm to create a clean, folded hem. Align this folded edge directly over the center of the box or along one of the bottom edges, then secure it with double-sided tape. This hidden seam technique ensures that no raw paper edges are visible.
Folding Perfect Hospital Corners
To wrap the ends of the box, start on one side by pushing the top flap of paper straight down against the side of the box, creating two neat, triangular wings on the left and right. Use your bone folder or ruler to crease these diagonal folds sharply. Next, fold the left and right triangular wings inward, pressing them tightly against the box side. Finally, fold the bottom flap upward. To finish this flap cleanly, fold its raw top edge under by 1 cm, apply double-sided tape to the inside of this fold, and press it firmly against the box. Repeat this exact process on the opposite end of the box, ensuring the tension remains uniform.
Tie and Style the Ribbon for a Professional Finish
Once your box is wrapped in crisp paper, the ribbon adds the final touch of elegance. Tying a ribbon that is both secure and visually balanced requires a systematic approach to measuring, knotting, and trimming.
Measuring and Cutting the Ribbon
To avoid running out of ribbon mid-tie, use a simple formula to calculate the required length. Wrap the ribbon loosely around the length and width of the box once, then add an additional 60 to 80 cm to account for the bow and tails. Cutting the ribbon before you begin tying makes the material much easier to handle and prevents it from twisting as you work.
Tying the Classic Cross-Over Bow
Place the wrapped wedding box face up on your work surface. Lay the center of your cut ribbon across the top of the box. Bring both ends of the ribbon down the sides, wrap them under the bottom of the box, and cross them over each other at a 90-degree angle. Bring the ends back up along the perpendicular sides of the box to the top surface. Thread one end of the ribbon completely under the central intersection of the ribbon on top, then pull both ends firmly to create a tight, secure base knot. This cross-over technique keeps the ribbon flat against all sides of the box.
Forming and Adjusting the Bow
With the base knot secure, create a loop with one of the ribbon tails. Wrap the other tail around the base of the loop and push it through the opening to form a classic bow, just as you would tie a shoelace. Hold the center knot firmly while gently pulling the loops and tails to adjust their size. The loops should be symmetrical and proportional to the face of the box, while the tails should drape elegantly without dragging on the table.
Trimming the Ribbon Tails
To prevent the ribbon from fraying and to add a tailored finish, trim the ends of the tails. You can cut them at a sharp 45-degree angle, or fold each tail in half vertically and cut upward at an angle from the folded edge to the outer edge to create a classic swallowtail notch. Always use ultra-sharp scissors for this step to ensure a clean cut without pulling the threads of the ribbon.
Troubleshoot Common Wrapping Mistakes
Even with careful preparation, minor issues can arise during the wrapping process. Knowing how to identify and correct these common mistakes will help you maintain a flawless presentation.
Preventing Wrinkled or Loose Paper
Wrinkled paper is usually the result of inadequate tension or excessive handling. If you notice the paper shifting or bubbling, gently peel back the tape, pull the paper taut, and re-secure it. Working on a clean, hard surface rather than a carpeted floor also helps maintain flat, smooth surfaces. If the paper is highly delicate, minimize the number of times you slide the box across it to prevent friction creases.
Avoiding Bulky, Uneven Corners
Bulky corners occur when there is too much excess paper at the ends of the box. If your end flaps extend past the height of the box when folded down, they will bunch up and ruin the crispness of your hospital corners. To fix this, trim the excess paper from the end flaps before you begin folding them inward. The paper should only extend far enough to cover the side surface without overlapping onto the adjacent sides.
Managing Slippery Ribbon Materials
Satin and silk ribbons are notoriously slippery, often losing tension as you attempt to tie the bow. To combat this, place a small dot of double-sided tape directly under the central ribbon intersection on top of the box before tying the knot. This anchors the ribbon in place, allowing you to focus on shaping perfect loops without the base slipping. Alternatively, you can tie a secure square knot before forming the loops to lock the tension.
Add Elegant Finishing Touches
Personalizing your wedding box with subtle, tasteful embellishments can elevate the design from standard gift wrapping to a bespoke work of art. The key is to enhance the presentation without overcrowding the box.
Incorporating Decorative Elements
Consider sliding a personalized gift tag onto one of the ribbon tails before tying the final bow. For a classic, old-world aesthetic, apply a custom wax seal directly over the ribbon intersection or onto the tag itself. You can also tuck a small botanical element, such as a sprig of dried eucalyptus, lavender, or a small faux blossom, under the ribbon knot. These natural textures contrast beautifully with smooth paper and satin ribbons.
Layering Ribbons for Depth
For a more luxurious look, try layering two different ribbons. Start by wrapping the box with a wider, textured ribbon, such as a 3.8 cm neutral grosgrain. Next, layer a narrower, contrasting ribbon, like a 1.5 cm metallic gold or satin ribbon, directly over the center of the first ribbon. Tie them together into a single, multi-textured bow to add depth and visual interest to the presentation.
Maintaining Color and Theme Cohesion
Ensure that all your wrapping materials and embellishments align with the overall wedding theme and color palette. For a rustic or bohemian wedding, pair kraft paper with cotton twine, linen ribbon, and dried florals. For a modern, minimalist wedding, opt for monochromatic matte black or white paper paired with a sleek, single-strand satin ribbon. Keeping the design cohesive ensures the gift looks intentional and beautifully integrated into the celebration.
Frequently Asked Questions (FAQ)
What is the best ribbon width for a standard wedding box?
For small favor boxes (under 10 cm), a narrow ribbon of 0.6 cm to 1.5 cm is ideal to avoid overwhelming the package. For medium-sized boxes (10 to 25 cm), a standard ribbon width of 1.5 cm to 2.5 cm provides a balanced, classic look. Large gift boxes (over 25 cm) benefit from wider ribbons, such as 3.8 cm to 5 cm, which scale proportionally and make a bold, elegant statement.
How do I keep satin ribbon from slipping when tying a bow?
To prevent slippery satin ribbon from losing tension, place a small piece of double-sided tape on the box where the ribbon crosses over. This holds the ribbon secure while you tie the knot. Alternatively, you can tie a tight surgeon’s knot (looping the ribbon through twice before pulling tight) to lock the tension in place before forming your bow loops.
Can I wrap a wedding box without using tape?
Yes, you can wrap a wedding box without tape by using alternative securing methods. One popular technique is tension wrapping, where the paper is folded tightly and held in place entirely by the pressure of the wrapped ribbon. Alternatively, you can use decorative wax seals or stickers to secure the paper seams, or opt for fabric wrapping (such as the Japanese furoshiki method) which relies entirely on knots to secure the package.

Community discussion
Share your experience or ask a question. Comments are reviewed before publication.