
Wrapping a sweet box beautifully is an art that elevates a simple gesture into a memorable gift. Whether you are preparing traditional treats for a festive celebration, artisanal chocolates for a wedding, or homemade confections for a friend, a neatly wrapped box sets the tone before the package is even opened. Achieving a crisp, professional finish requires a combination of the right materials, precise measurements, and structured folding techniques.
By mastering the balance between paper tension, seamless taping, and elegant ribbon placement, you can transform any standard sweet box into a stunning presentation. In humid climates like Singapore, choosing the right adhesives and paper types is especially important to ensure your gift remains pristine from the moment it is wrapped until it is opened.
Essential Tools and Materials for Wrapping
To achieve a flawless wrap, assembling the correct tools beforehand is essential. The foundation of any great gift wrap is the paper itself. For sweet boxes, which often contain delicate or oily items, selecting a paper with a suitable thickness is crucial. Standard wrapping paper between 70 to 90 gsm (grams per square meter) offers the ideal balance of flexibility and strength, allowing you to fold sharp corners without tearing.
Products mentioned in this guide
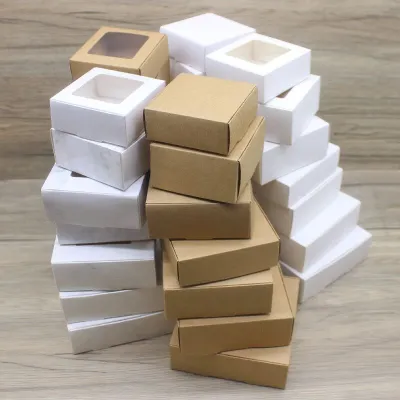
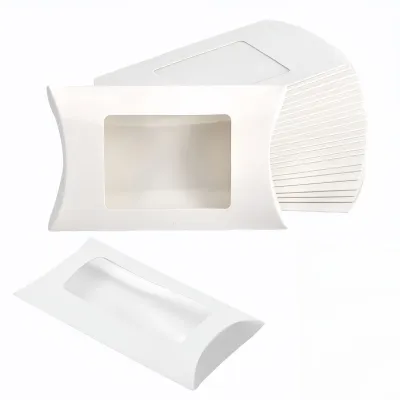
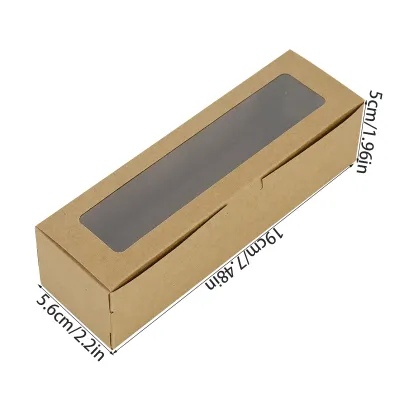
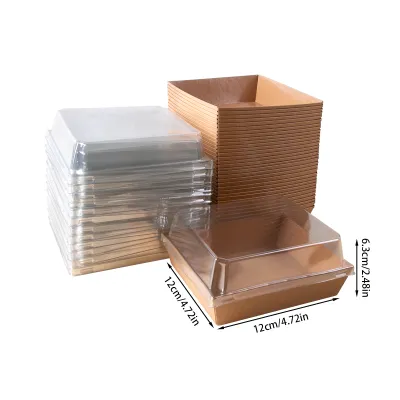
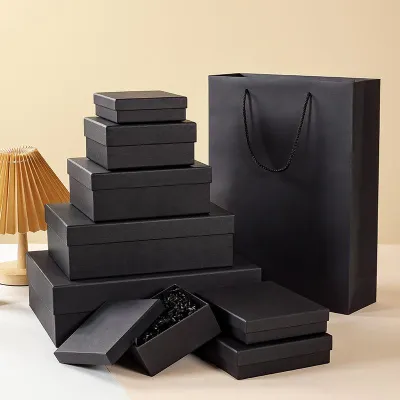
Prices are valid at publication and may change. Please refer to the product page for the latest price.
If you are using patterned paper, consider how the design repeats so that the main motifs align symmetrically across the top surface of the box. You should also perform a quick test on a scrap piece of paper to check its crease retention and ensure it does not tear easily when pulled taut over sharp box corners. For sweet boxes containing oily treats, check if the paper has a grease-resistant lining or perform a spot test with a small drop of oil on a scrap piece to verify bleed resistance before wrapping.
The ribbon you choose should complement the scale of the sweet box. A small box of macarons or truffles pairs best with a narrow ribbon of about 6mm to 12mm, while larger, multi-tier sweet boxes benefit from wider ribbons of 25mm or more. Satin, grosgrain, and organza are excellent material choices, each offering a different texture and structural hold when tied into a bow.
For securing the paper, the choice of adhesive dictates how clean the final seams will look. Standard clear tape is highly visible and can detract from a premium presentation. Double-sided tape is the preferred choice for an invisible finish, as it hides completely beneath the overlapping paper edges. In humid environments, ensure you use a high-quality, high-tack double-sided tape so the seams do not lift over time.
Finally, clean cuts are non-negotiable. Dull household scissors can chew through paper, leaving jagged edges that ruin the clean lines of your folds. Use a pair of dedicated, sharp stationery scissors or a rotary paper cutter. When using sharp blades, always work on a flat, stable surface and cut away from your body to ensure safety.
Measuring and Cutting the Wrapping Paper
Accurate measurement is the secret to avoiding bulky, uneven folds or, conversely, gaps where the box remains exposed. Before making any cuts, place your sweet box on a flat work surface. To determine the required width of the paper, wrap the paper loosely around the entire girth of the box. You want the paper to overlap by approximately 3 to 5 centimeters along the main seam.

This overlap ensures there is enough surface area for the double-sided tape to grip securely without creating an unsightly ridge of excess paper. If you are wrapping a premium, heavy sweet box, a slightly larger overlap can provide extra structural reinforcement.
To measure the height of the paper needed for the sides, look at the depth of your sweet box. The paper extending past the short ends of the box should equal slightly more than half of the box’s depth on each side. For example, if your sweet box is 6 centimeters deep, the paper should extend about 4 centimeters past the left and right edges.
If the paper is too long, it will bunch up when folded, creating thick, awkward triangles that refuse to lie flat. If it is too short, the box ends will not be fully covered, exposing the cardboard underneath.
Once you have marked your measurements, use a long ruler or a grid-aligned cutting mat to guide your cuts. If you are using a patterned paper, take a moment to center the box over a prominent design element before cutting. This step ensures that a beautiful floral motif, geometric pattern, or festive emblem sits perfectly in the middle of the box lid rather than being cut off at the edge.
If you notice the cut edge is slightly uneven, fold a tiny 5-millimeter hem along the raw edge of the paper. This simple trick hides any minor cutting mistakes and creates a clean, straight, reinforced edge that looks incredibly professional when taped down.
Folding and Securing the Sweet Box
With your paper precisely cut, you are ready to begin the folding process. Start by placing the wrapping paper design-side down on your clean work surface. Position the sweet box face-down in the exact center of the paper. Centering the box is critical; it ensures that the side flaps will be symmetrical when you fold them later.
Bring one long side of the paper up and over the bottom of the box, pulling it taut. Secure this edge to the center of the box bottom with a small piece of double-sided tape. Next, take the opposite long edge of the paper, fold under a small hem for a clean finish, and pull it tightly over the first layer.
Apply a strip of double-sided tape along the inside of this folded hem, then press it down firmly. The paper should fit snugly around the box like a glove, with no sagging or loose pockets.
Now, move to the open ends of the box. To create crisp, professional corners, you must fold the paper systematically. Start on one side by pushing the left and right vertical edges of the paper inward against the side of the box. This action will create two neat, triangular flaps at the top and bottom.
Use your thumb and forefinger to pinch the edges of these triangles, creating sharp, defined creases. Sharp creases are the hallmark of a professional wrap, so take your time to press them firmly against the box.
Next, fold the top triangular flap downward against the side of the box, smoothing it flat. Apply a small piece of double-sided tape to the inside tip of the bottom triangular flap. Pull the bottom flap upward tightly over the top flap, ensuring the seam is perfectly horizontal and aligned with the bottom edge of the box.
Press firmly to secure the adhesive. Repeat this exact process on the opposite end of the sweet box, maintaining consistent tension so the box remains perfectly balanced.
Adding and Tying the Ribbon
A beautifully tied ribbon is the crowning glory of a wrapped sweet box. To calculate the length of ribbon required for a classic cross-style bow, a reliable rule of thumb is to wrap the ribbon around the length and width of the box, then add about 60 centimeters to accommodate the knot and bow loops.
It is always better to have slightly too much ribbon than to struggle with a piece that is too short to tie comfortably. For a standard S$50 gift box, a generous ribbon length ensures a luxurious, high-end presentation.
To apply a classic cross ribbon, place the center of your ribbon across the top of the sweet box. Bring both ends down the sides, flip the box over, and cross the ribbon ends over each other at a 90-degree angle on the bottom. Pull the ends taut, bring them back up the remaining two sides of the box, and thread them under the original center loop on the top face.
This technique keeps the ribbon flat and secure on the bottom of the box, preventing the package from wobbling when placed on a table. It also ensures the ribbon remains centered throughout transport.
Tie a simple, tight knot at the center of the top face to secure the structure. To form the bow, create two symmetrical loops, cross them, and pull them through to form a classic bow. Adjust the size of the loops and the length of the tails until they are proportional to the size of the sweet box.
To finish the presentation, trim the ribbon tails. Cut them at a sharp 45-degree angle or fold the ribbon in half vertically and cut diagonally outward to create a classic swallowtail shape. If you are using synthetic ribbons like satin or polyester, you can gently pass the freshly cut edges near a small flame for a split second to seal the fibers and prevent fraying. Always exercise caution when using heat sources, keeping them away from flammable paper.
Fixing Common Wrapping Mistakes
Even with careful preparation, wrapping mistakes can happen. If you notice wrinkled corners or loose paper, do not tear the whole wrap apart. Often, you can gently peel back the tape on the side flaps, pull the paper tighter, and re-secure it.
If the paper has already creased permanently, placing a decorative gift tag or a strategically positioned ribbon over the wrinkle can easily camouflage the flaw.
When dealing with thick, premium paper, the folds can sometimes look bulky and refuse to stay flat. To resolve this, use a bone folder or the smooth edge of a plastic ruler to press down firmly along every crease. This extra pressure forces the thick fibers of the paper to hold their shape, reducing bulk significantly.
If you used standard clear tape and find the shiny lines distracting, you can hide them by placing your ribbon directly over the taped seams. Alternatively, you can apply a decorative sticker or a wax seal over the main seam to turn a functional necessity into an elegant design feature.
If your patterned paper did not align perfectly at the seam, do not panic. You can run a contrasting band of solid-colored paper or a wide ribbon down the center of the seam to break up the mismatched pattern, creating a deliberate, layered look.
Frequently Asked Questions (FAQ)
How do I wrap a sweet box without using tape?
Wrapping a sweet box without tape is entirely possible and can result in an incredibly elegant, eco-friendly presentation. One classic method is to rely solely on the ribbon to hold the paper in place. By folding the paper tightly around the box and holding the seams down temporarily with your fingers, you can wrap the ribbon around the package and tie a secure knot that locks all the folds together.
Alternatively, you can use decorative elements like wax seals, self-adhesive paper belly bands, or custom stickers to secure the overlapping edges. These options not only hold the paper firmly but also add a personalized, artisanal touch to your gift.
What is the best paper thickness for wrapping a sweet box?
The ideal paper thickness depends on the size and weight of your sweet box, but generally, a weight of 80 to 100 gsm is the sweet spot. Paper that is too thin (under 60 gsm) is prone to tearing at the sharp corners of the box and may allow grease from the sweets to seep through or reveal the contents of the box.
On the other hand, paper that is too thick (over 120 gsm) is difficult to fold cleanly, resulting in bulky, rounded edges rather than crisp, professional creases. For a premium feel that remains easy to manipulate, look for high-quality textured paper or clay-coated wrapping paper within the 80 to 100 gsm range.

Community discussion
Share your experience or ask a question. Comments are reviewed before publication.