
Wrapping a gift box beautifully is an art that transforms a simple gesture into a memorable experience. Achieving crisp corners, seamless edges, and a perfectly balanced bow does not require professional training; instead, it relies on methodical preparation, precise measurements, and steady tension. By mastering a few fundamental folding and tying techniques, you can elevate any standard gift box into a stunning presentation that shows genuine care.
Gather Your Wrapping Materials and Tools
Before cutting your first sheet of paper, take a moment to assess the physical dimensions of your gift box. A heavy or large box requires a sturdier wrapping paper, typically around 80 to 100 GSM, to prevent accidental punctures during handling. Smaller boxes benefit from lighter paper that creases easily without resisting the fold. Test a small fold on a corner of your paper first to check if the material cracks, tears, or holds a clean crease.
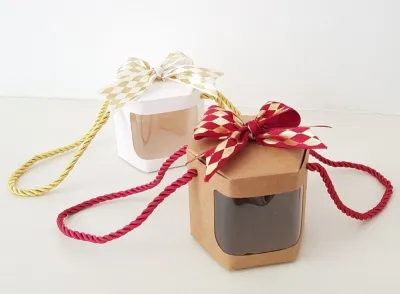
The choice of ribbon should complement the scale of your box. A wide satin or grosgrain ribbon of about 2.5 to 3.8 centimeters works beautifully on medium to large boxes, providing a luxurious focal point. For smaller jewelry boxes, a delicate 0.6-centimeter organza or metallic cord maintains a balanced proportion without overwhelming the package.
Products mentioned in this guide
![[SG Stock] 礼品盒Magnetic Gift Box | Solid Hard Large Gift Box with Ribbon For Mother s Day / Valentines Gift Packaging](https://img.lazcdn.com/g/p/5e5003d632dce3e647372c2e54605522.png_400x400q80.png_.webp)
![[SG SELLER] Premium Black Ribbon Gift Box| Gift Boxes | Wedding Gift Box | Birthday Gift Box | Christmas Gift Box](https://img.lazcdn.com/g/p/baaaf2d3d254dac6114704ca9e64b23e.jpg_400x400q80.jpg_.webp)
Prices are valid at publication and may change. Please refer to the product page for the latest price.
Gathering the correct tools beforehand ensures a seamless workflow. You will need a pair of sharp paper-cutting scissors to prevent jagged edges, and high-quality clear adhesive tape or double-sided tape for an invisible finish. Always work on a flat, clean, and hard surface, such as a large dining table or a clean desk, to keep the paper flat and prevent dust or debris from sticking to your adhesive. When handling sharp scissors, always cut away from your body and store them closed to maintain a safe workspace.
Measure and Cut the Wrapping Paper Correctly
Accurate measurement is the secret to avoiding bulky, uneven folds or frustrating gaps. Begin by unrolling your wrapping paper on your clean workspace, keeping the patterned side facing down. Place your gift box face down in the center of the unrolled sheet, which ensures that any seams or tape lines will ultimately remain hidden on the bottom of the finished package.

To determine the correct width of the paper, pull the free end of the roll over the top of the box until it covers the opposite side. Unroll enough paper so that when both sides are pulled taut over the box, they overlap by approximately 5 centimeters. This overlap provides a secure area for taping without creating unnecessary bulk that can distort the shape of the box.
Next, measure the paper length required for the open ends of the box. Pull the paper up against one of the open sides; it should reach slightly past the halfway point of the box’s height. Repeat this visual check on the opposite end, adjusting the box’s position until the paper coverage is symmetrical on both sides. If the paper is too long, it will bunch up and ruin the clean lines of your folds; if it is too short, the box will peek through.
Once your measurements are verified, use a pencil to lightly mark your cutting lines on the back of the paper. Hold the paper taut with one hand and glide your sharp scissors along the marked line in a single, continuous motion to achieve a perfectly straight edge. Clean cuts make folding significantly easier and ensure the final seams lie flat against the cardboard.
Wrap the Box: Step-by-Step Folding Techniques
Achieving a professional look depends entirely on how you manage the paper as you fold. Maintaining consistent, gentle tension throughout the wrapping process prevents the paper from shifting, sagging, or forming unsightly wrinkles.
Wrapping the Main Body
Start by pulling the cut edge of the paper snugly across the bottom face of the box, securing it temporarily with a small piece of tape to keep it aligned. Next, pull the remaining sheet tightly over the top and down the opposite side of the box, ensuring the paper wraps firmly around the corners.
Align the overlapping edge so that it forms a straight, clean seam running down the center or along one of the bottom edges of the box. Secure this seam with double-sided tape placed along the inside edge for an invisible finish, or use clear tape applied neatly across the seam.
Before pressing the tape down permanently, gently slide your hand across the paper-covered faces of the box to smooth out any trapped air bubbles or minor wrinkles. This step ensures the paper clings tightly to the cardboard, creating a smooth, polished foundation for your ribbon.
Folding the Ends for a Clean Finish
With the main body secured, turn your attention to one of the open ends of the box. Push the top flap of the paper straight down against the side of the box, using your thumb and index finger to crease the paper sharply along the top edge of the cardboard.
Next, fold the left and right side flaps inward toward the center of the box side. As you push these flaps in, they will naturally form neat, symmetrical triangles; press your fingers along these diagonal edges to create crisp, defined creases that lie flat against the box.
Fold the remaining bottom flap upward over the triangles, pulling it tightly to ensure there is no slack. Secure this final flap in place with a piece of clear or double-sided tape, making sure the edge of the flap aligns perfectly with the top edge of the fold.
Rotate the box 180 degrees and repeat this exact folding sequence on the opposite end. Maintaining the same folding direction and tension on both sides ensures a uniform, balanced appearance from every angle.
Add and Tie the Ribbon for a Professional Look
A beautifully tied ribbon serves as the crowning touch of your presentation. To measure the correct length of ribbon without wasting material, wrap the ribbon around the length of the box once, cross it underneath, wrap it around the width, and bring it back to the top. Pull an additional 30 to 40 centimeters of ribbon from the spool to accommodate the loops and tails of your bow before cutting.
To begin the tie, lay the center of your ribbon across the top of the box. Flip the box over while holding the ribbon in place, cross the two ends over each other at a 90-degree angle on the bottom, and bring them back up around the sides to the top face. If the ribbon slips, you can use a tiny piece of double-sided tape on the bottom of the box to hold it securely in place.
Thread one end of the ribbon under the central cross-point on the top of the box and pull both ends snugly to tension the wrap. Tie a simple, firm knot to lock the tension in place, ensuring the ribbon lies flat against the paper without warping the box.
Form a loop with one end of the ribbon, wrap the other end around the base of the loop, and pull it through to create a standard bow. Adjust the size of the loops and the length of the tails until they are symmetrical and proportional to the size of your gift box.
To finish the presentation, fold each ribbon tail in half vertically and cut upward at a 45-degree angle from the folded edge to the outer edge, creating a classic V-cut. Alternatively, a clean diagonal cut prevents the woven fibers of satin or grosgrain from fraying while adding a sophisticated, tailored detail.
Troubleshooting Common Wrapping Mistakes
Even with careful preparation, minor errors can occur during the wrapping process. If you notice the paper wrinkling or buckling on the flat surfaces, it usually indicates that the initial cut was slightly too large, leaving excess paper with nowhere to go. To fix this, gently peel back the tape, trim a few millimeters off the excess edge, and pull the paper tighter before re-securing.
Crooked ribbons can quickly detract from an otherwise perfect wrap. If your ribbon keeps sliding off-center, use the parallel edges of the gift box as a visual guide to align the fabric. Applying a small, hidden piece of double-sided tape underneath the ribbon on the sides of the box will keep it locked in place permanently.
Torn paper edges or accidental punctures do not mean you have to start over from scratch. You can easily conceal small tears by placing a decorative sticker, a personalized gift tag, or a secondary layer of contrasting ribbon directly over the damaged area. If the tear is near an edge, use sharp scissors to trim the torn section cleanly, then fold a new, crisp edge over it to hide the mistake.
Frequently Asked Questions (FAQ)
How do I wrap an oddly shaped gift without a box?
Wrapping items with irregular shapes, such as plush toys or bottles, can be challenging without a rigid structure. The most reliable method is to place the item inside a sturdy gift bag or create a custom cardboard base to support the weight. Alternatively, you can use the twist method: wrap the paper loosely around the item to form a cylinder, then gently twist the excess paper at both ends, securing them tightly with ribbon to create a classic cracker shape.
What is the best way to store leftover wrapping paper and ribbon?
Preserving your leftover materials ensures they remain clean and crease-free for future occasions. Store your wrapping paper rolls upright in a tall, dry container or a dedicated storage bag to prevent the ends from getting crushed. For leftover ribbons, wrap them tightly around a flat piece of cardboard or an empty spool, securing the loose end with a reusable twist tie or a small paperclip to prevent tangling.
Community discussion
Share your experience or ask a question. Comments are reviewed before publication.