
To wrap a gift box with twine neatly using the classic cross-tie method, you must establish a perfectly smooth paper base, maintain consistent tension across two perpendicular axes, and secure the intersection with a flat, slip-resistant knot. This traditional technique transforms ordinary packaging into an elegant, tactile presentation by creating a clean, symmetrical cross on the face of your gift. By mastering the physical mechanics of twine tension and choosing the right fiber thickness, you can achieve a polished, boutique-grade finish that remains secure from the moment of wrapping until the recipient opens the gift.
While the process is highly visual, its success relies on structural precision. Twine lacks the flat uniformity of synthetic ribbons, meaning any slack or misalignment will cause the fibers to slide, bunch, or crush the corners of your box. Taking a deliberate, step-by-step approach to measuring, folding, and securing both the paper and the cord ensures a professional result every time.
Essential Materials for a Neat Twine Wrap
Before beginning, gathering high-quality materials and specialized tools will streamline your workflow and prevent common wrapping frustrations. The foundation of a neat wrap starts with a sturdy gift box that can withstand the localized pressure of tightened cords without buckling. Pair this with a medium-weight wrapping paper that creases sharply without tearing, as overly thin paper will puncture under the tension of the twine, while excessively thick paper creates bulky corners that disrupt the symmetry of your wrap.
Products mentioned in this guide
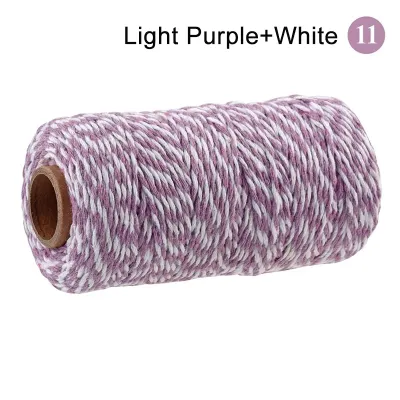
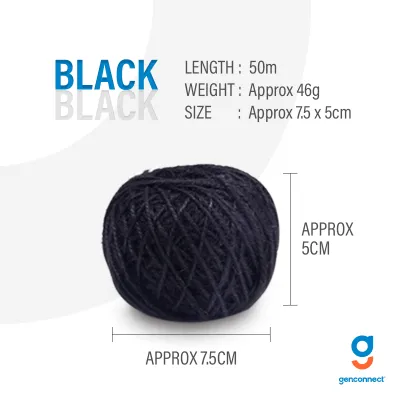
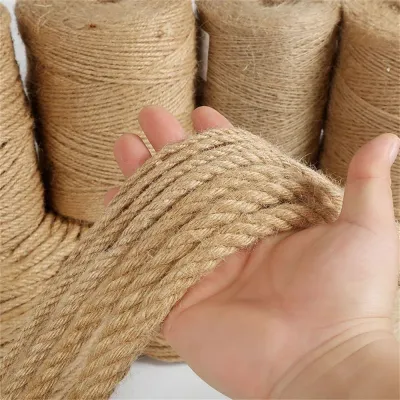
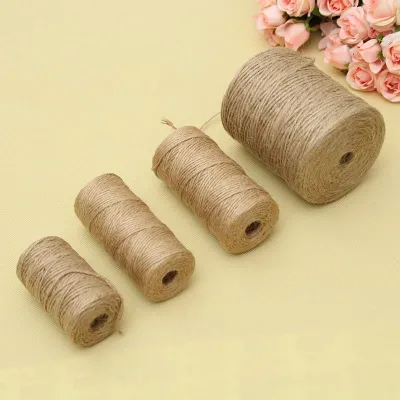
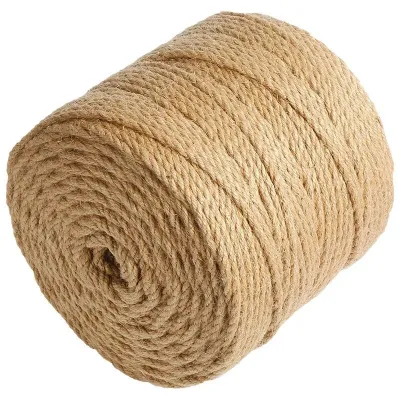
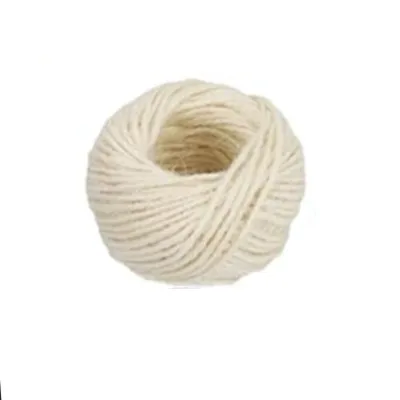
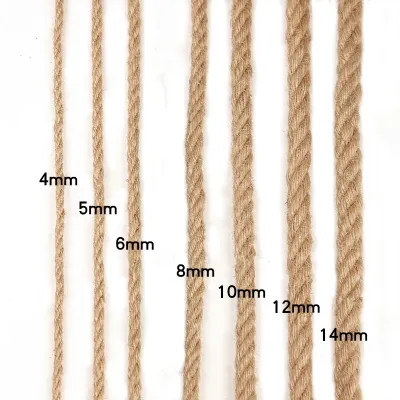
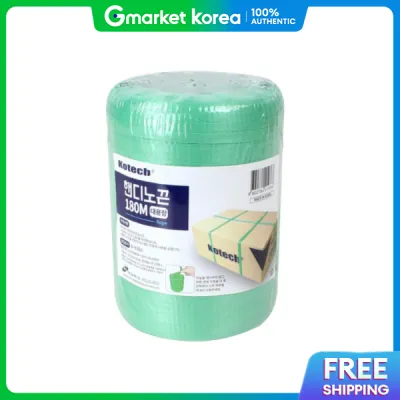
Prices are valid at publication and may change. Please refer to the product page for the latest price.
Selecting the correct type and thickness of twine is the most critical decision in this process. For a classic, rustic aesthetic, natural fibers such as jute, hemp, or polished cotton are highly recommended. A thickness of 1mm to 2mm is ideal for standard-sized gift boxes. Twine that is thicker than 2mm quickly becomes bulky, making it difficult to tie a flat, neat knot and often overpowering the visual balance of the box. Conversely, ultra-thin twine under 1mm behaves like thread, easily cutting into the edges of your wrapping paper and slipping out of alignment.
Equipping yourself with the proper tools ensures clean lines and prevents material damage. You will need a pair of exceptionally sharp crafting scissors or micro-snips to cut the twine cleanly; dull blades will crush and fray the natural fibers, leaving messy, unraveled ends. Additionally, keep a roll of high-quality double-sided tape or a bottle of fast-drying clear craft glue nearby to secure paper seams invisibly. A standard ruler or measuring tape is also indispensable for calculating precise paper dimensions and centering your twine axes accurately.
Preparing the Base: Wrapping the Box with Paper
A flawless twine wrap is impossible without a perfectly smooth, tightly wrapped paper base. Any loose folds, air pockets, or bulging seams in the wrapping paper will cause the twine to shift, lose tension, or sit unevenly across the surface of the box. To prevent these issues, you must measure and cut your wrapping paper with precision rather than relying on estimation.

Begin by placing your gift box face down on the inner side of the wrapping paper. Pull the paper up and over the sides of the box to measure the required width; the paper should overlap at the center seam by approximately 2 to 3 centimeters. For the ends of the box, the paper should extend slightly more than half the depth of the box on each side. Trim away any excess paper immediately, as surplus material creates unnecessary bulk at the corners, preventing the box from sitting flat and making it difficult to wrap the twine evenly.
Once the paper is cut to size, wrap it tightly around the main body of the box, securing the overlapping center seam with double-sided tape. Using double-sided tape is superior to standard clear tape because it hides the adhesive entirely beneath the seam, creating a seamless, professional appearance. Ensure the paper is pulled taut across the flat surfaces of the box, smoothing out any air bubbles with the side of your hand before pressing the tape into place.
Next, fold the ends of the box using a clean, mitered technique. Push the top flap of paper downward against the side of the box, creating sharp, distinct creases along the edges. Fold the left and right side flaps inward to form two neat triangles, then fold the bottom flap upward over the triangles. Secure this final flap tightly against the box with another strip of double-sided tape. Repeat this process on the opposite end, ensuring all folds are symmetrical, crisp, and completely flat so the twine can lie across the paper without catching on loose edges.
Creating the Classic Cross-Tie Pattern
With your box neatly wrapped in paper, you are ready to construct the classic cross-tie pattern. This design consists of two intersecting bands of twine that wrap around the box vertically and horizontally, meeting at a centralized intersection point. Maintaining even tension during this phase is the key to preventing the twine from sliding off the corners of the box.
Securing the First Axis (Vertical Wrap)
To establish the foundation of your cross-tie, you will first wrap the vertical axis of the box. Begin by cutting a generous length of twine—as a general rule, the piece should be roughly four to five times the longest dimension of your gift box to ensure you have ample excess for tying the final knot. Place your wrapped gift box top-side down on a flat, clean work surface, centering it directly over the middle of your cut twine.
Bring the two loose ends of the twine upward over the sides of the box, pulling them toward the center of the bottom surface. As you bring the ends together, pull them taut to create a firm, straight vertical line that runs parallel to the side edges of the box. It is vital to keep this line perfectly centered; you can use your ruler to verify that the twine sits exactly halfway between the left and right edges of the box.
Before proceeding to the horizontal axis, you must secure this initial vertical line to prevent it from losing tension. While you can hold the twine tightly with your thumb, a highly effective professional technique is to place a microscopic piece of double-sided tape directly onto the wrapping paper at the exact center point where the twine intersects. Press the vertical twine firmly into this tape; this anchor point keeps the cord from sliding or shifting while you transition your hands to wrap the second axis.
Crossing and Completing the Second Axis (Horizontal Wrap)
With the vertical axis securely anchored, you can now introduce the horizontal wrap to complete the cross. While advanced wrappers can complete a cross-tie using a single continuous piece of twine, utilizing two separate pieces of twine is highly recommended for beginners and intermediate crafters. This two-piece approach allows you to control the tension of each axis independently, resulting in a much neater and more symmetrical finish.
Cut a second piece of twine, making it slightly shorter than the first but still long enough to wrap around the horizontal circumference of the box with plenty of room to tie. Slide this second piece of twine horizontally underneath the box, aligning it so that it sits directly beneath the center of the vertical twine on the opposite side. Bring the two ends of this horizontal piece upward to the top surface, pulling them tight.
Cross the horizontal twine directly over the center of your anchored vertical line, creating a clean, 90-degree intersection. As you cross the fibers, pull all four segments of the twine outward away from the center point to distribute the tension evenly across the entire package. The twine should feel snug against the paper, but not so tight that it begins to compress or indent the cardboard corners of your gift box.
Inspect the alignment of the cross from all angles before proceeding to the knot. The intersection should sit precisely in the geometric center of the box’s face, and the lines must run perfectly parallel to the box’s edges. If any segment appears crooked, gently slide the twine along the edges of the box to adjust its position while maintaining a firm grip on the central intersection to preserve your tension.
Tying the Final Knot for a Professional Finish
The knot is the focal point of the classic cross-tie, serving both a structural and an aesthetic purpose. A poorly tied knot will slip over time, causing the twine to sag and ruin the presentation of your gift. To ensure maximum security and a clean, flat profile, you should always secure your twine with a classic square knot, also known as a reef knot.
A square knot is highly superior to a standard granny knot because its symmetrical structure prevents the twine from twisting or slipping under tension. To tie a square knot, take the two ends of the horizontal twine and cross the right end over the left end, tucking it under and pulling it through to form a simple half-knot. Pull this first half-knot down firmly against the central intersection of the cross, holding the tension with your index finger. Next, take the left end (which was originally the right end) and cross it over the right end, tucking it under and pulling it through. Pull both ends outward simultaneously to lock the knot in place.
Once the square knot is secure, you can customize the length of the remaining twine tails based on your desired aesthetic. For a minimalist, modern look, use your sharp crafting scissors to trim the ends close to the knot at a clean, 45-degree angle to prevent immediate fraying. Alternatively, you can leave the tails several centimeters long, allowing them to drape elegantly across the box, or use them to tie a simple, decorative bow directly over the square knot. These longer tails are also perfect for securing a custom gift tag, a sprig of dried lavender, or a small pinecone to the center of the package.
When working with natural twines like jute, hemp, or cotton, managing the cut ends is essential to maintain a neat appearance. Unlike synthetic cords, which can be melted with a flame, natural fibers will burn, char, and catch fire easily. You must never use a lighter or match to seal natural twine ends, as this poses a serious fire hazard and will leave unsightly black soot marks on your pristine wrapping paper. Instead, apply a tiny dab of clear-drying craft glue, fabric sealant, or transparent nail polish directly to the very tips of the cut twine. This invisible barrier binds the loose fibers together, ensuring the ends remain clean and unfrayed.
Troubleshooting and Pro Tips for Twine Wrapping
Even with careful preparation, wrapping with twine can present unique challenges depending on the materials you use. Understanding how to troubleshoot these issues will help you maintain a flawless presentation under any circumstances.
Slipping Twine One of the most common frustrations is twine slipping off the corners of boxes wrapped in glossy, metallic, or coated papers. These papers have an exceptionally smooth, low-friction surface that offers no grip for natural fibers. To resolve this, apply a microscopic dot of clear craft glue or a tiny square of double-sided tape directly to the corners of the box on the underside, hiding it beneath the twine. This creates a high-friction anchor point that holds the twine firmly in place without affecting the visual presentation of the top of your gift.
Uneven Tension If you notice that one side of your twine cross is sagging while the other is overly tight, do not untie the entire knot. Instead, before pulling the final loop of your knot completely tight, use a wooden toothpick or the tip of your closed scissors to gently lift the loose segment of twine near the edge of the box. Pull the excess slack toward the center knot, holding the tension with your finger, and then pull the opposite tail to absorb the slack. This localized adjustment allows you to balance the tension across all four quadrants of the box effortlessly.
Adding Embellishments Twine provides an excellent anchor for natural, rustic embellishments that elevate your gift wrapping to a professional standard. Before pulling your square knot completely tight, slide the stem of a dried flower, a sprig of fresh rosemary, or a dehydrated citrus slice underneath the intersection. Once the embellishment is positioned, tighten the knot firmly around the stem to lock it in place. This technique ensures your decorative elements remain secure during transport without the need for messy glues or unsightly tape.
Box Crushing If you are wrapping a gift box made of thin, lightweight cardboard, excessive twine tension can cause the structural walls of the box to buckle or collapse inward. To prevent this unsightly damage, insert a piece of rigid cardboard or a supportive packing material inside the box before wrapping it. If the box is already filled with a delicate item, reduce your wrapping tension slightly and opt for a softer, multi-ply cotton twine rather than stiff jute, as cotton distributes pressure more gently across the paper edges.
Frequently Asked Questions (FAQ)
How do I prevent natural twine from fraying after cutting?
To keep natural fibers like jute, hemp, or cotton from unraveling at the ends, you must start with a clean cut using exceptionally sharp crafting scissors or micro-snips. Dull blades crush the fibers rather than slicing them, which immediately initiates the fraying process. Once cut, apply a tiny drop of clear-drying craft glue, specialized fabric sealant, or clear nail polish to the tips of the twine. Allow the adhesive to dry completely for a few minutes; this binds the individual strands together permanently. You must never use a lighter, match, or open flame to seal natural twine, as these organic materials do not melt like synthetic cords. Instead, they will burn rapidly, creating a fire hazard and leaving black ash on your gift.
What is the best way to keep twine from slipping on glossy wrapping paper?
Glossy, varnished, or laminated wrapping papers have a highly polished surface that lacks the natural friction required to hold twine securely in place. To prevent the twine from sliding off the corners of your box, you can use discreet adhesive anchors. Place a small square of high-quality double-sided tape directly onto the wrapping paper at the center intersection point on the top of the box, and at key points on the bottom. When you wrap the twine, press it firmly into these taped areas to lock it in place. Before applying the tape to your main package, always test a small piece of the tape on a scrap of your wrapping paper to ensure that it can be adjusted or removed without tearing the printed surface.

Community discussion
Share your experience or ask a question. Comments are reviewed before publication.