
Creating a flawless, professional hem that remains completely hidden from the outside of a garment is one of the most satisfying skills in hand sewing. Using blind sewing needles—which can refer to specialized fine hand needles, curved slip-stitch needles, or easy-threading needles designed for quick setup—allows you to execute a precise blind stitch that catches only a fraction of the fabric’s weave. By mastering the delicate “picking” motion and managing your thread tension, you can secure trousers, skirts, and delicate garments with a clean, durable finish that rivals high-end tailoring. This technique is especially valuable when working with high-quality garments where visible machine stitching would detract from the clean lines and elegant drape of the fabric.
What Are Blind Sewing Needles and How Do They Work?
To understand how to use these tools effectively, it is helpful to clarify what a blind sewing needle actually is. In hand sewing, “blind needles” often refers to self-threading needles designed with a tiny, flexible split at the top of the eye. This unique design allows you to thread the needle simply by pulling a loop of thread down into the top slot, making the preparation process incredibly fast and accessible. Alternatively, when tailors speak of blind hemming, they often refer to using exceptionally fine, sharp hand needles or specialized curved needles that are engineered to glide smoothly through fabric layers without piercing all the way to the front face.
The core principle of an invisible hem relies on a clever geometric path. Instead of passing the needle straight through all layers of fabric, you run the needle primarily through the inside fold of the hem allowance. At regular intervals, you bring the needle out of the fold just enough to catch a single thread or two of the main garment fabric before diving back into the fold. Because the thread matches the fabric color perfectly and only grabs a microscopic portion of the weave, the resulting stitch is virtually undetectable on the right side of the garment.
Products mentioned in this guide
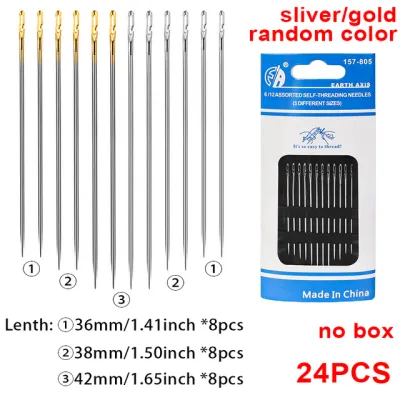
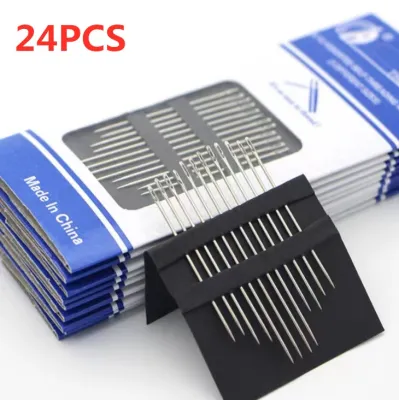
Prices are valid at publication and may change. Please refer to the product page for the latest price.
This hand-sewing technique is highly beneficial for garments that require a clean, uninterrupted drape. Tailored trousers, formal skirts, evening gowns, and delicate curtains are prime candidates for a hand-sewn blind hem. Unlike machine-sewn hems, which can sometimes look stiff or create a visible line of punctures, a hand-sewn blind hem remains soft, flexible, and completely hidden, preserving the original silhouette and movement of the fabric.
Essential Tools and Materials for Invisible Hemming
Before you begin your project, gathering the correct tools will ensure a smooth process and a professional result. The most critical decision is selecting the right needle size and type. For lightweight fabrics such as silk, chiffon, or fine linen, you should choose a very thin needle, such as a size 9 or 10 sharp. A needle that is too thick will leave permanent holes in delicate weaves, ruining the invisible effect. For medium to heavy fabrics like wool, denim, or heavy cotton, a size 7 or 8 needle provides the necessary strength to pierce the fabric layers without bending or breaking.

Your choice of thread is equally important and should match the properties of your fabric. Polyester thread is an excellent, all-purpose option that offers high strength and flexibility, making it suitable for synthetic fabrics and everyday wear. For luxury garments made of wool or silk, genuine silk thread is highly recommended; it is incredibly thin, exceptionally strong, and has a subtle luster that helps it blend seamlessly into the fabric fibers. Always choose a thread color that matches the main garment fabric as closely as possible, or select a shade slightly darker, as darker threads tend to shadow-blend better than lighter ones.
In addition to your needle and thread, several preparation accessories are essential for achieving a neat finish. High-quality fabric scissors are necessary to cut clean edges without fraying. Fine, sharp dressmaker pins or temporary hemming tape will hold your folds securely in place as you work. Finally, a reliable steam iron is indispensable; you cannot achieve a crisp, professional-looking hem without pressing your folds thoroughly before you begin sewing.
How to Prepare Your Fabric and Hem Allowance
Proper preparation is the secret to a successful invisible hem. Begin by trying on the garment with the shoes you intend to wear with it, and mark the desired finished length. You can use tailor’s chalk or fine pins to mark this line clearly around the entire circumference of the garment. Once marked, lay the garment flat on your workspace and measure the distance from the raw edge to your marked line to determine your hem allowance. A standard hem allowance of 3 to 5 centimeters is ideal for most trousers and skirts, as it provides enough weight to help the garment drape beautifully.
Next, fold the fabric along your marked line toward the inside (the wrong side) of the garment. Use your steam iron to press this fold thoroughly, creating a sharp, crisp crease. If you are working with delicate, synthetic, or textured fabrics, always use a clean pressing cloth between the iron and the fabric to protect the fibers from heat damage or unwanted shine. This pressed crease serves as your physical guide during the sewing process, ensuring your hemline remains perfectly straight and even.
Before you start stitching, you must finish the raw edge of the hem allowance to prevent it from fraying during wear and washing. For lightweight or medium-weight fabrics, you can create a double-fold hem by folding the raw edge under by 5 millimeters and pressing it flat. For heavier fabrics where a double fold would add too much bulk, finish the raw edge using pinking shears, a machine zigzag stitch, or an overcasting stitch. This step ensures the inside of your garment looks just as neat and professional as the outside.
Step-by-Step Guide to Sewing an Invisible Hem
With your fabric prepared and your tools ready, you can begin the sewing process. Start by cutting a length of thread no longer than your forearm; using a longer thread increases the risk of tangling and knotting as you work. Thread your blind sewing needle, leaving a single strand of thread to sew with, and tie a small, neat knot at the end. To conceal this starting knot, insert your needle from the inside of the folded hem allowance, bringing it out through the very top edge of the pressed fold. The knot will now be completely hidden between the layers of fabric.
Now, you will begin the “picking” motion that defines the blind stitch. Hold the fabric with the folded hem facing you, and gently fold the main garment fabric back slightly to expose the single threads of the main body just above the hem crease. Insert the tip of your needle into the main garment fabric, catching only one or two horizontal threads of the weave. Keep the needle parallel to the fabric surface and avoid pushing it all the way through to the right side. This tiny catch is what holds the hem up without showing on the outside.
Immediately after catching those one or two threads, bring the needle back down and insert it into the folded edge of the hem allowance, about 5 to 10 millimeters to the side of your previous stitch. Slide the needle through the inside of the fold for about 10 millimeters before bringing it out. This step creates a hidden bridge of thread inside the fold, keeping the majority of the thread completely out of sight.
As you pull the thread through, pay close attention to the tension. The thread should lie flat against the fabric without pulling it taut. If you pull too tightly, the fabric will pucker and create visible dimples on the outside of the garment. If the tension is too loose, the hem will sag and easily catch on shoes or hangers. Find a comfortable rhythm, checking the right side of the fabric every few stitches to ensure the hem looks flat and the stitches remain invisible.
When you reach the end of your hemline, secure the thread with a discreet knot. Make a small backstitch in the folded hem allowance, create a loop with your thread, and pass the needle through the loop twice to form a secure knot. Pull the knot tight against the fabric. To hide the thread tail, insert the needle back into the fold, bring it out about 2 centimeters away, pull the thread slightly taut, and snip it close to the fabric surface. The tail will naturally retract back inside the fold, leaving a clean, professional finish.
Troubleshooting Common Blind Hemming Mistakes
Even experienced sewists occasionally encounter issues when hand hemming, but most mistakes are easy to identify and correct. One of the most common problems is fabric puckering, which occurs when the working thread is pulled too tightly between stitches. If you notice your hemline looks gathered or wrinkled, do not panic. Gently slide your fingers along the stitched line to distribute the tension and smooth out the fabric. If the puckering persists, it is best to snip the thread, remove the tight section, and re-sew it with a lighter, more relaxed tension.
Another frequent issue is visible stitches appearing on the right side of the fabric. This happens when the needle catches too many threads of the main garment fabric or penetrates too deeply. To resolve this, adjust your needle depth and focus on catching only a single thread of the weave. If you find this difficult, try using a thinner needle or a magnifying lamp to help you see the individual threads of the fabric more clearly. Ensuring your thread color matches the fabric perfectly will also help mask any minor imperfections.
Thread tangling, knotting, or breaking can make the hemming process frustrating. To minimize these issues, avoid using excessively long pieces of thread, which are prone to twisting. You can also run your thread through a piece of beeswax or a specialized thread conditioner before sewing. This coats the fibers, reducing friction as the thread passes through the fabric and helping it glide smoothly without catching or knotting.
Adjusting Your Technique for Different Fabric Types
Different fabrics behave in unique ways, and adapting your technique to match your material will yield the best results. Sheer and lightweight fabrics, such as chiffon, organza, or lightweight silk, require a highly delicate touch. Use an exceptionally fine needle (size 10 or 11) and fine silk thread. Keep your stitches slightly closer together—about 5 to 8 millimeters apart—and use very light tension. Because these fabrics are so thin, catching only a single thread of the weave is absolutely critical to prevent the stitches from showing on the right side.
Thick or heavy fabrics, such as wool coating, heavy denim, or thick drapery materials, require a different approach. A sturdier needle (size 7 or 8) is necessary to pierce the thick layers without bending. For these materials, a standard blind stitch may not provide enough support. Instead, consider using a blind catch stitch (also known as a herringbone stitch). This cross-stitch pattern distributes the weight of the heavy hem more evenly and provides excellent strength, ensuring the hem remains secure even under the weight of heavy fabric.
Working with stretchy knit fabrics, such as jersey or interlock, presents a unique challenge because the hem must be able to stretch with the garment. To prevent the stitches from snapping when the garment is worn, use a ballpoint or stretch needle, which has a rounded tip that slides between the fabric fibers rather than cutting them. Space your stitches slightly further apart and leave a tiny amount of slack in the thread between each stitch. This extra slack allows the thread to expand and contract naturally with the fabric’s elasticity.
Frequently Asked Questions (FAQ)
Can I use a standard sewing needle instead of a blind sewing needle?
Yes, you can use a standard hand sewing needle, such as a sharp or a milliner needle, to sew an invisible hem. The primary advantage of a specialized blind sewing needle—particularly a self-threading variety—is the ease and speed of threading, which is highly beneficial if you have limited vision or want to save preparation time. Standard needles work perfectly well for the actual stitching, provided you select a size that is fine enough for your fabric weight to avoid leaving visible puncture marks.
How do I keep my thread from tangling while hand hemming?
To prevent thread tangling, keep your thread length to a manageable size, ideally no longer than 45 to 50 centimeters. Running the thread through a block of beeswax or a thread conditioner before you begin sewing will smooth down the fibers and significantly reduce friction. Additionally, letting your needle hang freely every few stitches allows the thread to untwist naturally, preventing the loops and knots that often form during prolonged hand sewing.
Is hand blind hemming durable enough for everyday wear?
A hand-sewn blind hem is remarkably durable when executed with the correct stitch density and thread choice. Using a strong polyester thread and spacing your stitches consistently between 5 and 10 millimeters apart ensures the hem can withstand regular washing and wearing. Because the thread is mostly protected inside the fold of the hem, it is less exposed to friction and abrasion than a standard machine-sewn hem, often resulting in a longer-lasting finish.

Community discussion
Share your experience or ask a question. Comments are reviewed before publication.