
Using a drawing board with light—commonly referred to as an LED light pad or tracing light box—is one of the most effective ways to improve drawing accuracy, refine rough sketches, and streamline your creative workflow. By projecting a controlled, even light through layers of paper, this tool allows you to clearly see underlying reference images or rough drafts, enabling precise tracing without damaging your original work. Whether you are a hobbyist learning the basics of proportion or a professional illustrator transferring a complex layout to heavy watercolor paper, mastering the setup and execution of this tool will save time and preserve the integrity of your final pieces.
Gathering Materials and Preparing Your Workspace
To achieve clean, professional results, you must first gather compatible materials and prepare a workspace that supports long drawing sessions. The thickness of your paper is the most critical factor in determining how well the light will penetrate. Standard copy paper (around 80 gsm) and lightweight sketching paper transmit light easily, making them excellent for quick drafts. If you plan to use heavier media, such as cartridge paper (up to 150 gsm) or Bristol board, check the manufacturer’s specifications for your light board to ensure its illumination is strong enough to shine through thicker sheets. You can perform a quick visual test by holding your chosen papers together against a bright window to verify that the details remain visible.
Along with your paper, gather your reference images, a graphite pencil, a soft eraser, and low-tack masking tape or drafting clips. A hard graphite pencil, such as an H or 2H, is ideal for initial tracing because it leaves light, precise lines that are easy to erase or cover with ink. Avoid using heavy pressure or soft, dark pencils like 4B, which can smudge easily and leave deep physical grooves in your paper. Low-tack tape is essential for securing your sheets without tearing the paper fibers when you remove them. Finally, set up your light board on a flat, stable work surface. Adjust your seating posture so your neck and back remain supported; bending over a flat surface for extended periods can cause physical strain, so consider using an angled stand if your board does not have built-in tilt adjustments.
Products mentioned in this guide
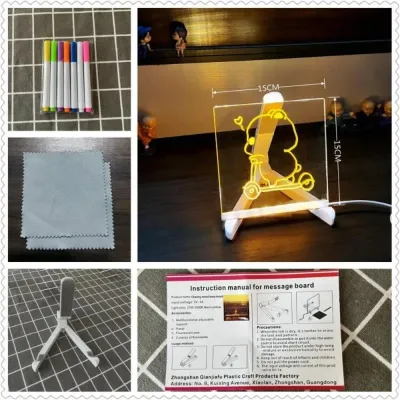
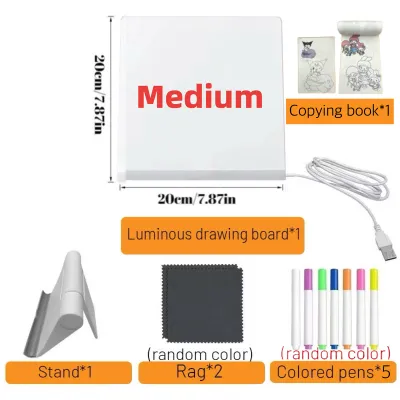
![[SG STOCK] Reusable LED Drawing Board DIY Luminous Acrylic Message Memo Note Pad Night Light Kids Writing Gift发光画板](https://img.lazcdn.com/g/p/4f49319070b36c6e7ba9cbce60944690.jpg_400x400q80.jpg_.webp)
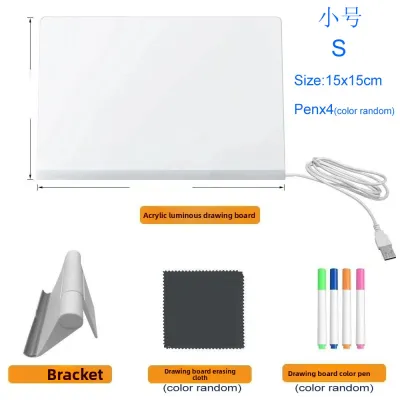
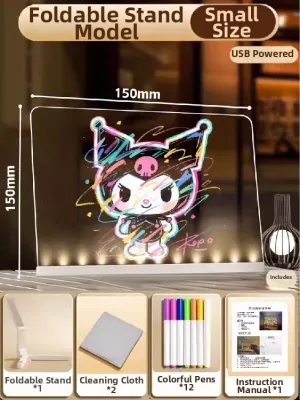
Prices are valid at publication and may change. Please refer to the product page for the latest price.
Configuring Your Drawing Board with Light for Optimal Visibility
Once your workspace is ready, connect your drawing board with light to its power source and adjust the settings to suit your environment. Most modern light pads feature adjustable brightness levels, which you should calibrate based on the ambient lighting in your room. Working in a completely dark room with a bright light board creates harsh contrast that quickly fatigues your eyes. Instead, work in a softly lit room with indirect ambient light, and adjust the board’s brightness so that the reference lines are clearly visible through your top sheet without being blindingly bright.

Next, secure your materials to the active area of the board. Place your reference image down first, ensuring it is perfectly flat against the acrylic surface, and secure its corners with small pieces of low-tack tape. Lay your blank drawing paper directly over the reference. To prevent the papers from shifting out of alignment while you work, apply a strip of tape along the top edge of the drawing paper, creating a hinge. This allows you to lift the paper from the bottom to check your progress without losing your alignment. Before you begin drawing, check the active area for even light distribution and reposition the board slightly to eliminate glare or reflections from overhead room lights.
Executing Accurate Traces: A Step-by-Step Workflow
Executing an accurate trace requires a methodical approach to preserve both your paper and the surface of your light board. Begin by aligning your reference image and top paper precisely. If you are working on a complex project with multiple layers, draw small registration marks—such as tiny crosshairs—in the margins of both sheets. These marks act as physical guides, allowing you to easily realign the papers if they accidentally slip or if you need to detach them temporarily.
With your papers secured, begin tracing using light, consistent pencil pressure. Let the light from the board do the work of revealing the lines; there is no need to press hard. Pressing too firmly can indent the paper fibers permanently, making it difficult to apply smooth shading or ink later, and it can also scratch the protective acrylic surface of your light board. Focus on capturing the main structural outlines and key proportions first, rather than trying to trace every minor detail or shadow.
As you work across different areas of your reference, you may find that some sections are highly detailed or have low contrast. Dynamically adjust the brightness dial on your board to bring out faint details in darker areas of the reference, or dim the light if the glare becomes too harsh on highly reflective white paper.
To ensure your drawing is progressing accurately, use the hinge technique to check your work. Without detaching the top tape, carefully lift a bottom corner of your drawing paper. Turn off the light board or look at the paper against a dark background to see how the traced lines look under normal, front-lit conditions. This quick check helps you spot missed lines, incorrect proportions, or areas where your hand pressure was too light before you finalize the trace.
Transferring Rough Sketches to Final Paper
A drawing board with light is an invaluable tool for elevating a rough, messy sketch into a clean, refined piece of final artwork. When you sketch freely, you often produce search lines, construction shapes, and eraser smudges that can ruin the surface of your final paper. By using a light board, you can keep your brainstorming phase entirely separate from your final execution.
To begin the transfer process, position your rough pencil sketch directly beneath a fresh, clean sheet of your final drawing paper, such as heavy cartridge paper or smooth Bristol board. Secure both sheets to the light board using the top-hinge method. Turn on the illumination and adjust the brightness until the essential lines of your rough sketch show through the final sheet.
Trace over the underlying rough lines with confident, deliberate strokes. Because you already solved the compositional and proportional challenges in your rough sketch, you can focus entirely on line quality, variation, and precision. Use this step to select only the successful lines from your draft, leaving behind the messy construction marks.
Once the primary linework is established, temporarily reduce the brightness of the light board or turn it off completely. Adding shading, fine textures, or opaque details is highly difficult when the paper is backlit, as the light shining from behind flattens the visual depth and distorts how values appear. Switch to your room’s ambient light to complete these final artistic touches. Before unmounting the finished piece, turn the light board back on one last time to verify line accuracy and make any necessary corrections.
Resolving Visibility and Alignment Issues
When tracing, you may occasionally encounter physical or optical obstacles that disrupt your workflow. Faint or invisible lines are usually the result of using paper layers that are too thick for your device’s light output. If you find yourself struggling to see the reference, evaluate the combined thickness of your sheets. If you are using heavy paper, try using a higher brightness setting, or transfer your reference to a thinner sheet of layout paper first to create an intermediate guide.
Another common issue is a blurred or double-image effect, which makes precise tracing nearly impossible. This optical distortion is typically caused by paper shifting, using thick reference materials that create a physical gap between the sheets, or working on an uneven board surface. Ensure both sheets are taped tightly flat against each other with no air pockets. If your reference is printed on thick cardstock, consider making a photocopy onto standard paper to minimize the gap between the layers.
Finally, managing physical comfort is essential for maintaining accuracy. The bright, concentrated glow of a light board can cause eye strain and visual fatigue over time. To prevent this, balance the board’s illumination with soft room lighting, avoid working in pitch-black environments, and take scheduled breaks. Looking away from the screen every twenty minutes to focus on a distant object helps relax your eye muscles and keeps your vision sharp for the rest of your drawing session.
Maintaining and Storing Your Light Board
Proper maintenance and storage are vital to preserve the surface clarity and electronic components of your drawing board with light. Over time, the acrylic or glass surface can accumulate dust, graphite smudges, and oils from your hands. To clean it safely, always unplug the device first. Wipe the surface gently with a dry, non-abrasive microfiber cloth. If the smudges are stubborn, use an electronics-safe cleaner or a slightly damp cloth as directed by your product manual, and avoid harsh chemical solvents like acetone or alcohol, which can permanently cloud or scratch acrylic.
When you are finished working, store the board flat or securely upright in a dry, temperature-controlled area. Avoid stacking heavy books or art supplies on top of the board, as localized pressure can damage the internal LED panels or warp the frame. Finally, inspect the power cables and connection ports periodically for signs of wear or loose connections. If you observe any fraying or electrical issues, stop using the device immediately and consult the manufacturer for repair or replacement options.
Frequently Asked Questions (FAQ)
Can I use watercolor or wet media on a drawing board with light?
Using wet media directly on a drawing board with light requires caution. Most light boards are electronic devices with sensitive internal components that can be permanently damaged by moisture. Before attempting any wet techniques, check the manufacturer’s guidelines to verify if your specific model has a water-resistant or sealed surface. To protect your device, consider placing a clear, waterproof plastic sleeve or a sheet of acetate over the illuminated surface before laying down your watercolor paper. This barrier prevents water, ink, or paint from seeping into the edges or power ports of the board.
Does using a light board damage my original reference photos?
Modern drawing boards with light utilize LED technology, which emits minimal heat compared to older, fluorescent light boxes. This makes them generally safe for standard printed photos, laser prints, and sketches during typical tracing sessions. However, prolonged exposure to light and minor warmth can still affect highly sensitive, antique, or heat-vulnerable documents. If you are working with irreplaceable original photos or delicate historical papers, limit their exposure time on the board, or use a high-quality photocopy as your tracing reference instead of the original.

Community discussion
Share your experience or ask a question. Comments are reviewed before publication.