
Choosing the right led drawing board—frequently referred to as a light pad or light box—can completely revolutionize your creative workflow. Whether you are tracing intricate tattoo stencils, weeding adhesive vinyl, practicing calligraphy, or animating frame-by-frame, backlighting provides the visual clarity needed to work with precision. The core challenge lies in balancing physical dimensions, light intensity, and surface durability against your specific artistic medium and workspace constraints.
To make an informed decision, you must evaluate how your typical paper weight, project scale, and mobility needs align with the technical specifications of modern light pads. A board that is too dim will fail to penetrate heavy watercolor paper, while one that is too large may overwhelm a compact desk or prove cumbersome to transport. By matching these factors systematically, you can avoid the frustration of underpowered illumination or the unnecessary expense of professional-grade features you may not require.
Quick Selection Guide: Matching Board Specs to Your Art Style
Selecting the ideal light pad requires a clear understanding of how your artistic style dictates your hardware needs. A beginner focusing on basic tracing or lettering does not require the same heavy-duty equipment as a professional architect or a 2D animator. The table below simplifies this decision-making process by mapping common skill levels and project types to their optimal specifications.
Products mentioned in this guide
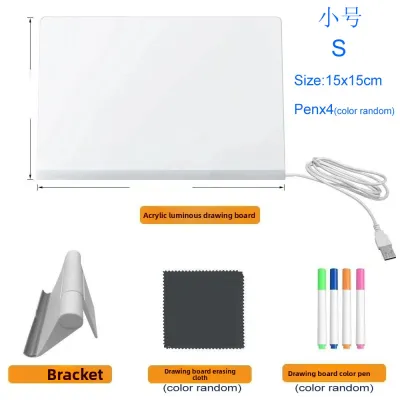
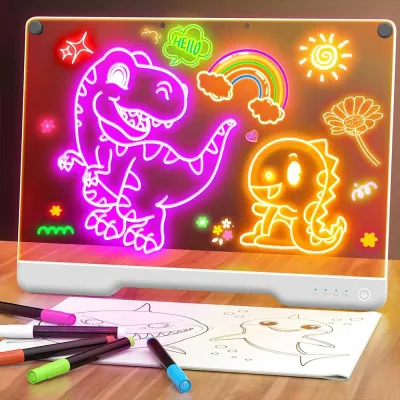
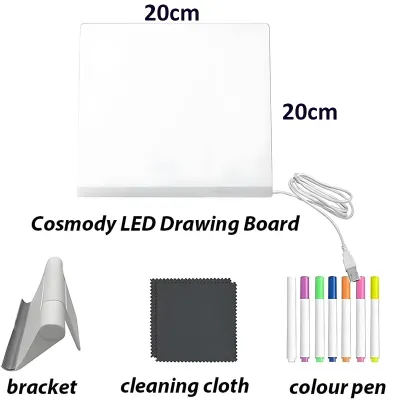
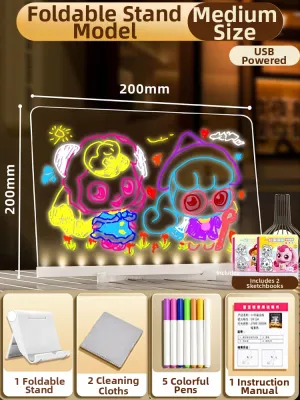
Prices are valid at publication and may change. Please refer to the product page for the latest price.
| Skill Level & Primary Project | Recommended Size | Power Source | Surface Material | Key Focus |
|---|---|---|---|---|
| Beginner / Hobbyist<br>(Tracing, Calligraphy, Diamond Painting) | A4 | USB-C / Micro-USB | Acrylic | Portability, affordability, and lightweight design |
| Intermediate Artist<br>(2D Animation, Sketching, Tattoo Stencils) | A3 | USB-C or AC Adapter | Acrylic or Thin Glass | Even light diffusion, smooth surface, and mid-range lux |
| Professional Creative<br>(Heavy Media, Architecture, Drafting) | A3 to A2 | AC Adapter (Direct Plug-in) | Tempered Glass | High luminance (3,000+ lux), scratch resistance, and large active area |
The “best” board is not simply the most expensive model available; rather, it is the one that seamlessly accommodates your primary paper stock (measured in grams per square meter, or gsm) and fits comfortably within your physical environment. For instance, artists working in compact urban apartments or shared workspaces benefit greatly from a slim, easily stowed A4 or A3 board. Conversely, a dedicated design studio with ample desk space can easily accommodate a heavy, stationary A2 tempered glass model designed for large-scale drafting.
Core Specifications: Size, Brightness, and Portability of an LED Drawing Board
To evaluate different models effectively, you must understand the key technical specifications that influence daily usability. These features determine how comfortable the board is to use for extended periods, how well it renders fine details through thick paper, and how easily it integrates into your existing workspace.

Board Size and Active Working Area
LED drawing boards are typically categorized by standard ISO paper sizes, including A4, A3, and A2. However, it is crucial to distinguish between the overall physical dimensions of the device and its active working area, which is the actual illuminated zone. The outer frame or bezel houses the LED strips, internal wiring, and control buttons, meaning the physical footprint of the board will always be larger than the illuminated drawing surface.
When choosing a size, consider the dimensions of your standard drawing medium. An A4 board typically offers an active illuminated area of roughly 300 mm by 210 mm, which perfectly accommodates standard printer paper or small sketchbooks. If you work with larger sketchpads, Canson sheets, or architectural blueprints, an A3 (approx. 420 mm by 297 mm) or A2 (approx. 594 mm by 420 mm) board is necessary. Selecting a board slightly larger than your paper ensures that your hands do not bump against the raised outer frame while drawing near the edges, preventing awkward hand positioning and uneven lines.
Brightness Control and Eye Comfort
Light intensity is a critical factor in determining which paper weights you can successfully trace through. For standard 80 gsm printer paper or layout paper, a basic light source outputting 1,500 lux is completely sufficient. However, if you work with heavy 300 gsm watercolor paper, bristol board, or thick cardstock, you will require a high-intensity board capable of delivering 3,000 to 5,000 lux to penetrate the dense paper fibers.
Modern boards offer two primary types of dimming mechanisms: stepped and stepless. Stepped dimming provides fixed brightness intervals, typically low, medium, and high, which are adjusted via simple button clicks. Stepless dimming utilizes touch-sensitive controls that allow you to smoothly ramp the brightness up or down by holding down the power button. This granular control is superior for matching the board’s illumination to the ambient light of your room, which significantly reduces eye strain.
To protect your vision during long creative sessions, prioritize boards equipped with flicker-free technology. High-quality light pads use constant-current drivers to maintain a perfectly stable light output. Cheaper models often rely on low-frequency pulse-width modulation (PWM) that causes microscopic flickering; while invisible to the naked eye, this rapid pulsing can cause severe eye strain, headaches, and physical fatigue. Additionally, look for boards featuring advanced light guide plates with uniform dot-matrix diffusion, which ensures the light is scattered evenly from the edge-lit LEDs across the entire screen, preventing distracting hot spots or dim corners.
Portability, Thickness, and Power Options
Your preferred working environment dictates the ideal power source and physical profile of your board. USB-powered models are highly versatile, drawing power from standard 5V USB ports. They can be plugged directly into laptops, USB wall adapters, or portable power banks. This setup is highly favored by students and mobile illustrators who enjoy working in cafes, libraries, or outdoor spaces where wall outlets may be scarce.
Battery-operated boards feature built-in rechargeable lithium-ion batteries, offering complete cordless freedom. The trade-off is that these boards are noticeably heavier, thicker, and their maximum brightness may gradually decline as the battery charge depletes. For large-scale professional boards (such as A2 sizes), direct plug-in AC adapters (typically 12V or higher) are standard, as they provide the stable, high-voltage current required to illuminate a massive surface area at maximum lux.
The thickness of the board directly impacts wrist ergonomics and storage. Ultra-thin profiles, ranging from 5 mm to 8 mm, allow your wrists to rest naturally on the desk surface with minimal elevation, reducing the risk of repetitive strain injuries. Wedge-shaped boards offer a built-in ergonomic tilt that some artists prefer for sketching, but they are bulkier to transport and require more storage space in a drawer or backpack.
Matching the Board to Your Skill Level and Art Projects
To prevent overbuying unnecessary features or under-equipping your workspace, it is helpful to categorize light pads by user experience and specific project demands. This ensures your investment aligns perfectly with your creative output.
Beginners and Hobbyists: Tracing, Calligraphy, and Diamond Painting
For those entering the world of arts and crafts, or hobbyists engaging in casual projects, an entry-level A4 LED drawing board is the most practical choice. These models are highly accessible and budget-friendly, typically ranging from S$15 to S$40. They provide a low-risk entry point without compromising on the basic functionality required for everyday crafting.
At this level, a lightweight acrylic board featuring a basic three-level stepped dimming system is more than adequate. These specifications are perfectly suited for tracing simple line art, practicing calligraphy guides, or working on diamond painting canvases. Because these projects generally utilize standard-weight papers (under 100 gsm) or translucent plastic mesh, extreme light penetration is unnecessary. The acrylic surface is highly impact-resistant and safe for younger users, making it an excellent addition to a family crafting table.
Intermediate Artists: 2D Animation, Sketching, and Stencils
As your skills progress to more complex techniques, such as hand-drawn 2D animation, detailed sketching, or creating tattoo stencils, your hardware requirements will increase. An A3-sized board is highly recommended for intermediate artists, as it provides the spacious active area needed to accommodate animation peg bars, registration marks, and multiple sheets of tracing paper simultaneously.
Intermediate workflows require a highly smooth, low-friction surface to facilitate rapid paper movement and quick sketching. Tattoo artists, in particular, rely on consistent, high-contrast backlighting to transfer intricate, fine-line stencil designs onto thick transfer paper. For these applications, select a board with stepless touch dimming and a minimum brightness output of 2,500 lux to ensure every subtle detail remains visible through dense stencil media.
Professionals: Large Illustrations, Heavy Media, and Architecture
Professional illustrators, architects, and drafting engineers require heavy-duty, studio-grade equipment designed to withstand daily, rigorous use. For these demanding environments, an A2 or custom large-format board is essential to accommodate expansive blueprints, large watercolor sheets, or complex comic book layouts.
Professional projects frequently involve highly opaque, heavy media, such as 300 gsm cold-press watercolor paper, heavy bristol board, or thick marker paper. To penetrate these dense paper fibers, you must use a high-luminance board capable of outputting 4,000 to 5,000 lux. Furthermore, professional work demands exceptional build quality. Tempered glass surfaces are highly recommended over acrylic because they resist scratching from metal drafting rulers, heavy hand pressure, and cutting tools. While these professional boards represent a larger financial investment—often ranging from S$120 to over S$300—their durability and perfectly flat, non-yielding surfaces are indispensable for high-end production work.
Surface Materials and Build Quality: Acrylic vs. Glass
The physical construction of your light pad directly determines its lifespan, weight, and tactile drawing feel. The primary decision you will face is choosing between an acrylic or a tempered glass drawing surface.
Acrylic (polymethyl methacrylate) is the most common material used in modern light pads. It is exceptionally lightweight, highly shatterproof, and cost-effective to manufacture. However, acrylic is relatively soft and prone to scratching. Over time, dust particles, hard pencil leads (such as 2H or harder), and metal tools can leave fine scratches on the surface. These scratches can catch the backlight, creating distracting glare and uneven light diffusion. If you choose an acrylic board, you must handle it with care and avoid using sharp instruments directly on the screen.
Tempered glass represents the premium tier of build quality. It is incredibly durable, highly scratch-resistant, and maintains its pristine clarity indefinitely. Glass surfaces can easily withstand the pressure of heavy drafting tools, hard pencils, and even the light use of craft knives (though using a cutting mat is still highly recommended to preserve your blades). The primary trade-offs are weight and cost. Glass boards are significantly heavier, making them less suitable for travel, and they carry a higher price tag.
Beyond the screen material, pay close attention to secondary build features that enhance usability:
- Anti-slip silicone pads: High-grip rubber or silicone feet on the underside of the board are crucial to prevent the device from sliding across your desk as you apply drawing pressure.
- Beveled edges: A smooth, sloped border prevents the sharp plastic or metal frame from digging into your wrists during long drawing sessions, significantly improving physical comfort.
- Printed measurement grids: Integrated rulers along the borders of the active area are incredibly useful for scaling drawings, aligning borders, or laying out comic panels with mathematical precision.
Recommended Board Profiles for Specific Use Cases
To help you visualize the ideal setup, let’s look at three distinct product profiles tailored to specific creative lifestyles. These profiles describe the optimal combination of features for different scenarios, allowing you to identify the right category of product without relying on specific brand names.
Best Profile for Travel and On-the-Go Sketching
If you are a mobile artist who frequently works in transit, at cafes, or during workshops, your priority is maximum portability. Look for an ultra-thin (approx. 5 mm to 6 mm) A4 board constructed from lightweight acrylic. It should weigh less than 600 grams and feature a modern USB-C port, allowing you to power it directly from a compact mobile power bank.
To prevent issues while traveling, select a model with a recessed power button or a physical lock switch; this prevents the board from accidentally turning on inside your bag and draining your power bank. Always transport the board in a padded protective sleeve or a dedicated hard-shell case. This shields the delicate acrylic surface from keys and pens, and prevents structural bending under physical pressure when packed inside a tight backpack.
Best Profile for Desk-Bound Animation and Illustration
For a permanent studio or home office setup dedicated to hand-drawn animation or detailed illustration, prioritize stability and ergonomic comfort. The ideal profile is an A3 board equipped with stepless touch dimming and a highly stable, weighted base. Because animation and illustration involve vigorous, repetitive hand movements, high-grip anti-slip silicone feet are essential to keep the board firmly anchored to your drafting table.
To prevent neck and shoulder strain, ensure the board is compatible with adjustable desktop stands or features a slight built-in wedge shape that positions the drawing surface at a comfortable 10-to-15-degree angle. This elevation keeps your work closer to your natural line of sight, preventing you from hunching over the desk.
Best Profile for Large-Scale Crafts and Diamond Painting
Crafting projects like diamond painting, stained glass patterning, or large-scale cross-stitch require a spacious and highly bright working area. The optimal profile is an A2 board with a high brightness output of at least 3,000 lux to successfully illuminate through thick craft backing papers or adhesive canvases.
A printed grid lining across the active working area is a massive advantage for crafters. This grid provides a constant, reliable visual guide for aligning tiny diamond drills or fabric grids perfectly straight. Because crafting projects can span several weeks, look for a board with a robust, easy-to-clean acrylic surface that can handle the occasional adhesive residue without degrading the light diffusion layer.
Ergonomic Setup, Maintenance, and Surface Care
Investing in a high-quality light pad is only the first step; maintaining proper ergonomics and caring for your equipment will ensure a long lifespan for both your body and your device. Long hours spent hunched over a flat light source can lead to severe neck, shoulder, and wrist strain. To maintain proper ergonomics, avoid placing the board completely flat on a low desk. Instead, mount it on an adjustable drafting stand or wedge to raise the surface to a 15-to-30-degree angle. This keeps your head in a more neutral position, reducing pressure on your cervical spine.
When cleaning your board, always consult the manufacturer’s care instructions first. To clean acrylic surfaces safely, use only a dry or slightly damp microfiber cloth. Avoid harsh chemical solvents, window cleaners, or high-concentration isopropyl alcohol, as these chemicals can react with the acrylic, causing micro-cracks (crazing) or permanent cloudiness that ruins light transmission. For tempered glass surfaces, a mild glass cleaner or a drop of dish soap on a damp cloth is safe, but always ensure the device is completely unplugged and dry before reconnecting power.
Finally, practice proper cable management. Secure the power cable to your desk using clips or tape to prevent it from hanging loose. This simple step prevents accidental trips that can yank the cable, which is the single most common cause of damage to the delicate Micro-USB or USB-C ports on the board. If your ink pens or markers bleed through your paper, ensure the ink is fully dry before placing the sheet on the board, preventing permanent staining or chemical transfer to the drawing surface.
Frequently Asked Questions (FAQ)
Can I use an LED drawing board for weeding vinyl or screen printing?
Yes, an LED drawing board is an exceptional tool for weeding vinyl. The bright backlight shines directly through the cut lines in adhesive vinyl sheets, making them highly visible and significantly speeding up the weeding process. It is also excellent for aligning multi-layer screen printing transparencies. However, if you are weeding on an acrylic board, be extremely careful not to let your weeding pick or craft knife scratch the surface. Always check the manufacturer’s instructions, and consider placing a thin, clear protective sheet over the board if using sharp tools.
Does the light color temperature affect tracing accuracy?
Generally, cool white light (ranging from 6,000K to 6,500K) provides the highest visual contrast, making it much easier to trace faint graphite pencil lines or ink strokes. However, prolonged exposure to cool blue-toned light can contribute to eye strain and disrupt sleep patterns if used late at night. Neutral (approx. 4,000K) or warm light (approx. 3,000K) is gentler on the eyes for extended sessions. Note that while the color temperature may temporarily shift how colors look while the board is turned on, it does not permanently alter the physical pigments of your markers, paints, or inks once the backlight is switched off.
How do I prevent paper from sliding on a smooth acrylic surface?
Because acrylic and glass surfaces are exceptionally smooth, drawing paper can easily slide around. To secure your work without damaging the board, use low-tack artist tape or washi tape, which holds the paper firmly but peels off cleanly without leaving sticky residue. Drafting weights or flat silicone pads are also excellent non-adhesive alternatives. Avoid using high-tack household masking tapes or duct tape, as they can leave stubborn adhesive residues that attract dust and degrade the light diffusion layer, or even peel away the protective border of the board.
Community discussion
Share your experience or ask a question. Comments are reviewed before publication.