
A beautifully wrapped gift is more than just a physical offering; it is a visual expression of care, anticipation, and respect. While high-quality wrapping paper sets the stage, the ribbon bow serves as the ultimate focal point that elevates the entire presentation from ordinary to professional. Tying a flawless, symmetrical bow is a skill that often seems elusive, yet it relies entirely on structural technique rather than artistic luck. By understanding the physics of ribbon tension, the mathematics of proportion, and the unique characteristics of different fabrics, anyone can achieve boutique-level results at home.
Choosing the Right Ribbons for Gift Wrapping
Selecting the perfect ribbons for gift presentation requires balancing aesthetics with structural functionality. The scale of your ribbon must match the dimensions of your gift box to create a harmonious visual weight. If the ribbon is too narrow, it will look lost on a large package; if it is too wide, it will overwhelm a delicate gift.
To determine the ideal ribbon width, follow this general guideline based on box sizes:
Products mentioned in this guide
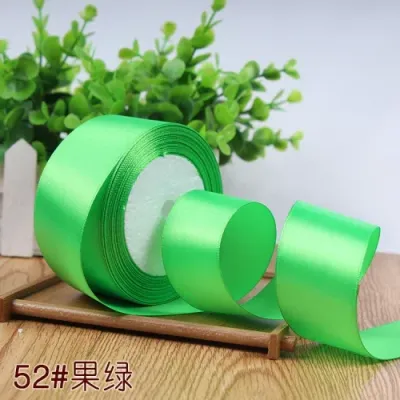
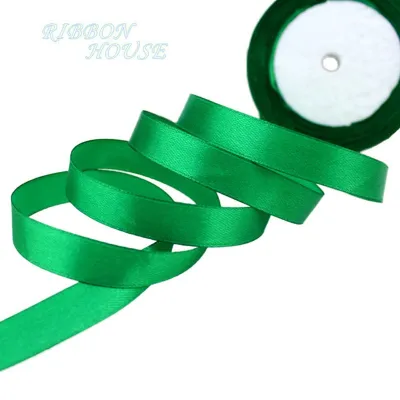
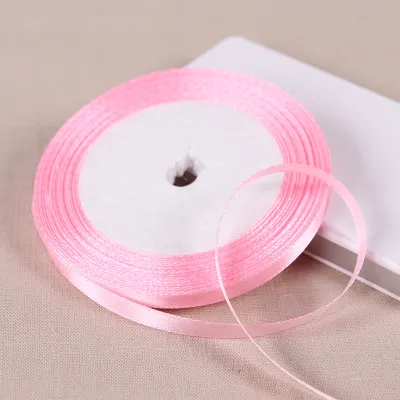
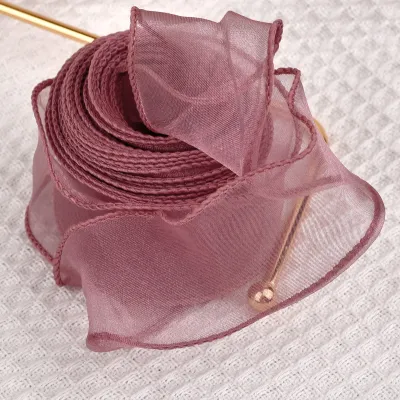
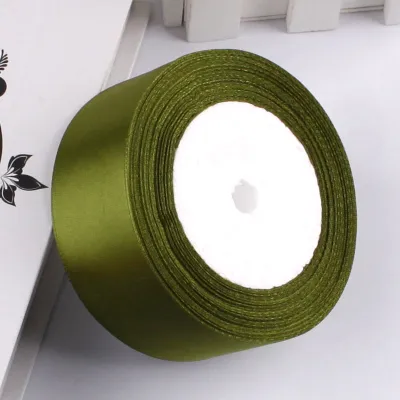
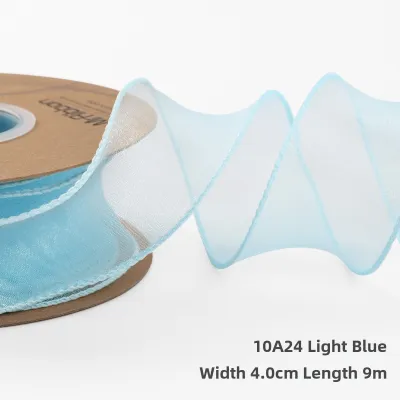
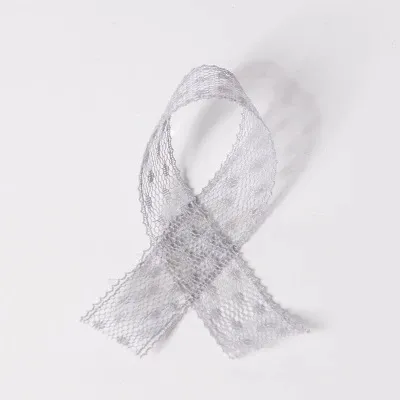
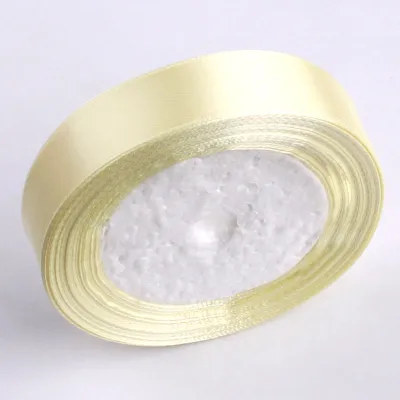
Prices are valid at publication and may change. Please refer to the product page for the latest price.
- Small Gift Boxes (under 10 cm): Opt for narrow ribbons measuring 6 mm to 10 mm (1/4 inch to 3/8 inch). These are perfect for jewelry boxes or small perfume bottles.
- Medium Gift Boxes (10 cm to 25 cm): Choose standard widths of 15 mm to 25 mm (5/8 inch to 1 inch). This range is highly versatile and works beautifully for books, apparel boxes, and standard cosmetic sets.
- Large Gift Boxes or Hampers (over 25 cm): Select wide ribbons ranging from 38 mm to 50 mm (1.5 inches to 2 inches) or more. These substantial widths provide the necessary structural presence to balance a larger surface area.
Calculating the exact length of ribbon you need before cutting prevents costly waste and ensures you do not run out of material mid-tie. To find the correct length for a classic cross-wrap bow, use the following formula:
$$\text{Total Length} = (2 \times \text{Length}) + (2 \times \text{Width}) + (4 \times \text{Height}) + 50\text{ cm}$$
The additional 50 cm accounts for the loop allowance (approximately 30 cm) and the tail allowance (approximately 20 cm). If you are wrapping a particularly large box or desire long, flowing tails, increase this allowance to 70 cm. It is always safer to work with a slightly longer ribbon and trim the excess at the end, as trying to tie a bow with a piece that is too short is incredibly difficult.
The material of the ribbon also dictates how the bow behaves. Satin offers a glossy, luxurious finish but is highly slippery, requiring tight knotting. Grosgrain features a ribbed texture that provides excellent grip, making it ideal for crisp, structured bows that stay in place. Burlap and cotton offer a rustic, organic feel that pairs perfectly with kraft paper, while wired ribbons contain thin metallic edges that allow you to sculpt and hold dramatic, volumetric shapes. Always check the manufacturer’s label for material composition and care instructions, especially if you plan to reuse high-quality textiles.
Essential Tools and Materials
A smooth wrapping workflow depends entirely on preparation. Attempting to tie a bow without the proper tools nearby often leads to uneven tension, frayed edges, and frustration. Gather these essential items before you begin:

- Sharp Fabric Scissors: This is the most critical tool in your kit. Standard household scissors are often dull and will chew through delicate ribbon fibers, leaving messy, frayed ends. Dedicate a pair of high-quality fabric shears or sharp stationery scissors exclusively for cutting ribbons.
- Adhesives: Double-sided tape, glue dots, or a low-temperature hot glue gun are invaluable for securing the ribbon to the box. Placing a small piece of double-sided tape on the bottom of the box keeps the ribbon centered and prevents it from shifting while you tie the top knot. When using a hot glue gun, always prioritize safety: work on a heat-resistant surface, keep the nozzle away from your skin, and test a small dab of glue on a scrap piece of ribbon first, as extreme heat can melt synthetic polyester ribbons.
- Reinforcement Tools: Keep a small spool of thin floral wire or matching pipe cleaners on hand. These are particularly useful for securing the center of complex or multi-loop bows before you wrap them with a decorative fabric knot.
- Measuring Tools: A clear plastic ruler or a flexible sewing measuring tape is essential for measuring the box dimensions, calculating ribbon length, and ensuring your loops and tails are mathematically symmetrical.
Step-by-Step Guide to Tying a Classic Professional Bow
Creating a classic, professional-looking bow requires a methodical approach. Follow these step-by-step instructions to tie a symmetrical bow directly onto your gift box.
Step 1: Measuring and Positioning
Place your wrapped gift box face up on a flat, clean work surface. Unroll your calculated length of ribbon. Slide the ribbon underneath the center of the box, ensuring that the lengths extending from both the left and right sides are perfectly equal. Bring both ends of the ribbon up to the top center of the box. Cross the right ribbon end over the left ribbon end, wrap it underneath, and pull both ends firmly to create a secure, flat single knot against the surface of the box. This serves as the anchor for your bow.
Step 2: Forming the First Loop
Take the lower ribbon strand and fold it back on itself to form a neat loop, often referred to as the “bunny ear.” Ensure that the decorative or shiny side of the ribbon faces outward. Hold the base of this loop securely between your thumb and forefinger, keeping it flat against the center knot of the box. Avoid twisting the ribbon at the base, as this will cause the loop to lean awkwardly.
Step 3: Wrapping and Tying the Center Knot
Take the remaining upper ribbon strand and drape it over the front of your first loop, wrapping it around the base to create a small collar. As you wrap, you will notice a small gap or loop opening behind the collar. Fold the draping ribbon to form a second loop, and push this folded section through the gap from front to back. Be careful not to twist the ribbon as it passes through the opening.
Step 4: Tightening and Shaping
Gently pull the second loop all the way through the gap. Now, hold both loops firmly between your fingers and pull them away from each other in opposite directions to tighten the center knot. Maintain steady, even tension on both sides to avoid crushing the fabric. Once the knot is secure, slide your fingers inside both loops and pull outward to fluff them and create volume. If one loop is larger than the other, gently pull the corresponding tail to adjust the size, then pull both loops again to retighten the center knot.
Step 5: Trimming the Tails
The final touch that distinguishes a professional wrap is the treatment of the ribbon tails. To cut a classic 45-degree angle, hold the tail flat and cut diagonally from one side to the other with your fabric scissors. For a sophisticated notched or “swallowtail” finish, fold the ribbon tail vertically in half. Cut upward from the folded edge to the outer edge at a 45-degree angle, then unfold the ribbon to reveal a perfect, symmetrical V-shape. Ensure both tails are of equal length, extending slightly past the edge of the box for a balanced silhouette.
Troubleshooting Common Bow-Tying Mistakes
Even with careful attention, minor errors can disrupt the symmetry of your bow. Understanding how to diagnose and correct these issues will save you time and material.
- Twisted Loops: If the matte underside of a single-sided ribbon keeps facing outward on one of your loops, the issue lies in how you wrapped the center knot. When wrapping the ribbon around the first loop in Step 3, twist the ribbon 180 degrees before pushing it through the center gap. This twist flips the decorative side forward, ensuring both loops display the beautiful, finished surface of the ribbon.
- Uneven Tails: If your tails end up highly asymmetrical after tightening, do not untie the entire bow. Instead, hold the center knot firmly with one hand to keep it secure, and gently slide the ribbon through the knot to redistribute the length. Once the tails are balanced, retighten the loops. If the difference is minor, simply use your sharp fabric scissors to trim the longer tail to match the shorter one.
- Loose Center Knots: Slippery ribbons, such as satin or silk, often slip out of their knots, causing the bow to sag over time. To prevent this, tie a small piece of thin floral wire tightly around the center of the loops before wrapping the final decorative knot over it. Alternatively, apply a tiny dot of clear fabric glue inside the center knot. Press and hold the knot firmly for ten seconds to allow the adhesive to bond.
- Crushed or Wrinkled Ribbons: Ribbons stored on tight spools or salvaged from previous gifts often carry deep creases. If you notice minor wrinkles, run the ribbon gently over the edge of a clean wooden table to smooth it out, or pull it through a hair straightener set to its lowest heat setting. Always test a small scrap first to ensure the heat does not melt or discolor the synthetic fibers.
Adapting Techniques for Different Ribbon Materials
Different ribbon materials possess unique physical properties, friction levels, and structural integrity. Adjusting your tying technique to match these characteristics ensures a flawless result.
- Satin and Silk: These materials are highly prized for their luxurious sheen and elegant drape. However, their ultra-smooth surfaces offer very little friction, making them prone to slipping. When working with satin ribbons, maintain constant, firm tension throughout the tying process. Consider using a double-knot at the base or securing the first knot with a small piece of double-sided tape before forming the loops. Avoid pulling too hard on the loops, as this can cause the delicate threads to shift or warp.
- Grosgrain and Cotton: These ribbons feature a ribbed or matte texture that provides excellent grip. Knots tied with grosgrain will stay securely in place without slipping, but they can easily look bulky if not handled carefully. Focus on making crisp, flat folds and keeping your center knot as small and tight as possible to maintain a clean, modern profile.
- Wired Ribbons: Wired options are incredibly forgiving and perfect for creating dramatic, high-volume bows. Because the thin wire along the edges holds any shape you sculpt, you do not need to pull the knots as tight. Instead, focus on bending and shaping the wire to create perfect, hollow loops and elegant, undulating tails. When cutting wired ribbon, avoid using your best fabric scissors on the wire edges, as this can dull the blades; use wire cutters or utility scissors to snip the wire first.
- Testing Your Ribbon: Always cut a small test strip of your chosen ribbon before committing to the final wrap. Tie a quick sample knot to observe how the material holds a crease, slips, or drapes, allowing you to adjust your hand tension and technique accordingly.
Frequently Asked Questions (FAQ)
How do I store leftover ribbons to prevent creasing in a humid climate?
In humid environments, such as Singapore, moisture can degrade ribbon fibers and cause them to lose their crispness. Store leftover ribbons by rolling them loosely around their original cardboard spools or a clean cardboard tube. Avoid folding them tightly, which can cause permanent, stubborn creases. Place the spools inside a rigid, airtight plastic storage box, and add a few silica gel packets to absorb excess moisture and prevent mold or mildew from developing on natural fibers like cotton or silk.
Can I reuse a tied ribbon bow for another gift?
Yes, high-quality ribbons can easily be reused if detached carefully. Instead of untying the center knot, which can stretch and distort the fabric fibers, carefully slide a pair of scissors under the securing tape or wire at the back of the box to release the bow intact. Store the pre-tied bow flat inside a rigid cardboard box, placing tissue paper inside the loops to help them maintain their shape and volume until you are ready to use them again.

Community discussion
Share your experience or ask a question. Comments are reviewed before publication.