
Creating a memorable goodie bag for a birthday celebration involves more than just selecting the right treats; the presentation itself sets the tone for the entire event. Elevating a plain, utilitarian paper bag into an elegant, custom-wrapped favor adds a thoughtful, personal touch that guests of all ages will appreciate. By wrapping a standard goodie bag in high-quality wrapping paper and securing it with a beautifully styled ribbon, you can achieve a polished, professional look that rivals high-end boutique packaging.
This technique is particularly useful when you want to match your party favors to a specific birthday theme, color scheme, or venue aesthetic. Whether you are preparing for a children’s party in Singapore or a sophisticated milestone celebration, mastering the art of neat paper folding and ribbon tying ensures your party favors look cohesive and inviting. With a few simple tools and a methodical approach, you can transform plain bags into stunning decorative elements for your display table.
Materials and Tools You Will Need
Before beginning the wrapping process, gathering the correct tools and materials is essential for achieving a clean, wrinkle-free finish. Using the wrong paper weight or adhesive can lead to torn edges, bulky seams, and slipping ribbons.
Products mentioned in this guide
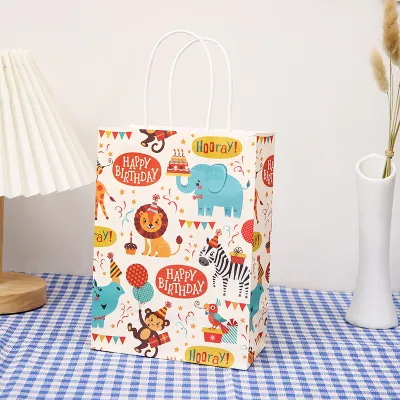
![[SG] Big Size Birthday Paper Bag Kids Birthday goodie bag High Quality Kraft Paperbag birthday party childrens day present](https://img.lazcdn.com/g/p/8199f691728dcfb094ba050068a33b81.jpg_400x400q80.jpg_.webp)
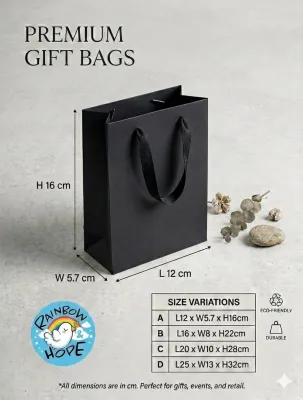

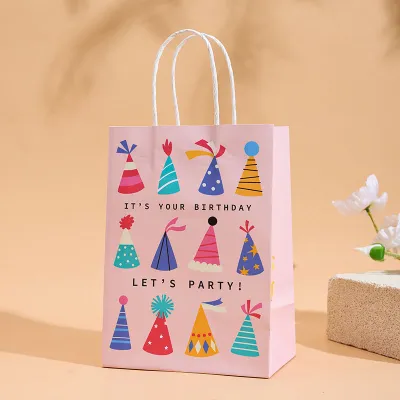
Prices are valid at publication and may change. Please refer to the product page for the latest price.
Essential Tools and Materials Checklist
- Plain Goodie Bags: Standard kraft paper bags with flat bottoms and simple handles serve as the perfect sturdy base. Ensure the bags are clean, dry, and free of deep creases.
- Wrapping Paper: Select a medium-weight wrapping paper, ideally between 70 gsm and 90 gsm. Paper that is too thin (under 60 gsm) tears easily at the corners of the bag, while heavy cardstock (over 120 gsm) is too rigid to fold cleanly and will resist staying taped down. High-quality wrapping paper rolls typically range from S$3 to S$8, depending on the thickness and finish.
- Ribbon: Choose a ribbon style that complements your paper pattern. Double-sided satin, grosgrain, or organza ribbons are excellent choices. For small to medium bags, a ribbon width of 1.5 cm to 2.5 cm is proportionate and easy to tie.
- Sharp Scissors: Use dedicated paper scissors or a rotary paper cutter to ensure clean, straight edges without fraying the paper or ribbon.
- Double-Sided Tape: Opt for high-quality, tissue-backed double-sided tape or clear acrylic adhesive dots. Avoid standard single-sided shiny plastic tape, as visible tape lines detract from the professional finish.
Safety and Material Verification When preparing materials for a children’s birthday party, ensure that any scissors, paper cutters, or adhesive dispensers are kept out of reach of young children if they are assisting you. Before applying adhesive to your chosen wrapping paper, perform a quick compatibility check. Cut a small scrap of the paper and apply a piece of double-sided tape to it. Press it down firmly, then gently try to peel it back. This test verifies whether the adhesive is strong enough to hold the paper’s fibers together without causing the paper to warp, bubble, or lift the ink from the printed design.
Step-by-Step Guide to Wrapping the Goodie Bag
Covering a plain paper bag with wrapping paper requires a systematic approach to ensure the paper hugs the bag’s contours tightly without causing the structural base to collapse. Follow these sequential steps to achieve a seamless wrap.

Measuring and Cutting the Wrapping Paper
To prevent excess bulk or exposed patches of the plain bag, precise measurements are crucial. Lay your empty goodie bag completely flat on a clean, hard work surface.
To determine the correct width of the paper, wrap the paper loosely around the entire circumference of the flat bag. The paper must cover the front panel, the back panel, and both side gussets entirely, with an additional 2 to 3 cm of overlap to create a secure vertical seam. If you prefer a mathematical approach, use this formula:
Paper Width = (Bag Front Width 2) + (Bag Side Depth 2) + 3 cm
To calculate the required height of the paper, measure the height of the bag. You will need to allow enough excess paper at both the top and the bottom. The bottom excess should be equal to approximately three-quarters of the bag’s base depth, ensuring the flaps can overlap fully when folded. The top excess should be roughly 4 to 5 cm, allowing you to fold the paper inward over the top rim of the bag to create a reinforced, clean edge.
Once your measurements are marked lightly on the back of the paper with a pencil, use sharp scissors or a paper cutter to make your cuts. If your wrapping paper has a grid pattern printed on the reverse side, use these lines to guide your blades for a perfectly straight edge. Keep the lower blade of your scissors flat against the table surface to maintain stability and prevent jagged cuts.
Wrapping and Securing the Paper
With your paper cut to size, place it face down on your work surface so the patterned side is against the table. Position the flat goodie bag in the center of the paper, aligning it so the top and bottom excess margins are equal.
Bring one vertical edge of the paper over the back of the bag, pulling it taut. Fold the opposite vertical edge over to meet it, creating a neat overlap. It is best to position this seam along one of the side gussets or near the edge of the back panel so the front of your goodie bag remains completely smooth and uninterrupted.
Maintain consistent tension as you wrap the paper. If you pull too tightly, you risk crushing the paper bag underneath; if you wrap too loosely, the paper will sag and wrinkle. Once the paper is aligned perfectly, apply a continuous strip of double-sided tape along the entire length of the overlapping edge. Press down firmly from top to bottom with your fingers to secure the seam, ensuring an invisible, flush finish.
Folding the Edges for a Clean Finish
The top and bottom edges of the bag require a precise folding technique to mimic the crisp, clean corners of a professionally wrapped gift box.
Start with the bottom of the bag. With the bag lying flat, push the side flaps of the excess paper inward. This action will naturally create two neat, triangular flaps at the top and bottom of the base. Crease these side folds sharply using your thumbnail or a bone folder. Next, fold the top triangular flap down flat against the bag’s base. Apply a strip of double-sided tape to the inner edge of the bottom triangular flap, fold it upward tightly over the top flap, and press firmly to seal the bottom of the bag.
For the top opening, stand the bag upright and gently open it to its full shape. Fold the excess paper at the top rim inward, tucking it down into the interior of the bag. This creates a smooth, double-thick border around the opening, which prevents the paper from tearing when guests reach inside. If your plain bag has pre-existing ribbon or rope handles, use a utility knife to make tiny, precise slits in the folded-over paper directly where the handles are attached. Gently thread the handles through these slits before taping the inner fold flat against the inside walls of the bag.
Adding Ribbon and Decorative Touches
Once the paper casing is secure, adding a high-quality ribbon provides both structural reinforcement and a beautiful visual accent. The ribbon can be used to cinch the top of the bag closed or decorate the handles.
To determine the correct length of ribbon, measure the width of your bag and multiply it by three. This provides ample length to wrap around the bag or thread through the handles while leaving enough excess to tie a full, symmetrical bow with elegant tails. Cut the ribbon ends at a clean 45-degree angle using sharp scissors; this diagonal cut prevents the woven fabric from fraying over time.
If your goodie bag has handles, loop the ribbon through the base of the handles where they meet the paper rim. Tie a simple, tight knot first to anchor the ribbon, then form a classic bow. Pull the loops gently to adjust their size, ensuring they are symmetrical and proportionate to the overall scale of the bag. If you are wrapping a bag without handles, pinch the top opening closed, wrap the ribbon around the neck of the bag, and tie the bow in the center of the front panel.
If the ribbon tails curl awkwardly or block the opening of the bag, you can secure them in place. Apply a tiny dot of double-sided tape or a small glue dot to the underside of the ribbon tail and press it gently against the wrapped paper. To elevate the presentation further, slide a personalized name card or a themed gift tag onto the ribbon before tying the final bow. Ensure the decorative tag is lightweight so it does not pull the bow downward or distort the shape of the bag.
Pro Tips for a Polished and Professional Look
Achieving a flawless finish requires attention to detail and a few professional techniques to handle common wrapping challenges.
- Scoring Stiff Paper: If you are using thick, textured, or metallic wrapping paper that resists folding, do not force the creases. Forcing can cause the paper fibers to crack, leaving unsightly white lines. Instead, place a metal ruler along your fold line and gently run a bone folder or the blunt back of a butter knife along the line to score it before folding.
- Hiding Adhesives: Never allow tape to show on the exterior of the bag. Always place double-sided tape strictly on the underside of overlapping seams and inside the folded flaps.
- Reinforcing for Heavy Treats: If your birthday goodie bags will be filled with heavier items like glass jars of jam, heavy toys, or dense candies, the paper bottom can sag or tear. To prevent this, cut a piece of lightweight cardboard to match the dimensions of the bag's bottom and slide it inside the bag before filling. Additionally, reinforce the outer bottom seam with an extra strip of high-tack double-sided tape.
- Managing Air Bubbles: When smoothing the wrapping paper over the flat surfaces of the bag, always work from the center of the panel outward to the edges. This motion pushes out any trapped air bubbles that can cause the paper to look loose or warped.
- Accounting for Local Humidity: In humid climates like Singapore, paper can absorb moisture from the air, causing it to lose its crispness and making adhesives less effective over time. To preserve your hard work, wrap your goodie bags in an air-conditioned room and store the finished bags in a cool, dry place inside a sealed plastic container until the day of the birthday party.
Frequently Asked Questions (FAQ)
What type of wrapping paper works best for goodie bags?
Medium-weight kraft paper or standard-quality wrapping paper (around 70 to 90 gsm) works best. Very thin, glossy paper tends to tear easily at the sharp corners of the inner bag, while heavy cardstock or thick metallic paper is too rigid to crease neatly around the flexible edges of a goodie bag.
How do I keep the ribbon from slipping on the handles?
To prevent the ribbon from sliding, tie it securely around the structural base of the handles rather than higher up on the loops. For extra security, apply a tiny dot of non-toxic craft glue or a small piece of double-sided tape directly under the knot to hold it firmly in place against the paper without damaging the ribbon fabric.

Community discussion
Share your experience or ask a question. Comments are reviewed before publication.