
Selecting the correct bubble mailer bag size is a balancing act between product protection and shipping efficiency. If the mailer is too small, the seams can burst during transit, leaving your items exposed to damage or loss. If it is too large, your products will slide around inside, and you may end up paying unnecessary dimensional weight fees to your courier.
To find the ideal fit, you must account for the physical thickness of your product, the space occupied by the internal bubble lining, and the sealing flap. By taking precise measurements and applying a simple sizing formula, you can confidently select a mailer that keeps your items secure and your shipping costs optimized.
The Quick Formula for Sizing Bubble Mailers
To quickly estimate the required size of a bubble mailer bag, you can use a straightforward formula based on your product’s dimensions. The minimum inner dimensions of your mailer must accommodate not just the flat width and length of the item, but also its depth.
Products mentioned in this guide
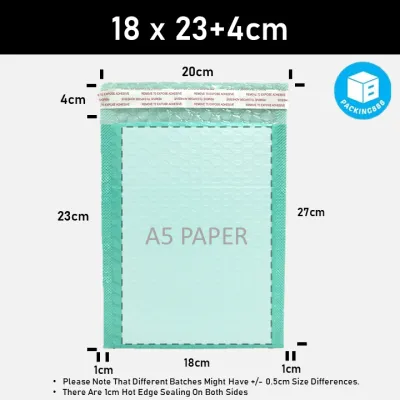
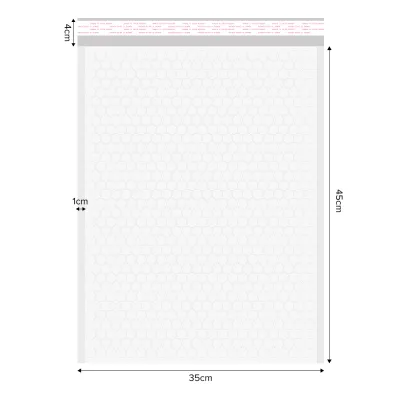
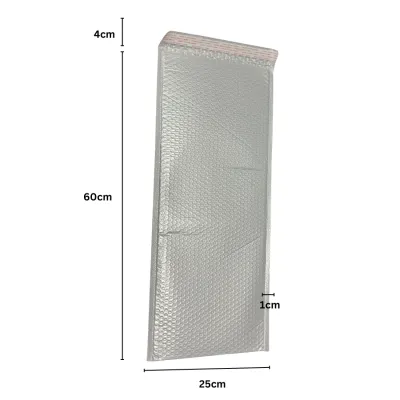
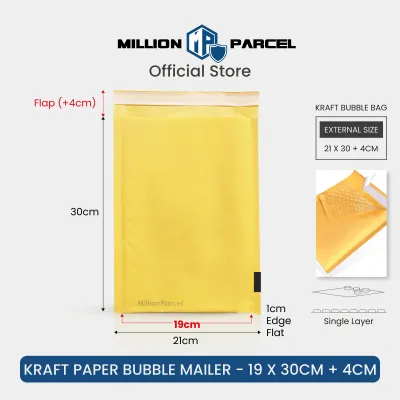
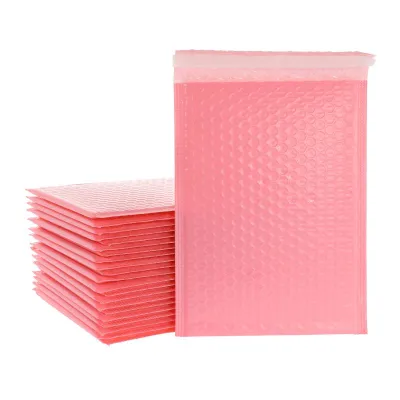
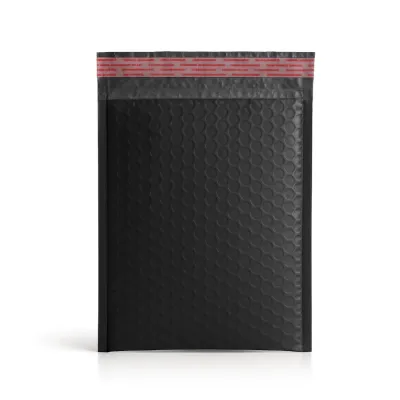
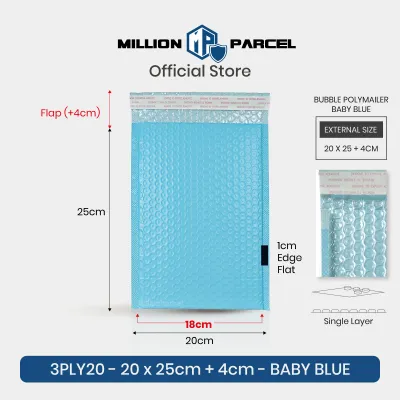
Prices are valid at publication and may change. Please refer to the product page for the latest price.
The basic calculation is:
- Minimum Inner Width = Product Width + Product Thickness + 15 mm (Clearance)
- Minimum Inner Length = Product Length + Product Thickness + 15 mm (Clearance)
When your calculated dimensions fall between two standard mailer sizes, always round up to the next available size. This extra margin prevents seam stress and ensures you do not have to force the item into the opening. Always verify the manufacturer’s listed usable inner space rather than relying on the overall outer dimensions, as the protective bubble lining significantly reduces the actual room inside.
Decoding Bubble Mailer Dimensions
One of the most common mistakes when purchasing packaging materials is confusing a mailer’s outer dimensions with its inner dimensions. Manufacturers almost always print the outer dimensions on the box or product listing, but these numbers do not represent the space available for your product.

The outer measurements span from the very outer edges of the paper or plastic film, including the welded side seams and the bottom fold. These side seams typically consume 10 mm to 15 mm of width on each side. Additionally, the internal bubble lining itself takes up physical volume, further reducing the usable width and length.
To find the true capacity, you must consult the manufacturer’s specification sheet for the “usable” or “inner” dimensions. A mailer labeled with outer dimensions of 150 mm by 200 mm will never fit a flat product of those exact same measurements. The opening will be too narrow, and the internal bubble layer will restrict the item from sliding to the bottom.
Measuring Your Product Accurately
Before you can choose a bubble mailer bag, you need precise measurements of the items you plan to ship. Using a standard ruler or a digital caliper, measure the three primary dimensions of your product: length, width, and thickness.
For flat items like notebooks, art prints, or sticker sheets, measuring is straightforward. However, if your product has an irregular shape—such as a cosmetic bottle, a piece of handmade jewelry, or a molded plastic tool—you must measure the widest, tallest, and thickest points. Treat the item as if it were enclosed in a rigid rectangular box to ensure the mailer can close over its bulkiest sections.
If you frequently ship multiple items together, such as a set of three notebooks or a bundle of stationery accessories, do not measure them individually. Instead, stack the items exactly as they will be packaged and measure the combined stack’s maximum length, width, and thickness. This combined measurement serves as your single product dimension for the sizing formula.
It is also important to consider the material properties of your product. Rigid items, such as hardback books or acrylic cases, have no flexibility and require a strict clearance margin to slide into the mailer without tearing the paper or plastic. Flexible items, like small textiles, socks, or soft accessories, can compress slightly to conform to the shape of the mailer, allowing for a slightly more forgiving fit.
Calculating the Final Mailer Size
When a flat bubble mailer bag is filled, the front and back panels are pulled together to wrap around the three-dimensional object. This displacement consumes both the width and the length of the mailer, meaning a thick item requires a significantly larger bag than a flat item of the same face dimensions.
To calculate the final size, you must factor in this girth allowance. For example, if you are shipping a book that is 150 mm wide, 200 mm long, and 25 mm thick, the thickness will pull the mailer’s sides inward. Adding the thickness to both the width and length ensures the mailer can expand comfortably around the book.
You must also account for the sealing flap. The self-sealing adhesive strip needs to fold over flat against the back of the mailer to create a secure, tamper-evident seal. If the product is too long or too thick, it will pull the opening wide, preventing the flap from reaching the adhesive area or causing the flap to seal at an angle, which compromises the package’s water resistance.
Use this simple sizing checklist before ordering your packaging:
- Measure: Note the maximum length, width, and thickness of your item (or combined bundle).
- Calculate: Add the thickness and a 15 mm safety margin to both the width and length.
- Compare: Match these numbers against the manufacturer's listed inner dimensions.
- Select: Choose the standard mailer size that meets or slightly exceeds your calculated requirements.
Optimizing Protection and Shipping Costs
Selecting the right bubble mailer bag size is not just about physical fit; it directly impacts your business’s bottom line. Courier services, including local postal networks in Singapore, often use dimensional weight pricing to calculate shipping fees. This means you are charged based on the physical space your package occupies in the delivery vehicle, rather than just its actual weight.
Using an oversized mailer can easily push your package into a higher pricing bracket, costing you extra dollars per shipment. For example, keeping your package thickness under local slot-delivery limits (often 20 mm or 30 mm) allows you to utilize cheaper trackable mail services rather than expensive parcel rates, saving you up to S$2 or S$3 per package on local postage rates.
In addition to dimensions, the material of the bubble mailer bag affects your shipping costs. Kraft paper mailers offer excellent rigidity but add more weight to the package. Poly bubble mailers, made from lightweight plastic, are highly water-resistant and add virtually zero weight to your shipment. When trying to stay under strict weight limits for local postal tiers, choosing a lighter poly mailer can prevent your package from crossing into a more expensive weight bracket.
Conversely, trying to save money by squeezing products into an undersized mailer carries severe risks. Overstuffed mailers put immense pressure on the welded side seams, making them highly susceptible to bursting when stacked under heavier boxes in transit. Furthermore, stretching the mailer tight flattens the internal bubbles, destroying the cushioning effect and leaving your product vulnerable to impact damage.
An oversized mailer also allows the product to slide around freely. This internal movement creates friction, which can scuff book covers, scratch delicate surfaces, or cause heavy items to punch through the corners of the mailer. Choosing a snug, properly sized mailer protects your product and keeps your shipping rates as low as possible.
Frequently Asked Questions (FAQ)
Can I use a bubble mailer for fragile or sharp items?
Standard bubble mailers are designed for semi-fragile items that only require light impact protection, such as books, documents, or durable plastic goods. They do not provide structural rigidity. For highly fragile items like glassware, ceramics, or delicate electronics, a bubble mailer alone is not safe. Additionally, sharp edges or pointed corners on metal stationery, tools, or acrylic stands can easily puncture the plastic bubble lining and tear the outer paper during sorting. If your item has sharp edges, wrap them in protective cardboard or foam first, or switch to a rigid corrugated box.
Do I need to add extra padding inside a bubble mailer?
If your product fits snugly and is not highly delicate, the built-in bubble lining provides sufficient protection. You can verify this by performing a gentle shake test: place the item inside, temporarily fold the flap, and shake the mailer. If you feel the item shifting significantly, add a layer of tissue paper, recycled paper void fill, or a small sheet of bubble wrap to fill the void. However, avoid overstuffing the mailer. Overstuffing puts continuous tension on the self-sealing adhesive strip and the side seams, which can cause the package to burst open under pressure during transit.

Community discussion
Share your experience or ask a question. Comments are reviewed before publication.