
Making your own custom party bags from wrapping paper and ribbons is an excellent way to add a personal, creative touch to any celebration while tailoring the size and design to your exact needs. By folding a single sheet of wrapping paper and securing it with adhesive, you can construct a sturdy, flat-bottomed gift bag that rivals store-bought options. This DIY approach allows you to match your party theme perfectly, repurpose leftover gift wrap, and control the exact dimensions of your packaging. Whether you are preparing favors for a birthday party, a wedding, or a festive holiday gathering, mastering this simple folding technique ensures you always have beautiful, custom packaging on hand.
Gather Your Materials and Tools
Before starting your crafting session, assembling the right materials ensures a smooth and efficient process. The foundation of your party bag is the wrapping paper itself. For a bag that holds its shape and resists tearing, select a medium-to-heavyweight paper. Standard thin, glossy papers tend to crease unpredictably and tear easily under the weight of party favors, whereas thick matte paper, kraft wrapping paper, or textured specialty sheets offer excellent structural integrity. Pay attention to pattern alignment as well; non-directional patterns or small, repeating motifs are easier to work with because you do not have to worry about the design appearing upside down on one side of the finished bag.
The handles and decorative accents require carefully chosen ribbons that complement your paper design. Satin, grosgrain, organza, or cotton ribbons are all excellent choices. Grosgrain ribbon offers a ribbed texture that holds knots exceptionally well, while satin ribbon provides a smooth, elegant sheen that elevates the overall look of the bag. Ensure the ribbon width matches the scale of your bag; a width of 1 to 1.5 centimeters is generally ideal for small to medium party bags, providing comfortable handling without overpowering the design.
Products mentioned in this guide
![[SG Stock] 10 Pcs Kraft Paper Bags with Handles Party Bags Birthday Bags Goodie Bags Colour Paper Bags Gift Bags](https://img.lazcdn.com/g/p/125c8522e89dfb6d8f20af7b66e96f8b.jpg_400x400q80.jpg_.webp)

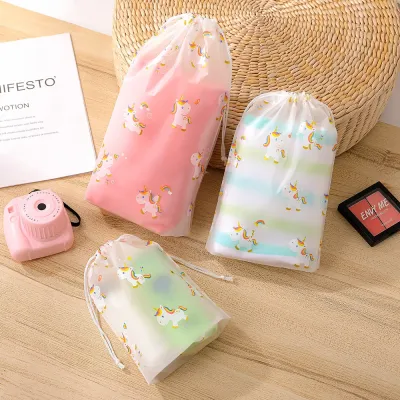
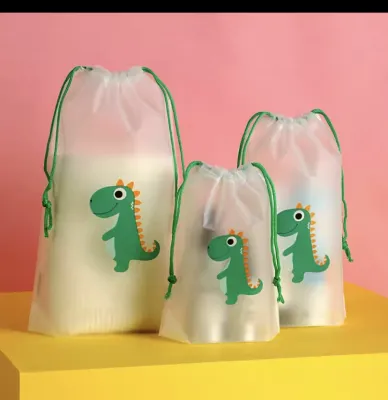
![✨💖 [BUNDLE 8 PCS] A4 Size Children Drawstring Bag 💖 Big Cartoon Party Goodie Bag 💖 Frozen Hello Kitty Mario Roblox Spiderman Avengers LOL Shark Unicorn Dinosaur Christmas Bag 💖 Backpack Light Weight Bag 💖 Party Favors Gifts 💖](https://img.lazcdn.com/g/p/3d7ac4b7da6c1571182218b5c3204b72.jpg_400x400q80.jpg_.webp)
Prices are valid at publication and may change. Please refer to the product page for the latest price.
Having the correct tools on hand makes the measuring and assembly steps precise and enjoyable. You will need a pair of sharp scissors or a craft knife for clean edges, a metal ruler to measure dimensions and help score crisp fold lines, and a pencil for light marking. For securing the seams, high-quality double-sided tape is highly recommended over liquid craft glue, as it provides an instant, strong bond without warping or wrinkling the paper. Finally, a standard single-hole punch is essential for creating clean, uniform holes for your ribbon handles.
Cut and Fold the Wrapping Paper Base
To begin constructing the bag, you must first measure and cut your wrapping paper to the correct dimensions. A helpful formula for determining your paper size is to decide on the desired height, width, and depth of your finished bag. The width of your paper sheet should equal twice the desired bag width, plus twice the desired depth, plus an extra 3 centimeters for an overlap seam. The height of the paper sheet should equal the desired bag height, plus the depth of the bag (for the bottom folds), plus an extra 3 to 4 centimeters for a top fold reinforcement. For a standard medium favor bag, a paper sheet measuring 40 centimeters wide by 30 centimeters tall is an excellent starting point.

Lay your cut paper face down on a clean, flat work surface so the plain reverse side faces up. Fold the top edge down by about 3 centimeters to create a neat, reinforced collar along what will become the mouth of the bag. Crease this fold sharply using your fingernail or a bone folder. Next, fold the left and right sides of the paper inward so they meet and overlap by about 2 centimeters in the center. Apply a strip of double-sided tape along this overlap seam, pressing firmly to seal the paper into a continuous sleeve or cylinder. Ensure the seam is perfectly straight to keep the bag aligned.
With the seam centered on the back of your paper sleeve, you can now form the structured flat bottom of the bag. Fold the bottom edge of the sleeve upward by a distance that matches your desired bag depth—for example, about 8 centimeters. Press this fold flat. Open this folded bottom section up and press the left and right outer corners inward to form two neat, flat triangles on either side. This action will create two long flaps, one at the top and one at the bottom of this opened section.
To secure the bottom of the bag, fold the top flap downward slightly past the center line. Next, fold the bottom flap upward so it overlaps the top flap by about 1.5 centimeters. Apply double-sided tape generously to these overlapping flaps, ensuring you do not tape the bottom to the inside of the bag itself. Press down firmly to secure the bottom base. To create the side gussets, gently push the sides of the bag inward, creasing them down the center to form a classic accordion fold that allows the bag to expand and collapse neatly.
Attach and Reinforce the Ribbon Handles
Once the main body of your party bag is assembled, you can prepare and attach the ribbon handles. Start by cutting two equal lengths of ribbon, typically between 25 and 30 centimeters each, depending on how long you want the handles to be. This length allows enough room for comfortable carrying while leaving sufficient material inside the bag to secure the ends. If you are using synthetic ribbons like satin or polyester, you can carefully pass the cut ends near a small flame to seal them and prevent fraying, or simply cut them at a sharp angle.
To ensure the handles are symmetrical, use your ruler to mark two hole positions on the front and back panels of the bag, about 2 centimeters down from the top reinforced collar and spaced evenly from the side edges. Use your single-hole punch to create clean holes at these marked spots. Because wrapping paper can tear under tension, reinforcing these holes is a crucial step. Cut small squares of leftover wrapping paper or thin cardstock, apply double-sided tape to them, and adhere them to the inside of the bag directly over the punched areas before punching through the holes a second time. Alternatively, you can apply a neat strip of clear tape on the inside surface before punching.
Thread one end of the ribbon through the front-left hole from the outside to the inside of the bag. Tie a secure overhand knot on the inside, pulling it tight so it cannot slip back through the hole. Repeat this process with the other end of the same ribbon through the front-right hole, ensuring the handle is not twisted. Repeat the entire sequence on the back panel with the second piece of ribbon. Adjust the knot positions if necessary to ensure both handles are perfectly symmetrical and hang at the exact same height.
Customize and Decorate the Finished Bags
With the structural work complete, you can unleash your creativity to customize the bags to match your specific event theme. Leftover scraps of wrapping paper can be repurposed into coordinating gift tags. Cut these scraps into classic luggage-tag shapes, punch a small hole at one end, and write the recipient’s name using a calligraphy pen or metallic marker. You can attach these tags directly to one of the ribbon handles before tying the final knots, creating a seamless and professional presentation.
Layering different textures is another highly effective way to elevate the look of your handmade bags. Consider tying a secondary bow made of thin jute twine, metallic thread, or a contrasting narrow ribbon around the base of one of the main handles. For a polished interior presentation, place a sheet of coordinating tissue paper inside the bag, allowing the edges to peek out of the top in soft folds. This not only hides the internal knots and seams but also adds an element of anticipation for the recipient opening the gift.
You can easily adapt these decorative elements to suit various occasions throughout the year. For a rustic wedding, use brown kraft wrapping paper paired with white lace ribbon and a sprig of dried lavender. For a child’s birthday party, choose bright, primary-colored paper and add playful stickers or custom stamped designs featuring the birthday child’s initials. For festive holiday gatherings, deep red or forest green paper paired with shimmering gold metallic ribbon instantly creates a warm, celebratory feel that guests will appreciate.
Store and Use Your Handmade Bags Safely
While handmade wrapping paper bags are surprisingly sturdy, it is important to recognize their physical limitations compared to heavy-duty commercial options. Wrapping paper is generally thinner than the thick kraft paper used for commercial shopping bags, meaning your custom creations are best suited for lightweight favors, small treats, stationery, or soft items. Avoid filling them with heavy glass jars, sharp-edged toys, or dense liquids that could stress the seams or puncture the paper.
If you are preparing for a large event, you can easily make these bags several weeks in advance and store them safely until the big day. To prevent accidental creasing, fading, or moisture damage, collapse the bags flat along their side gussets and stack them neatly inside a clean, dry plastic storage bin or a sturdy cardboard box. Keep the storage container in a cool, dark place away from direct sunlight, which can cause certain wrapping paper inks to fade over time.
Before loading your completed bags with party favors, perform a quick quality check on each one. Gently pull on the ribbon handles to ensure the knots are secure and the paper around the holes shows no signs of tearing. Inspect the bottom seams to verify that the double-sided tape has bonded completely and is not peeling at the corners. Taking these simple precautions ensures that your beautiful, handmade party bags perform flawlessly and delight your guests from the moment they arrive.
Frequently Asked Questions (FAQ)
What type of wrapping paper works best for making bags?
The best wrapping paper for making sturdy party bags is a medium-to-heavyweight matte paper or kraft-based wrapping paper. These materials offer excellent structural integrity, fold cleanly without cracking, and resist tearing when handled. Avoid using very thin, cheap glossy papers, as they tend to crease unpredictably, show adhesive lines easily, and tear under minimal weight. If you are unsure about a paper’s suitability, perform a quick test by folding a small scrap; if it feels brittle or tears easily along the crease, it is best reserved for standard gift wrapping rather than bag construction.
How can I prevent the ribbon handles from tearing the paper?
To prevent ribbon handles from tearing through the wrapping paper, you must reinforce the area around the punched holes. The most effective method is to adhere a small strip of thin cardboard, cardstock, or heavy kraft paper to the inside collar of the bag before punching the holes. This distributes the weight of the bag’s contents across a stronger material. Alternatively, you can apply a layer of clear packing tape or heavy-duty double-sided tape to the inside surface of the paper before punching, or use metal eyelets and an eyelet setting tool for a highly durable, professional finish.
Can I make these bags in different sizes?
Yes, you can easily scale this tutorial to create bags of almost any size, provided you maintain the correct mathematical proportions. To adjust the dimensions, remember that the width of your paper sheet must equal twice the desired bag width plus twice the desired depth, plus a small overlap seam allowance of about 3 centimeters. The height of your paper sheet must equal the desired bag height plus the depth of the bag, plus a few centimeters for the top fold reinforcement. For very large bags, ensure you use exceptionally thick paper or cardstock to support the increased volume and weight of the contents.

Community discussion
Share your experience or ask a question. Comments are reviewed before publication.