
Creating a handmade Teachers’ Day gift (教师节礼物) is a deeply meaningful way to express gratitude to the educators who dedicate their time, patience, and energy to guiding students. While store-bought cards are readily available, a DIY greeting card carries a personal touch that reflects genuine effort and appreciation. By using basic stationery items found at home or in local school supply shops, anyone can craft a beautiful, durable card that stands out. The process requires no advanced artistic training—only a few careful steps, some patience, and a sincere message.
Designing and assembling your own card allows you to customize every detail, from the color scheme to the layout, ensuring it matches your teacher’s personality. Whether you want to create a clean, minimalist design or a vibrant, layered masterpiece, understanding the fundamentals of paper crafting will help you achieve a polished, professional result. This guide walks through the essential materials, design planning, assembly techniques, and finishing touches needed to create a memorable keepsake.
Gather Your Basic Craft Supplies
Before beginning your project, gathering the right materials ensures a smooth crafting process and prevents interruptions. The foundation of any high-quality card is the paper. Standard printer paper, which typically weighs between 70 GSM and 80 GSM, is too thin to support decorations and will easily warp or wrinkle when adhesive or ink is applied. Instead, look for cardstock or heavy paper labeled between 200 GSM and 300 GSM. This thickness provides the necessary structural integrity to stand upright on a desk without sagging. Clean, recycled cardboard from packaging can also serve as an excellent, eco-friendly alternative for a rustic card base.
Products mentioned in this guide
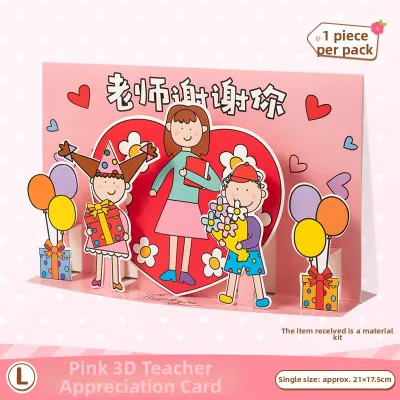
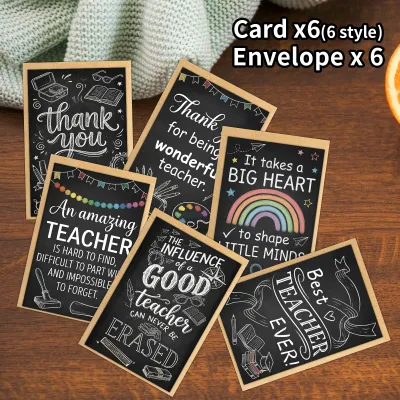
![[MIN 3 CARDS] 🇸🇬SG Punny Teacher Appreciation Card Special Editions for Graduation Greeting Thank You Heartfelt Support Message Card](https://img.lazcdn.com/g/ff/kf/S46b8562713de4564b8cea4c9945a655fF.jpg_400x400q80.jpg_.webp)
Prices are valid at publication and may change. Please refer to the product page for the latest price.
For cutting and shaping, a reliable pair of scissors is essential for straight lines and broad curves. If your design includes intricate cutouts or windows, a sharp craft knife paired with a metal ruler will offer the precision you need. When working with utility knives or craft blades, always place a self-healing cutting mat underneath your work to protect your table surface. Keep your fingers well behind the cutting edge and pull the blade toward you in a slow, controlled motion to ensure safety.
Adhesives play a critical role in the longevity and neatness of your card. A standard glue stick is highly suitable for flat paper layers because it contains very little moisture, minimizing the risk of paper warping. For heavier embellishments or precise edges, double-sided craft tape provides an instant, dry bond that keeps your work clean. Liquid craft glue can be used for small details, but it must be applied sparingly with a toothpick or small brush to prevent bubbling and bleeding through the paper.
Finally, select your decorating mediums. Water-based markers, colored pencils, and gel pens are excellent choices for adding color and text. To ensure your writing instruments perform well on your chosen cardstock, always conduct a quick trial on a scrap piece of the same paper. This allows you to observe the drying speed, check for ink bleeding, and verify if the ink smudges when lightly rubbed. You can also gather decorative elements like patterned washi tape, stickers, or leftover wrapping paper to add texture and visual interest.
Choose a Card Design and Layout
Selecting a card structure that matches your skill level and available materials is key to a successful project. A standard bi-fold card is highly reliable and classic, offering a clean front cover and a protected interior space for your personal message. If you want to add a bit of dimension, a layered design is an accessible option. This involves cutting colored paper panels slightly smaller than the card base and layering them on the front cover to create a framed, three-dimensional border effect.

Deciding on the orientation of your card—either portrait (vertical) or landscape (horizontal)—depends on your planned design and message length. A portrait layout is excellent for tall visual elements, such as a drawing of a potted plant, a stack of books, or a single elegant flower. It also naturally accommodates longer, vertically structured written messages. A landscape layout works beautifully for wide, panoramic drawings, classroom scenes, or bold, horizontal hand-lettering across the front cover.
Before making any permanent cuts or folds, always sketch a rough draft of your design on a scrap piece of standard paper. Fold the scrap paper to the exact dimensions of your final card and use a pencil to map out the placement of your headings, illustrations, and written text. This planning stage helps you balance the visual elements, ensures you do not run out of space for your teacher’s name, and prevents you from placing important decorations too close to the fold line or edges.
Step-by-Step Guide to Assembling the Card
To achieve a clean, professional fold without cracking the paper fibers of your cardstock, you must score the paper before folding it. Start by measuring the exact midpoint of your cardstock sheet using a ruler, making a tiny, light pencil mark at the top and bottom edges. Align your metal ruler along these two marks. Using a bone folder, or the blunt back edge of a butter knife, press firmly along the ruler’s edge to create a straight, clean indentation in the paper. Fold the cardstock along this scored line, smoothing the crease with the flat side of your tool to create a sharp, crisp edge.
Next, prepare your decorative layers. If you are adding a colored paper panel to the front of your card, subtract approximately 1 centimeter from both the width and height of your card base dimensions. This measurement leaves a neat 5-millimeter border of the base card visible all around the panel, framing your design beautifully. Use your scissors or a craft knife and ruler to cut these panels to size, ensuring all edges are perfectly straight and square.
When applying adhesive to your decorative panels, focus on the outer edges rather than the center. If you are using a glue stick, apply a thin, even layer along the perimeter of the panel’s backside. If you prefer liquid glue, apply tiny dots along the edges and spread them flat with a scrap piece of paper. Carefully align the panel over your card base, lower it gently, and press down firmly from the center outward to smooth out any trapped air bubbles and prevent warping.
If your design includes a simple pop-up element inside the card, prepare an insert sheet that is slightly smaller than your card base. Fold the insert sheet in half, and make two parallel cuts across the folded crease to create a tab. Push this tab inward so that it stands upright when the card is opened. You can then glue your paper illustration—such as a small apple, a star, or a book cutout—onto the front of this tab. Finally, glue the outer back of the insert sheet into the main card base, taking care not to get adhesive on the pop-up tab itself.
Add Personalized Messages and Decorations
A truly memorable Teachers’ Day gift (教师节礼物) relies on a thoughtful, personalized message. When drafting your note, focus on specific memories, lessons, or moments where your teacher offered encouragement or guidance. Expressing how their teaching style impacted your learning or thanking them for their patience makes the card incredibly unique. Write your message on a separate piece of scrap paper first to check spelling, grammar, and spacing before writing on the final card.
For the lettering on the front cover and inside, neatness is essential. If you are confident in your handwriting, use a pencil to draw very light guide lines on the card to keep your text straight. Write your message in pencil first, then trace over the letters with a fine-liner pen or gel pen. Allow the ink to dry completely before gently erasing the pencil lines with a soft vinyl eraser. If you prefer not to hand-write the main headings, you can type them on a computer using a clean font, print them on high-quality paper, cut them into neat banner shapes, and glue them onto the card.
When arranging your decorations, aim for a balanced visual hierarchy. Place your main illustration or heading first to establish a clear focal point. Once the main element is secured, add smaller embellishments like washi tape borders, small hand-drawn stars, or stickers around it. Be careful not to overcrowd the design; leaving some empty space around your text and drawings makes the card easier to read and more visually appealing.
Finishing Touches and Presentation
Once your card is fully assembled and decorated, take a few minutes to inspect your work for any minor imperfections. Look for stray glue strings, wet adhesive residue, or visible pencil marks. You can gently rub away dried glue residue with a clean fingertip or a dedicated adhesive eraser. Ensure all pencil guide lines are completely erased, taking care not to rub too hard and damage the paper surface or smudge the dried ink.
Allowing adequate drying time is crucial for preventing smudges and warping. Place your completed card flat on a clean surface under a light, flat weight—such as a heavy book—for at least 30 minutes. This pressure keeps the paper perfectly flat as the adhesive cures and ensures that any layers bonded with liquid glue do not curl at the corners. Make sure all ink from gel pens or markers is completely dry before handling or folding the card.
To protect your handmade card, present it in a matching envelope. A standard C6 envelope fits a quarter-fold A4 card perfectly. If your card is an unusual size, you can easily fold a custom envelope from a sheet of colored paper or wrapping paper. Place your card in the center of the paper, fold the side flaps inward to meet the edges of the card, fold the bottom flap up, and secure the overlapping seams with double-sided tape. Slide your card inside, fold the top flap down, and write your teacher’s name neatly on the front.
Frequently Asked Questions (FAQ)
What is the best paper weight for a DIY greeting card?
For a sturdy card base that stands upright without bending or sagging, cardstock with a weight between 200 GSM and 300 GSM is highly recommended. Standard printer paper, which is typically 70 GSM to 80 GSM, is too thin for a card base but works well for interior inserts, printed text banners, or delicate paper cutouts. Always check the packaging label of your paper pack to verify the GSM rating before starting your project.
How can I fix a mistake or tear on the card surface?
Minor mistakes or small tears do not mean you have to discard your work and start over. You can easily conceal a smudge or tear by gluing a decorative element, such as a paper flower, a star cutout, or a strip of patterned washi tape, directly over the blemish. If you make a spelling error in your main message, write or print the corrected sentence on a separate strip of paper, cut it into a neat banner shape, and layer it over the mistake to make it look like an intentional design choice.
Can I use digital tools to design parts of the handmade card?
Yes, combining digital design with physical assembly is an excellent way to achieve clean typography and precise graphics. You can design custom borders, illustrations, or typed messages on a computer, print them onto standard paper, and cut them out to glue onto your cardstock base. Always allow the printer ink to dry completely—especially if using an inkjet printer—before handling or applying glue, as moisture can cause the ink to bleed.

Community discussion
Share your experience or ask a question. Comments are reviewed before publication.