
Decorating a plain small paper gift bag with ribbons and wrapping paper is an excellent way to elevate your gift presentation. This approach allows you to customize packaging for any occasion, turning a simple, budget-friendly bag into a memorable part of the gift itself. By combining coordinated paper accents with structured ribbon techniques, you can achieve a polished, professional look that rivals high-end boutique packaging.
The key to success lies in selecting compatible materials, measuring accurately, and applying clean assembly techniques. Whether you are preparing for a festive holiday, a birthday, or a corporate event, mastering these simple styling methods ensures your packaging is both beautiful and structurally sound. This guide provides a step-by-step walkthrough to help you design, assemble, and finish decorated paper bags with ease.
Gather Your Materials and Tools
Before beginning, gathering the right supplies ensures a smooth workflow. The foundation is the base bag. Opt for a small paper gift bag made from sturdy kraft paper or cardstock, ideally with a paper weight of 120 gsm or higher. Bags with flat, stable bottoms and secure handles—such as twisted paper or inserted ribbon—provide the structural integrity to support additional decorative layers without sagging.
Products mentioned in this guide
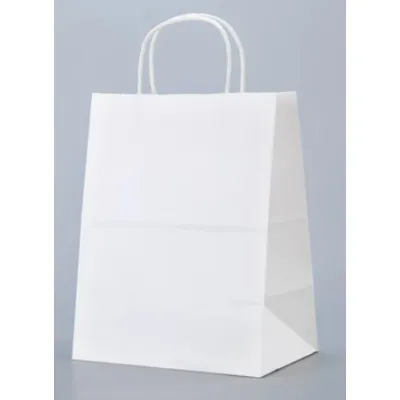
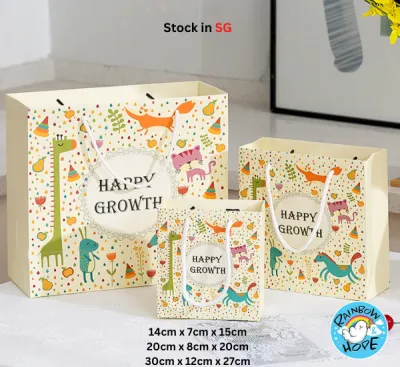
![[BestGreen] Kraft Paper Bag | Door Gift & Goodie Bag | Party & Present Packaging | Birthday Party](https://img.lazcdn.com/g/p/ddc507abca925f1120a731e5ee8a97e4.png_400x400q80.png_.webp)
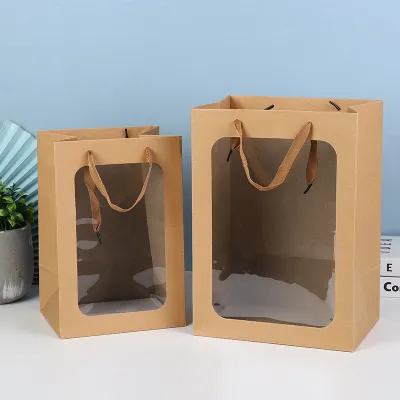

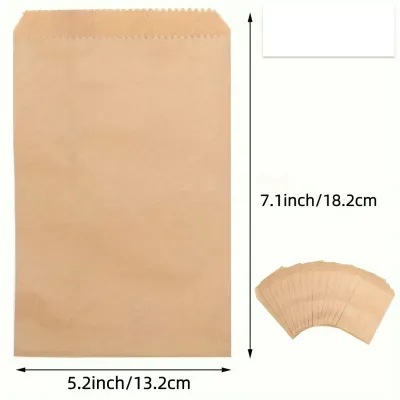
Prices are valid at publication and may change. Please refer to the product page for the latest price.
For paper accents, look for high-quality wrapping paper sheets or scraps. When decorating small bags, pattern scale is highly important. Choose designs with small, repeating motifs, delicate geometric patterns, or solid, textured finishes so the visual elements remain clear and proportional. Heavyweight, matte-finish wrapping papers are generally easier to work with and less prone to creasing than ultra-thin, metallic, or highly glossy varieties.
Your choice of ribbon defines the final style. Satin, grosgrain, and organza ribbons are excellent choices for adding texture and color contrast. For small bags, ribbon widths between 9mm and 15mm work beautifully, as they are easy to tie into neat bows without overwhelming the bag’s dimensions. Additionally, gather your essential tools: a self-healing cutting mat, a metal ruler, a sharp craft knife, precision scissors, and reliable adhesives such as double-sided tape or acid-free glue sticks.
Prepare the Bag and Wrapping Paper Accents
Proper preparation is the secret to a clean, professional finish. Begin by laying your small paper gift bag flat on a clean, hard surface. Measure the front panel of the bag carefully using your metal ruler, noting both the height and width. To create a visually appealing framed effect, plan your wrapping paper accent to be slightly smaller than the bag’s face, leaving a consistent border of approximately 5mm to 10mm around all four edges.

Once you have determined your dimensions, transfer these measurements to the back of your wrapping paper using a light pencil mark. For the straightest, cleanest edges, place the wrapping paper on a self-healing cutting mat, align your metal ruler with the pencil marks, and cut firmly with a sharp craft knife. While standard scissors can work, a craft knife prevents the paper from snagging or fraying along the cut lines, resulting in a much sharper silhouette.
You can experiment with different design layouts to suit the occasion. A single, centered rectangular panel is a classic choice that showcases a beautiful pattern. Alternatively, you can cut a wide horizontal band to wrap around the lower third of the bag, or design diagonal geometric panels for a modern, artistic look.
Before applying any adhesive, perform a dry-fit of all your cut paper pieces. Place the wrapping paper accents directly onto the flat bag to verify that the borders are even and the alignment is correct. This step allows you to make minor trimming adjustments before the paper is permanently bonded, saving you from wasting materials or ruining the base bag.
Attach Wrapping Paper Details for a Custom Look
Securing your wrapping paper accents smoothly requires a careful hand and the right adhesive technique. Liquid school glues should generally be avoided, as their high water content can easily saturate thin wrapping paper, leading to unsightly wrinkles, bubbles, and warping. Instead, opt for high-quality double-sided tape or a dry, acid-free glue stick, which provide strong adhesion without introducing moisture to the paper fibers.
If using double-sided tape, apply thin strips along the edges of the reverse side of your wrapping paper accent, ensuring it runs completely to the corners. Add a small cross of tape in the center to prevent the middle from bowing outward. For glue sticks, apply a thin, even layer across the entire back, paying close attention to the edges to prevent lifting.
To attach the paper, align the top edge of your accent piece with your visual guides on the bag. Gently lower the paper onto the bag’s surface, starting from the top and working your way down. Once the paper is in position, use a clean bone folder, a plastic scraper, or the side of your hand to smooth the paper firmly from the center outward to the edges. This outward motion pushes out any trapped air pockets, ensuring a perfectly flat, bubble-free bond.
If your design involves wrapping paper around the side gussets, you must handle the folds with care. Use your bone folder or a clean ruler to gently score the paper along the bag’s existing fold lines before adhering it. This allows the decorative paper to bend naturally with the bag’s structure, preventing the paper from cracking or tearing when the bag is opened or closed. If you notice any lifting edges after assembly, use a toothpick to slide a tiny amount of glue under the loose area and press down firmly for a few seconds.
Tie and Style Ribbons for a Polished Finish
Ribbons add movement, texture, and a sense of luxury to your decorated paper bag. There are several ways to incorporate ribbon depending on the bag’s handle style. If your bag has pre-drilled holes for rope or ribbon handles, you can thread your decorative ribbon directly through these holes, securing them with neat knots on the inside. Alternatively, for bags with fixed paper handles, you can tie a beautiful bow around the base of one handle, allowing the tails to drape elegantly down the front of the bag.
When tying bows for small bags, keeping the proportions balanced is essential. A massive bow can make a small bag look bottom-heavy or cluttered. Aim for a classic bow where the loops are roughly one-third the width of the bag, and the tails extend no further than the bottom edge of the bag. For a minimalist, contemporary look, consider tying a simple, tight square knot instead of a traditional bow, leaving short, neatly angled tails.
To give your ribbon ends a professional finish, always cut them at an angle or in a classic V-shape (chevron cut). The method you use to prevent the ends from fraying depends on the ribbon material. For synthetic ribbons like polyester satin or grosgrain, you can seal the edges using heat. For natural fibers like cotton or silk, a tiny dab of clear fabric sealant or clear craft glue along the cut edge will keep the threads intact.
Consider the visual weight of your ribbon in relation to your wrapping paper design. If your wrapping paper accent features a busy, colorful pattern, choose a solid-colored ribbon in a coordinating neutral or primary shade to anchor the design. Conversely, if your paper accent is a solid color or a subtle texture, you can use a patterned, metallic, or multi-layered ribbon combination to create an eye-catching focal point at the top of the bag.
Add Final Touches and Inspect Your Work
Once your paper accents are secured and your ribbons are tied, take a few moments to inspect your completed gift bag. Examine all the edges of the wrapping paper to ensure they are fully bonded to the bag surface. If you spot any sticky adhesive residue on the exterior of the bag, use a clean adhesive eraser or a slightly damp microfiber cloth to gently lift it away, taking care not to rub too hard and damage the paper.
Next, check the symmetry of your ribbon tails. If they appear uneven or too long, use ultra-sharp fabric shears to trim them to the desired length. If you want to add a personal touch, thread a small, lightweight gift tag onto the ribbon before tying the final knot. Keep the tag simple and proportional to the bag’s size so it does not drag the handles down or obscure your beautiful wrapping paper design.
Finally, consider the structural integrity of the bag’s base. If you plan to fill the bag with slightly heavier items, such as a small jar of jam or a ceramic ornament, the added weight can cause the paper bottom to sag. To prevent this, cut a piece of thick cardstock or chipboard to match the exact dimensions of the bag’s interior bottom. Slide this insert inside the bag to distribute the weight evenly, ensuring your beautifully decorated bag maintains its shape and stands upright proudly.
Frequently Asked Questions (FAQ)
Can I use double-sided tape instead of glue for paper accents?
Yes, double-sided tape is highly recommended for decorating small paper bags. It provides an instant, dry bond that eliminates the risk of paper warping, wrinkling, or adhesive bleed-through, which often happens with liquid glues. It is particularly effective on lightweight wrapping papers. However, if you are using heavily textured, handmade, or thick embossed papers, a high-tack craft glue stick or specialized paper adhesive may be necessary to grip the uneven surface. For best results, apply the tape as close to the outer edges of the paper accent as possible to prevent lifting.
How do I prevent thin ribbons from fraying at the ends?
Preventing fraying depends entirely on the ribbon material. For synthetic ribbons such as polyester satin, nylon, or grosgrain, you can seal the edges using heat. Carefully pass the cut edge of the ribbon near a small flame (such as a lighter or candle) for a fraction of a second; the heat will melt the synthetic fibers together to form a clean, sealed bead. Always perform this in a well-ventilated area away from flammable materials. For natural fiber ribbons like cotton, linen, or silk, heat will burn rather than melt the fibers. Instead, apply a very thin line of clear fabric sealant or clear craft glue along the cut edge, or cut the ribbon at a sharp 45-degree angle with ultra-sharp fabric shears to minimize fiber separation.
What is the best way to store decorated paper bags before gifting?
To keep your decorated bags looking pristine, store them flat in a cool, dry place away from direct sunlight, which can fade paper colors and degrade adhesives over time. In humid climates like Singapore, excess moisture can cause paper to warp or adhesives to lose their grip, so storing them in a sealed plastic container with a small silica gel packet is highly effective. If you have already tied dimensional bows or attached delicate tags, do not fold the bags completely flat. Instead, place a sheet of clean tissue paper inside the bag to help it maintain its shape, and store the bags upright in a sturdy box, leaving enough space between them so the ribbons are not crushed or creased.

Community discussion
Share your experience or ask a question. Comments are reviewed before publication.