
Transforming plain party bags into custom, eye-catching favor bags is an excellent way to elevate any celebration. By combining basic kraft or cardstock bags with wrapping paper and ribbons, you can create bespoke packaging that matches your event’s theme perfectly. This approach is both cost-effective and highly customizable, allowing you to control the textures, colors, and structural integrity of your final presentation.
Using wrapping paper and ribbons to decorate plain bags allows you to repurpose leftover materials while achieving a high-end, artisanal look. Whether you are preparing for a birthday party, a wedding, or a festive gathering, mastering a few simple wrapping and folding techniques will ensure your party bags look professionally crafted rather than hastily assembled.
Materials and Tools for Bag Decoration
Selecting the right materials is the first step toward a successful crafting project. The base bag’s material dictates how well adhesives will adhere to the surface. Plain kraft paper bags feature a porous, textured surface that bonds exceptionally well with almost all types of glue, including standard glue sticks and double-sided tape. Conversely, glossy cardstock bags have a slick, non-porous coating that can resist weaker adhesives, making high-tack double-sided tape or specialized craft glue necessary to prevent the wrapping paper from peeling away over time.
Products mentioned in this guide
![[SG Stock] 10 Pcs Kraft Paper Bags with Handles Party Bags Birthday Bags Goodie Bags Colour Paper Bags Gift Bags](https://img.lazcdn.com/g/p/125c8522e89dfb6d8f20af7b66e96f8b.jpg_400x400q80.jpg_.webp)


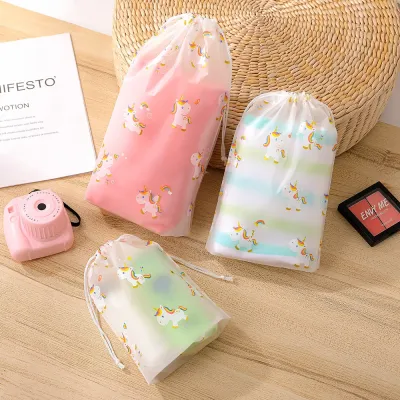
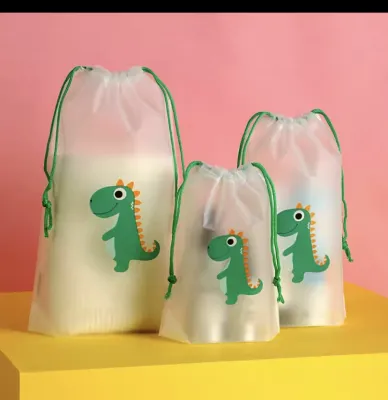
![✨💖 [BUNDLE 8 PCS] A4 Size Children Drawstring Bag 💖 Big Cartoon Party Goodie Bag 💖 Frozen Hello Kitty Mario Roblox Spiderman Avengers LOL Shark Unicorn Dinosaur Christmas Bag 💖 Backpack Light Weight Bag 💖 Party Favors Gifts 💖](https://img.lazcdn.com/g/p/3d7ac4b7da6c1571182218b5c3204b72.jpg_400x400q80.jpg_.webp)
Prices are valid at publication and may change. Please refer to the product page for the latest price.
When choosing your decorative elements, proportion is key to maintaining structural balance. Lightweight wrapping paper (around 70 to 90 gsm) is highly flexible, wraps smoothly around corners, and resists cracking along fold lines. Heavyweight paper (over 100 gsm) offers a premium, sturdy feel but requires firm creasing and stronger adhesives to stay secure. Similarly, match the ribbon width to the bag’s dimensions; a delicate 6mm ribbon works beautifully on small favor pouches, whereas a wider 25mm or 38mm ribbon is better suited to anchor the visual weight of a larger gift bag.
To achieve clean, professional results, gather a set of essential stationery tools before you begin. Sharp scissors or a utility knife are vital for making clean cuts without fraying the paper or ribbon. A metal ruler and a pencil will help you mark precise guidelines, while a bone folder is invaluable for creating crisp, sharp creases along the edges of the bag. For adhesives, high-quality double-sided tape provides a clean, instant bond without the drying time or moisture warping associated with liquid glues.
Step-by-Step Guide to Covering and Decorating
Decorating a plain party bag requires a systematic approach to ensure the paper wraps smoothly without wrinkling or tearing. By following a logical sequence—from preparing the surface to applying the final ribbon embellishments—you can maintain consistency across multiple bags. This structured workflow saves time and minimizes material waste.

Safety should always be a priority when working with sharp tools and adhesives. Always cut away from your body when using utility knives or scissors, and use a dedicated cutting mat to protect your work surface. If you choose to use hot glue guns for heavy embellishments, work on a heat-resistant surface and keep the hot nozzle away from bare skin to prevent burns.
Measuring and Cutting the Wrapping Paper
To ensure full coverage and clean lines, you must calculate the paper dimensions based on the physical structure of your party bag. Start by measuring the height, width, and depth of the bag’s front panel. If you plan to wrap the paper entirely around the bag, measure the total perimeter (front, back, and both side gussets) and add an extra 2 to 3 centimeters to create a secure overlap seam at the back.
If you prefer to cover only the front and back panels individually, cut separate sheets that match those dimensions exactly. When wrapping over the top rim of the bag for a seamless look, add a 1.5-centimeter allowance to the height measurement. This extra paper will fold neatly inside the bag’s opening, hiding the raw edge of the wrapping paper from view.
Lay your wrapping paper flat on a clean work surface, pattern side down. Use your metal ruler and pencil to mark the calculated dimensions on the reverse side of the paper. Cut slowly along these pencil lines using sharp scissors or a utility knife guided by the metal ruler, ensuring straight, unfrayed edges that will align perfectly with the bag’s borders.
Securing the Paper to the Bag
Before applying any adhesive, wipe the surface of the plain bag with a dry microfiber cloth to remove any dust or manufacturing residue. To verify how your chosen paper and adhesive interact, perform a quick trial on a small scrap of paper and an inconspicuous area of the bag, such as the bottom panel. This allows you to check for adhesive bleed-through, paper warping, or slow drying times before committing to the main panels.
Apply double-sided tape or a thin, even layer of glue stick directly to the outer edges of the bag’s panel, paying close attention to the corners and high-stress fold areas. Align the cut wrapping paper with the bottom edge of the bag first, then slowly smooth it upward to prevent air bubbles and wrinkles. Use the flat edge of a bone folder or a clean fingernail to press the paper firmly into the adhesive, working from the center outward.
When wrapping around the side gussets, fold the paper gently along the bag’s natural creases. Use your bone folder to sharpen these folds, ensuring the bag can still expand and fold flat without binding. If you notice any lifting at the corners, apply a tiny dot of adhesive using a toothpick to secure the loose edges without creating a mess.
Attaching Ribbons and Embellishments
Ribbons serve as both functional handles and elegant decorations for your party bags. If you are replacing or adding ribbon handles, you must reinforce the bag’s structure to prevent tearing. Apply a strip of heavy cardstock or heavy-duty clear tape to the inside rim of the bag before punching holes through both the wrapping paper and the bag wall.
Thread your ribbon through the punched holes and tie a secure double knot on the inside of the bag to hold it in place. For decorative ribbon bands wrapped around the body of the bag, secure the ribbon ends at the back seam using a small strip of double-sided tape. This keeps the ribbon taut and prevents it from sliding down the bag.
To prevent polyester, satin, or grosgrain ribbons from fraying, cut the ends at a clean 45-degree angle or a classic V-shape. You can also seal the raw edges of synthetic ribbons by carefully passing them near a small heat source, ensuring you do not scorch the fabric. Hide any visible adhesive points or knots behind decorative bows, gift tags, or paper cut-outs to maintain a polished, professional appearance.
Design Variations for Different Party Themes
Adapting your materials and techniques to match specific event aesthetics allows you to create highly personalized party bags. For elegant gatherings such as weddings, anniversaries, or bridal showers, pair matte-finish pastel wrapping paper with wide, high-quality satin or organza ribbons. This combination offers a sophisticated, tactile contrast that feels luxurious to the touch.
For children’s birthday parties, opt for bright, patterned wrapping paper featuring playful motifs, paired with vibrant curling ribbons or textured grosgrain ribbons. You can create a dynamic, three-dimensional effect by layering a solid-colored paper band over a patterned background, then securing a custom paper cut-out—such as a star, dinosaur, or flower—directly over the ribbon band using foam adhesive dots.
Always consider the weight of your added decorations relative to the base bag’s carrying capacity. Heavy embellishments like thick wooden shapes, large metal charms, or multiple layers of heavy cardstock can cause a lightweight paper bag to sag, tear, or tip over. Keep your decorations lightweight and securely anchored to the lower half of the bag to maintain stability when the bag is filled with party favors.
Troubleshooting Common Wrapping Issues
Paper tearing at the folds is a common issue, especially when working with stiff, dry, or fibrous wrapping paper. To prevent this, score your fold lines lightly with a bone folder and a ruler before bending the paper. If a small tear does occur during the crafting process, reinforce the inside of the fold with a small piece of clear matte tape to stop the tear from spreading further.
Adhesive failure usually stems from using incompatible glue types on slick surfaces or working on dusty bag surfaces. If your wrapping paper begins to peel away from a glossy cardstock bag, switch from a standard glue stick to a high-tack double-sided tape or a specialized craft adhesive designed for non-porous surfaces. Ensure the bag is completely clean and dry before application, and allow any liquid adhesives to cure fully before handling the bags.
Slipping ribbon knots and misaligned seams can quickly compromise the look of your finished bags. If your ribbon bows keep coming undone, apply a tiny dot of clear-drying craft glue inside the knot to lock it in place. For misaligned paper seams, always dry-fit your paper panels against the bag before peeling the backing off your double-sided tape, ensuring everything aligns perfectly with the bag’s edges.
Frequently Asked Questions (FAQ)
Can I use regular liquid glue instead of double-sided tape?
While liquid school glue is readily available, it is generally not recommended for wrapping paper projects. The high water content in standard liquid glue easily saturates thin wrapping paper, leading to unsightly warping, wrinkling, and adhesive bleed-through. If you must use liquid glue, apply it extremely sparingly with a brush or sponge to ensure an even, thin layer. For a smooth, professional finish without drying delays, dry adhesives like double-sided tape or high-quality glue sticks are highly superior choices.
How do I prevent the wrapping paper from tearing when guests carry the bags?
To ensure your decorated party bags survive the journey home, focus on reinforcing high-stress areas. Apply a strip of heavy-duty packing tape or a second layer of cardstock along the inside top rim where the handles are attached. This distributes the weight of the bag’s contents more evenly. Additionally, avoid overloading the bags; match the weight of your party favors to the thickness of the base bag, keeping heavier items at the bottom to maintain structural balance.
What is the best way to store decorated party bags before the event?
Proper storage prevents your hard work from being ruined by dust, moisture, or physical damage. Store your completed bags upright in a sturdy, clean plastic bin or a cardboard box to prevent them from getting crushed. If your bags feature delicate 3D bows or fragile paper cut-outs, place sheets of tissue paper between each bag to prevent the decorations from snagging or flattening. Keep the storage container in a cool, dry, and dark place to protect the adhesives from melting and to prevent the wrapping paper colors from fading under direct light.

Community discussion
Share your experience or ask a question. Comments are reviewed before publication.