
Decorating a window gift bag requires a thoughtful balance between embellishment and visibility. Unlike traditional opaque gift wrapping, a window gift bag uses a transparent cutout to offer a sneak peek of the contents inside, making the gift itself an active element of the overall presentation. By strategically applying ribbons, custom tags, and delicate embellishments, you can elevate a plain paper bag into a bespoke, professional-grade gift package. The key to success lies in framing rather than obscuring the window, selecting a cohesive color palette, and using the correct tools to prevent paper warping or adhesive smudges.
Designing Around the Transparent Window
The defining feature of a window gift bag is its clear cutout, typically made of acetate, cellophane, or glassine. When designing your decorations, your first priority is to treat this window as a picture frame rather than a blank canvas to cover up. The items placed inside—whether they are artisanal baked goods, hand-poured candles, or curated stationery sets—should dictate your color scheme and design theme. For example, if you are gifting a pastel-colored candle, choosing a complementary soft cream or sage green ribbon creates a harmonious visual transition from the outside of the bag to the inside.
To maintain a balanced aesthetic, plan the placement of your decorations before applying any adhesive. Standard placement options include framing the perimeter of the window with thin ribbon, accenting the top fold or flap of the bag with a structured bow, or focusing your efforts entirely on upgrading the handles. If the gift inside has intricate details, keep the exterior decorations minimal and concentrated around the upper third of the bag. Conversely, if the gift is simple or monochromatic, you can afford to create a more elaborate frame or add layered tags that hang just to the side of the window cutout. Always ensure that no decorative elements hang directly in front of the window in a way that blocks the view or scratches the delicate transparent film.
Products mentioned in this guide
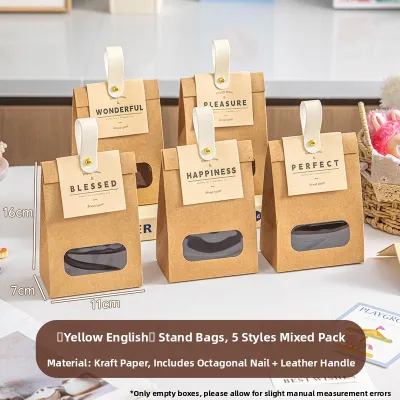
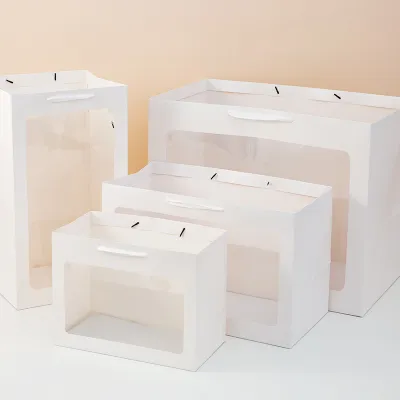
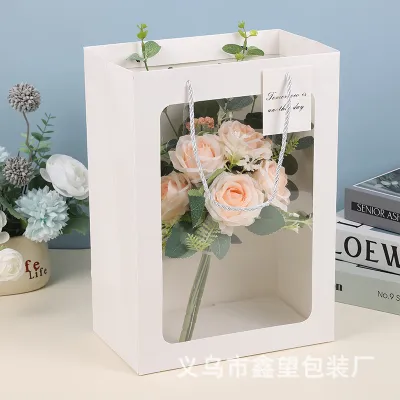
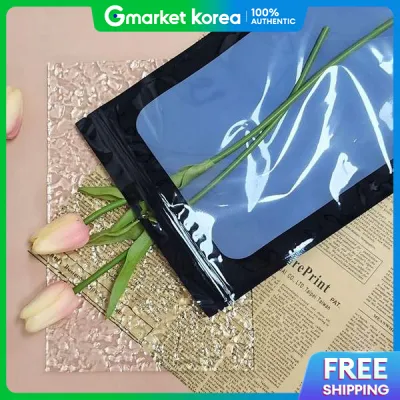
Prices are valid at publication and may change. Please refer to the product page for the latest price.
Essential Tools and Materials
Before beginning your project, gather high-quality tools and materials to ensure a clean, durable finish. Using the right adhesives and cutting tools prevents frayed edges and warped paper, which can quickly ruin the polished look of your gift presentation.

Prepare the following essential items on a clean, flat workspace:
- Base Bag: A plain window gift bag made from sturdy kraft paper, matte white cardstock, or textured heavy-weight paper. Ensure the bag is free of creases and the clear window is securely attached to the interior frame.
- Ribbons: Select satin, grosgrain, or organza ribbons. Satin offers a luxurious sheen, grosgrain provides a ribbed texture that holds knots exceptionally well, and semi-sheer organza adds a delicate, lightweight feel. Keep a variety of widths on hand, such as 15mm to 25mm for handles and 6mm to 10mm for delicate borders or tag ties.
- Embellishments: Gather custom cardstock tags, dried botanicals (like lavender sprigs or bunny tails), pre-made wax seals with adhesive backings, rustic jute twine, or flat paper stickers.
- Precision Tools: Sharp craft scissors are critical for clean ribbon cuts. You will also need high-tack double-sided tape (6mm width is ideal), pressure-sensitive glue dots, a craft hole punch, and a ruler or measuring tape.
Step-by-Step Guide to Adding Ribbons
Ribbons are the most versatile element when customizing a standard window gift bag. They instantly introduce rich textures, colors, and structural interest, transforming a mass-produced paper bag into a thoughtful, handcrafted keepsake. By replacing standard cord handles, crafting a perfectly balanced bow, or framing the clear window, you can guide the recipient’s eye naturally toward the gift inside. The following step-by-step techniques detail how to execute these ribbon applications with professional precision.
Threading Ribbons Through Handles
Many standard window gift bags come with basic twisted paper or synthetic cord handles. Replacing these with wide satin or grosgrain ribbon immediately elevates the bag’s tactile appeal. Start by turning the bag inside out or reaching inside to untie or snip the existing knots, then gently pull the old handles out of the reinforced metal or paper eyelets.
Measure and cut two equal lengths of ribbon, typically between 35cm and 45cm per handle, depending on whether you want a short hand-carry grip or a longer shoulder strap. To prevent fraying, cut the ribbon ends at a clean 45-degree angle. Thread one end of the ribbon from the outside of the bag through the left eyelet, and the other end through the right eyelet.
Once threaded, secure the ribbon ends on the inside of the bag. Tie a secure, bulky knot (such as a double overhand knot) at each end, pulling it tight so it cannot slip back through the eyelet. For extra security on heavy-weight bags, you can apply a tiny drop of low-temperature craft glue to the knot to lock it in place. If using hot glue, exercise extreme caution: apply a minimal amount and avoid touching the glue directly to the paper bag’s exterior or the clear window, as excessive heat can warp synthetic films and scorch thin paper.
Creating a Decorative Ribbon Bow
A beautifully structured bow serves as the perfect focal point, usually placed at the base of the handle or on the top corner of the bag. To create a classic double-loop bow, cut a 50cm length of medium-width (approximately 20mm) grosgrain or satin ribbon. Fold the ribbon to create two equal-sized loops, cross the left loop over the right, tuck it through the center loop space, and pull tight to secure.
Adjust the loops and tails until they are symmetrical. To add volume and a professional touch, gently insert your fingers into the loops to fluff them out, ensuring the shiny side of the ribbon faces forward if you are using single-sided satin. If you prefer a more elaborate look, you can layer a thinner organza ribbon over a wider grosgrain ribbon before tying the knot, creating a textured, multi-dimensional bow.
The final step is trimming the ribbon tails. Always use ultra-sharp fabric or craft scissors to make a single, decisive cut at a sharp 45-degree angle, or fold the tail in half vertically and cut upward at an angle to create a classic swallowtail (V-shape) finish. This clean cut not only looks polished but also prevents the woven threads of the ribbon from unraveling over time.
Framing the Window with Ribbon
Framing the transparent cutout with a thin ribbon border defines the window and draws immediate attention to the gift. This technique works exceptionally well on plain kraft paper bags, adding a crisp, tailored border. Begin by measuring the exact length of all four sides of the window cutout using a ruler, adding an extra 2cm to your total measurement to account for corner adjustments.
Apply a continuous strip of narrow (3mm to 6mm) double-sided tape directly along the outer edge of the window frame on the paper surface. Press the tape down firmly to ensure complete adhesion, then peel away the protective paper backing to expose the adhesive.
Take a thin ribbon, such as a 6mm grosgrain or metallic trim, and carefully press it onto the tape. Start at the bottom center of the window to keep the seam less visible. When you reach a corner, create a neat mitered fold by folding the ribbon back on itself at a 45-degree angle before continuing along the next side. This ensures a flat, professional corner without any bulky overlapping. Once the frame is complete, trim the end flush with the starting point and press down firmly to secure.
Attaching Embellishments for a Polished Finish
While ribbons provide the primary structure and color, secondary embellishments add layers of depth, texture, and personal storytelling. Incorporating elements like natural botanicals, personalized tags, or vintage-inspired wax seals transforms the gift bag from a simple container into an active part of the gifting experience. The key to adding these details successfully is using non-damaging attachment methods that keep the embellishments secure during transport without compromising the structural integrity of the paper bag.
Layering Gift Tags and Twine
Gift tags offer a dedicated space for personal messages while serving as a beautiful visual layer. Choose a heavy-weight cardstock tag (around 250 to 300 gsm) that matches your color palette. If your tag does not have a pre-punched hole, use a standard craft hole punch to create a clean opening at the top.
Thread a 20cm piece of rustic jute twine, metallic thread, or baker’s twine through the hole. Tie the twine securely around the base of your ribbon bow or directly to one of the handle knots. This keeps the tag integrated into the main design rather than letting it look like an afterthought.
When positioning the tag, ensure it rests naturally against the solid paper body of the bag. Avoid letting the tag swing freely over the transparent window cutout. A loose tag sliding across the acetate window can easily cause fine scratches on the plastic surface, clouding the view of the gift inside. If necessary, place a small piece of double-sided tape or a removable glue dot behind the tag to anchor it gently in place against the paper.
Applying Flat Embellishments and Wax Seals
For a sophisticated, tactile finish, consider adding flat embellishments such as dried lavender, pressed eucalyptus leaves, or custom paper die-cuts. To attach these delicate items without creating a mess, always opt for pressure-sensitive glue dots or thin double-sided tape. Simply press the stem of a dried flower onto a glue dot, then position it gently onto the paper bag, tucking the stem beneath your ribbon bow for a seamless look.
Wax seals add an old-world charm to modern gift packaging. Rather than pouring hot wax directly onto the paper bag—which carries a high risk of scorching the paper or melting the nearby plastic window—use pre-made wax seals. These are cast on non-stick surfaces and finished with a strong adhesive backing. You can apply the wax seal directly over the center intersection of your ribbon bow, or use it to seal the top flap of the bag closed.
When applying any embellishment, strictly avoid wet liquid craft glues, such as standard white PVA school glue. Liquid glues contain high water content, which quickly saturates paper fibers, causing the bag to buckle, warp, or develop translucent wet spots. Additionally, any accidental drips of liquid glue on the transparent window are incredibly difficult to remove without leaving a permanent, cloudy residue.
Final Checks and Presentation Tips
Once your decorations are securely attached, take a few moments to perform a final quality check. This step ensures your window gift bag looks pristine, stands upright securely, and remains practical for the recipient to carry.
Begin by inspecting the entire bag under good lighting. Use a pair of fine embroidery scissors to snip away any stray threads from the ribbon edges. If you spot any exposed edges of double-sided tape or tiny bits of adhesive residue, gently roll them away using a clean fingertip or a dedicated adhesive eraser, taking care not to tear the paper surface.
Next, address the clarity of the transparent window. Synthetic window films are highly prone to static electricity, which easily attracts dust, paper fibers, and fingerprints during the crafting process. Take a clean, dry microfiber cloth and gently wipe the window, both inside and out. Avoid using wet wipes or chemical glass cleaners, as these can react with the plastic film, causing permanent cloudiness or streaks.
To ensure the bag maintains its shape and does not tip over, pay attention to how you pack the interior. Place a sheet of crumpled, acid-free tissue paper at the very bottom of the bag to create a flat, supportive base for your gift. This prevents the gift from shifting during transport and helps the paper bag maintain its structural integrity. Finally, lift the bag by the decorated handles to verify that the weight is evenly distributed and that the added embellishments do not make the bag top-heavy or awkward to carry.
Frequently Asked Questions (FAQ)
This quick-reference guide addresses common troubleshooting questions to help you achieve a flawless finish when decorating your window gift bags.
What is the best adhesive for paper gift bags?
The best adhesives for paper gift bags are dry, pressure-sensitive options such as high-tack double-sided tape, glue dots, and adhesive runners. These tools provide an immediate, strong bond without introducing moisture, keeping the paper completely flat and wrinkle-free. In warm, humid climates like Singapore, high humidity can affect how adhesives cure and how paper holds its shape. Using high-tack double-sided tape or strong glue dots ensures your decorations stay firmly attached without peeling due to moisture in the air. Avoid using wet liquid glues, like standard white school glue or liquid craft glue, because their water content will saturate the paper fibers, causing the bag to buckle, warp, or lose its structural strength. Similarly, avoid using excessive hot glue on thin paper bags, as the high heat can easily warp the paper or melt the synthetic window film.
How do I keep the clear window smudge-free?
To keep the clear window perfectly pristine, handle the bag exclusively by its solid paper edges or handles during the decoration process. This prevents the natural oils from your fingers from transferring to the clear film. If smudges, fingerprints, or static dust do collect on the window, gently buff them away using a clean, dry microfiber cloth. Avoid using chemical glass cleaners, rubbing alcohol, or wet wipes; these liquids can permanently degrade or cloud certain synthetic window films, leaving unsightly streaks that are impossible to remove.

Community discussion
Share your experience or ask a question. Comments are reviewed before publication.