
Decorating a plain gift pouch for Teachers’ Day using ribbons and embellishments is an excellent way to transform simple packaging into a personalized, memorable keepsake. This creative approach allows you to customize the presentation to match a teacher’s personality while providing a reusable container they can use long after the holiday. By selecting compatible materials, mastering basic ribbon-tying techniques, and adding thoughtful details like custom tags, you can easily elevate a modest gift into a highly polished token of appreciation.
In Singapore, Teachers’ Day is a highly anticipated occasion where students and parents express gratitude for educators’ dedication. Gift pouches are particularly popular because they are practical, portable, and perfectly sized to hold essential stationery items. Instead of relying on single-use wrapping paper, a beautifully decorated fabric pouch serves as both a protective cover and a functional accessory for storing pens, markers, or personal items in a school bag or desk drawer.
Preparing Your Pouch, Ribbons, and Embellishments
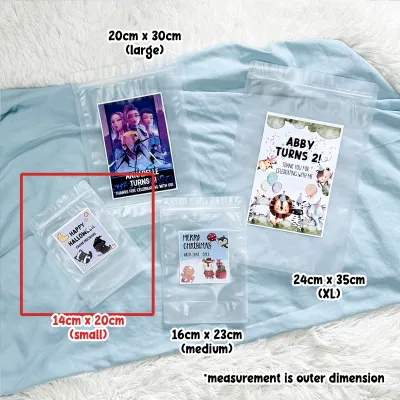
Before beginning your project, select a base pouch that matches your design goals and can support your chosen decorations. Common options include cotton, canvas, and organza. Cotton and canvas pouches offer a sturdy, opaque background that easily supports heavier embellishments and absorbs fabric adhesives well. Organza is sheer and delicate; because liquid glues will seep through its open weave, it is best decorated using threaded ribbons or tied-on charms rather than adhesives.
Products mentioned in this guide
![[SG] [FREE SHIP] 10x15cm Organza Pouch Birthday Party Gift Mesh Bag Wedding Favour Teachers Mothers Day Christmas Gift](https://img.lazcdn.com/g/p/0f388112ccdd3b8fdd49fa667f856d31.jpg_400x400q80.jpg_.webp)
Prices are valid at publication and may change. Please refer to the product page for the latest price.
Your choice of ribbon significantly influences the overall texture and style of the presentation. Satin ribbons provide a classic, high-gloss finish that looks elegant, though their slippery texture requires careful knotting to stay secure. Grosgrain ribbons feature a distinct ribbed texture that offers excellent grip, making them highly durable and easy to tie into crisp, structured bows. For a rustic aesthetic, jute twine or cotton cord can also be layered alongside your primary ribbons.
Having the right tools on hand ensures a smooth crafting process and a clean finish. Gather a pair of sharp fabric scissors to prevent frayed edges when cutting ribbons, a standard hole punch for preparing gift tags, and your chosen adhesives. If you plan to use glue, select a clear-drying fabric adhesive or a low-temperature glue gun. Always perform a quick compatibility test by applying a tiny drop of adhesive to an inconspicuous area, such as the inside seam of the pouch, to check for bleed-through or fabric staining.
Take a moment to plan your layout and color palette before securing any elements permanently. Classic Teachers’ Day themes often utilize warm, cheerful colors like pastel yellow, soft mint green, or deep navy blue. Lay your pouch flat and arrange your ribbons, tags, and charms on top to visualize the final composition. Ensure the scale of your decorations is balanced; for instance, a small 10cm x 12cm pouch is best paired with a narrow 1cm ribbon, while a larger canvas pouch can easily accommodate a wider bow.
Tying and Styling Ribbons on the Gift Pouch
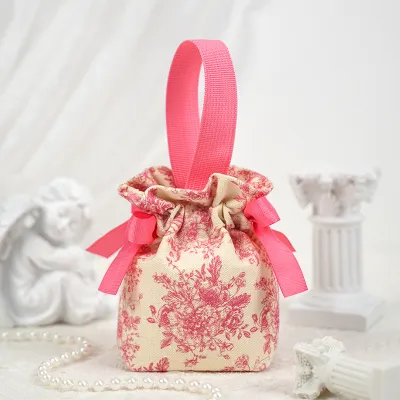
Securing and styling your ribbons correctly ensures the gift pouch remains intact during transit and looks professionally wrapped. If your base pouch features standard cotton drawstrings, you can easily enhance them by weaving a secondary, contrasting ribbon through the pouch neck casing. Attach a small safety pin to the end of your ribbon and guide it through the casing alongside the existing drawstring, then tie the ends together to create a layered, multi-textured effect.

To tie a decorative bow that will not slip undone in a student’s backpack, start by tying a secure square knot at the center of the pouch neck. Once the base knot is tight, form two even loops with the ribbon ends, cross them, and pull them through to create a classic bow. For slippery satin ribbons, consider tying a double-knot at the center before forming the loops, or use a small dab of clear craft glue inside the knot to lock it in place without affecting the loops.
For flat, envelope-style pouches that do not have drawstrings, alternative wrapping techniques like a belly band or a cross-wrap work beautifully. To create a belly band, wrap a wide strip of grosgrain ribbon horizontally around the center of the pouch, overlap the ends at the back, and secure them with double-sided fabric tape. You can then slide a thinner, contrasting ribbon underneath the band and tie it into a neat bow at the front, adding depth to the design.
Preventing ribbon ends from fraying is crucial for maintaining a neat appearance. Always cut your ribbon tails at a sharp 45-degree angle or a clean V-shape (chevron cut) using sharp scissors. If you are using synthetic ribbons like polyester satin or grosgrain, you can seal the edges using heat. Work in a well-ventilated area away from flammable materials, and briefly pass the cut edge near a heat source without touching the flame directly; observe the edge melt slightly to lock the fibers, then let it cool completely.
Attaching Embellishments and Personalized Tags
Adding small embellishments is the key to personalizing your Teachers’ Day gift pouch. Lightweight charms, such as miniature metal apples, wooden rulers, or small alphabet beads spelling out the teacher’s name, can be threaded directly onto the ribbon tails before you tie the final bow. If you prefer a natural touch, a small sprig of dried lavender or baby’s breath can be gently tucked under the ribbon knot and secured with a tight wrap of baker’s twine.
A personalized gift tag adds a heartfelt touch that teachers truly appreciate. Design your tag using sturdy cardstock, keeping the size proportional to the pouch. Use a hole punch to create a clean opening at the top of the tag, then thread a thin piece of ribbon or twine through the hole. Tie the tag directly to the main ribbon bow or drawstring of the pouch, ensuring it hangs flat and the written message is easily legible.
When using adhesive embellishments, such as flatback pearls, rhinestones, or felt shapes, apply the glue sparingly. Place a small dot of fabric glue directly onto the back of the embellishment rather than applying it to the pouch fabric. This prevents excess glue from squeezing out the sides and leaving unsightly shiny residue. Press the embellishment firmly onto the fabric and hold it in place for a few seconds to establish a strong bond, then allow it to dry completely flat.
Maintain visual balance by avoiding the temptation to over-decorate. The goal is to complement the pouch, not crowd it. If you are using a bold, patterned ribbon, keep your other embellishments minimal and neutral. If your pouch is a plain, solid-colored canvas, you can afford to be more creative with layered ribbons, colorful tags, and eye-catching charms, keeping the focus centered around the closure of the pouch.
Inspecting and Presenting the Finished Gift Pouch
Once your decorations are complete, conduct a quick quality inspection to ensure the pouch is secure and presentable. Gently tug on all tied ribbons, tags, and glued embellishments to verify that they are firmly attached and will not fall off during handling. Use your fabric scissors to trim any stray threads from the pouch seams or any unevenness on the ribbon ends, and carefully peel away any dried glue strings.
Next, carefully select the stationery items to place inside the pouch. For a standard-sized pouch, a premium gel pen paired with a matching notepad makes an excellent gift. When choosing these items, verify their dimensions to ensure they fit smoothly inside without stretching the pouch seams or distorting its shape. If gifting a pen, check that the ink type is suitable for daily grading and that any refills are compatible with the pen model. With a modest budget of S$5 to S$10, you can assemble a beautiful set of stationery fillers that feel both premium and practical.
To keep your decorated pouches looking pristine before Teachers’ Day, store them flat in a clean, dry container or a shallow box. Avoid stacking heavy items on top of them, which can crush the ribbon bows, bend the cardstock tags, or damage delicate dried flowers. Keeping them in a protective environment ensures they look fresh, crisp, and professionally crafted when presented to the teacher.
Frequently Asked Questions (FAQ)
How do I prevent ribbon ends from fraying without using a flame?
If you prefer a flame-free method to seal ribbon ends, you can apply a very thin layer of clear nail polish along the cut edges of the ribbon. Alternatively, specialized fabric fray-check sealants are widely available and dry completely clear. For a purely mechanical solution, you can tie small, tight knots at the very tips of the ribbon tails, or apply a tiny dot of clear craft glue, smoothing it flat with a toothpick and letting it dry completely before handling.
What is the best adhesive for attaching heavy charms to a fabric pouch?
For heavier embellishments like metal charms or thick wooden shapes, a low-temperature hot glue gun provides an instant, strong bond on cotton and canvas surfaces. Fabric glue is also highly effective and remains flexible when dry, though it requires several hours to cure completely. Always test your chosen adhesive on a small, hidden area of the pouch first to ensure it does not stain or bleed through the fabric, and allow the glue to cure fully before filling the pouch.
Can I wash and reuse a decorated gift pouch after Teachers' Day?
Yes, fabric gift pouches are highly reusable, but the cleaning method depends on how they are decorated. Before washing, remove all detachable elements such as tags, pinned charms, or threaded ribbons. If the pouch has only sewn decorations, it can be hand-washed gently in cool water with a mild detergent and air-dried flat. For pouches with permanently glued embellishments, avoid full submersion in water, as this can dissolve the adhesive; instead, spot-clean any dirty areas carefully with a damp cloth.

Community discussion
Share your experience or ask a question. Comments are reviewed before publication.