
Transforming a standard spidey paper bag into an eye-catching, professional-grade gift presentation is an excellent way to elevate a child’s birthday gift. While a character-themed bag provides a vibrant foundation, adding custom ribbons, structured handles, and strategic embellishments turns simple packaging into an exciting part of the gift-giving experience. By focusing on structural reinforcement, color coordination, and clean adhesive application, you can create a polished, durable presentation that stands out on any party table.
Gathering Materials and Tools for Your Spidey Paper Bag
Selecting high-quality materials is the first step to ensuring your decorated gift bag looks cohesive and professional. For the base, choose a sturdy spidey paper bag made from thick kraft paper or cardstock, ideally in the 120 to 150 GSM range. Before purchasing, inspect the handle attachments and paper thickness to ensure the bag can support the weight of your gift without sagging or tearing. Budget-friendly options typically range under S$2, while premium textured bags may cost between S$3 and S$6.
To complement the classic Spider-Man theme, gather a variety of ribbons in coordinating colors: vibrant red, deep royal blue, matte black, and metallic silver or white. Grosgrain ribbon (1.5 inches or 38mm wide) is ideal for structured bows due to its ribbed texture, while satin ribbon adds a sleek, glossy contrast. Keep a spool of thin curling ribbon (0.25 inches or 6mm) on hand for playful, cascading accents near the top of the bag.
Products mentioned in this guide
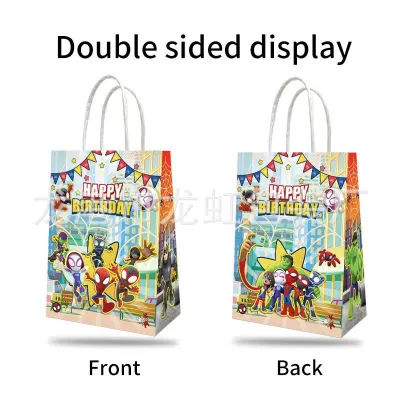
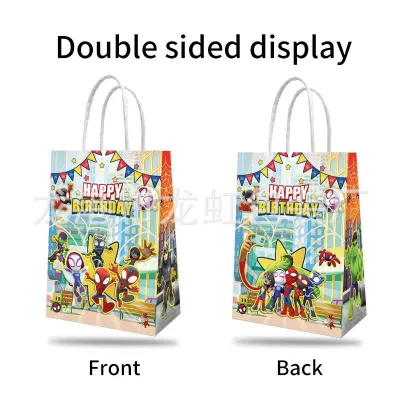
Prices are valid at publication and may change. Please refer to the product page for the latest price.
Adhesive selection is critical when working with paper mediums. Avoid standard liquid school glue, which introduces moisture and causes paper to warp or pucker. Instead, opt for high-tack double-sided tape, clear glue dots, or a low-temperature hot glue gun. If children are helping with the assembly, always supervise the use of hot glue guns to prevent accidental burns, or substitute them entirely with heavy-duty glue dots.
For embellishments, collect themed stickers featuring action words like “POW!” or “BAM!”, spider web motifs, cardstock gift tags, and lightweight foam cutouts. Ensure you have the right tools ready: a pair of sharp fabric scissors to prevent ribbon fraying, a standard hole punch, a metal ruler for precise measurements, and a lighter to gently seal the cut edges of synthetic ribbons.
Preparing and Reinforcing the Paper Bag Base
Before applying any decorative elements, inspect the raw paper bag for structural integrity. Examine the bottom seam to ensure the factory adhesive is fully sealed, and check the reinforcement patches around the handle punch-holes. If you notice any lifting or weak spots, apply a thin strip of double-sided tape to secure the paper layers before proceeding.

If you are gifting heavier items like books, toy figurines, or stationery sets, the bottom of a standard paper bag can sag or tear. To prevent this, measure the interior bottom dimensions of the bag using your ruler. Cut a piece of thick corrugated cardboard or heavy cardstock (around 300 GSM) to these exact dimensions and slip it flat into the bottom of the bag. This distributes the weight evenly and maintains a crisp, flat base.
Wipe the exterior of the bag with a dry microfiber cloth to remove any dust or manufacturing residue that could interfere with adhesive bonding. Gently press along the side gussets and bottom folds to ensure the bag opens fully and stands upright without wobbling. This step is particularly important in humid climates like Singapore, where moisture in the air can soften paper fibers over time.
When applying stickers, tape, or 3D elements, pressing down on an empty, flexible bag can cause unsightly creases and dents. To combat this, loosely stuff the bag with crumpled tissue paper or clean packing paper. This provides a firm, temporary internal structure, allowing you to apply pressure evenly across the exterior surfaces while decorating.
Attaching Ribbons and Bows for a Polished Finish
Standard paper or rope handles can look plain and unfinished. To upgrade them, select a 0.5-inch satin ribbon in a contrasting color, such as metallic silver or deep blue. Secure one end of the ribbon inside the bag at the base of the handle using double-sided tape. Wrap the ribbon tightly around the handle in a spiral pattern, keeping the overlaps consistent. Once you reach the other side, feed the ribbon end back into the bag interior and secure it firmly with another strip of high-tack tape.
A beautiful bow acts as the centerpiece of your design. To create a classic double-loop bow, cut a 24-inch length of 1.5-inch grosgrain ribbon. Fold the ribbon into two loops, cross them over, and pull one loop through the center loop to tie. Pull the loops tight and adjust the tails so they are symmetrical. Cut the tails at a 45-degree angle or in a V-shape (chevron cut) to prevent fraying. Use a low-temperature hot glue gun or a large glue dot to anchor the bow securely to the front center of the bag or at the base of one of the wrapped handles.
To frame the existing Spidey graphics on the bag, apply a thin ribbon border. Run a line of double-sided tape along the top rim or the bottom edge of the bag. Press a 0.25-inch red or black satin ribbon firmly onto the tape, starting from the back seam and wrapping all the way around. Cut the ribbon so the ends meet flush at the back, creating a clean, tailored frame that highlights the character artwork.
For a touch of playfulness, cut several 12-inch strands of red, blue, and silver curling ribbon. Hold one strand firmly against the dull edge of a pair of scissors and pull the ribbon quickly across the blade to create tight, springy curls. Punch a small hole near the top rim of the bag (or use the existing handle holes) and tie these curled ribbons so they cascade down the side of the bag, adding movement and texture.
Embellishing with Tags, Stickers, and Themed Accessories
A personalized gift tag adds a thoughtful touch. Cut a tag from sturdy blue or red cardstock, or use a pre-printed comic-book-style speech bubble tag. Write your message using a bold black marker or a metallic silver gel pen. Test your pen on a scrap piece of the same cardstock first to check for ink bleed resistance and drying speed. Attach the tag to the base of the handle or tuck it into the focal bow using a mini wooden clothespin, a piece of baker’s twine, or a small glue dot.
It can be tempting to cover the entire bag with stickers, but this often looks cluttered. Instead, adopt a balanced design approach. Group action-word stickers (like “BOOM!”) or spider web decals in small clusters of three near the top-left or bottom-right corners of the bag. This creates visual interest while keeping the central Spidey graphic as the main focus.
To make the bag truly dynamic, incorporate three-dimensional embellishments. Glue lightweight foam star shapes, die-cut foam spider webs, or even a small, lightweight plastic spider toy to the front of the bag. Use a low-temperature hot glue gun to attach these elements, placing them lower on the bag’s surface to maintain a low center of gravity so the bag does not tip over.
Once you have placed your decorations, take a step back and view the bag from a distance of two meters. Ensure that the original Spidey graphics are still clearly visible and not overshadowed by the ribbons and stickers. If the design feels too busy, refrain from adding more elements; a polished finish relies on a clean balance between the printed bag design and your custom embellishments.
Final Checks and Safe Gift Presentation
Before heading out to the party, place your gift inside the bag and perform a gentle weight test. Lift the bag by its decorated handles a few inches off a flat surface. Observe how the handles and the bottom seam react to the weight. If the paper around the handles begins to stretch or stress, add another layer of clear packing tape to the interior handle reinforcement patch.
If the gift is for a young child, safety is paramount. Inspect the bag to ensure all hot glue strings have been removed and that the glue has fully cooled and hardened. Double-check that any small, potentially detachable items—like plastic spider charms or small beads—are glued down with maximum-strength adhesive, or replace them with larger cardstock cutouts to eliminate choking hazards. Ensure there are no exposed sharp wire edges if you used wired ribbon.
To keep your beautifully decorated bag pristine during transport, place it upright in a clean cardboard box or a reusable grocery bag on the car floorboard. Avoid placing heavy items next to it that could crush the delicate grosgrain bows or bend the curled ribbons. In Singapore’s humid climate, avoid leaving the decorated bag in a hot car trunk for extended periods, as high heat can soften hot glue and cause adhesives to slip.
Complete the presentation by layering sheets of red and blue tissue paper inside the bag. Let the corners of the tissue paper flare out of the top of the bag in alternating colors. For an extra touch, tuck a matching Spidey-themed greeting card or a small coordinating party favor (like a custom bubble wand or a sticker sheet) into the handle loop so it is visible to the birthday child right away.
Frequently Asked Questions (FAQ)
How do I keep the paper bag from tearing when adding heavy ribbons?
To prevent heavy ribbons, bows, or charms from tearing the paper bag, you need to reinforce the attachment points from the inside. Cut a small, 1-inch square of thick cardstock or plastic (such as a piece cut from an old plastic folder). Place this reinforcing square on the inside of the bag directly behind where you plan to attach the heavy bow or punch a hole. If you are punching a hole, punch through both the bag and the plastic square, then feed your ribbon through. If you are gluing, apply the adhesive on the outside while pressing firmly against the interior backing square. This simple step distributes the pulling force across a larger surface area, keeping the paper from ripping under tension.
What is the best glue to use on paper gift bags without causing wrinkles?
The best adhesives for paper gift bags are dry, moisture-free options such as high-tack double-sided tape, clear glue dots, or dry scrapbooking glue sticks. Avoid using liquid white school glue, PVA glue, or liquid hot glue in excessive amounts, as the water content in these liquid adhesives quickly absorbs into the paper fibers. This causes the paper to swell, warp, and wrinkle as it dries, resulting in a messy, puckered finish. For heavy embellishments or thick ribbons, a low-temperature hot glue gun is highly effective because it cools and bonds almost instantly without introducing moisture into the paper.
Can I reuse the decorated Spidey paper bag for another gift?
Yes, you can easily design the decorations to be removable so the recipient can reuse the bag. Instead of gluing ribbons and tags directly to the paper, use temporary bonding methods. Tie your focal bows and gift tags to the handles using soft twine, yarn, or satin ribbon loops that can be untied without tearing the paper. For flat embellishments like stickers or foam cutouts, use removable adhesive putty (such as Blu-Tack) or low-tack double-sided tape designed for easy removal. This allows the birthday child to save the decorative elements as keepsakes while keeping the Spidey paper bag completely intact for future gift-giving.

Community discussion
Share your experience or ask a question. Comments are reviewed before publication.