
Transforming a plain kraft bag into a personalized, polished gift presentation is an elegant and sustainable way to elevate your gift-giving. Kraft paper, with its natural texture and warm, neutral tone, serves as an exceptionally versatile canvas for a wide range of creative techniques. By combining simple stationery supplies like rubber stamps, ribbons, twine, and hand-drawn details, you can craft a custom design that reflects the recipient’s personality and the occasion’s theme. Whether you are preparing a gift for a birthday, a wedding, or a festive holiday, decorating your own gift bag adds a thoughtful, artisanal touch that pre-printed bags simply cannot match.
This creative process is highly accessible, requiring no advanced artistic skills—only a few basic tools and a structured approach. By planning your design, preparing the paper surface, and applying decorative elements in a logical sequence, you can ensure a clean, professional finish that remains structurally sound. From rustic, minimalist aesthetics to vibrant, layered designs, the possibilities are virtually endless when you master the fundamentals of working with kraft paper.
Gather Your Decorating Materials and Tools
To achieve a professional result, it is essential to gather the correct materials and tools before you begin. The base of your project is the plain kraft bag itself. When selecting your bags, pay close attention to the paper weight, which is typically measured in grams per square meter (gsm). For lightweight gifts like stationery, jewelry, or clothing, a standard bag of 120 gsm is usually sufficient. However, if you plan to present heavier items such as books, jarred preserves, or small homeware pieces, opt for a sturdier bag of 150 gsm or higher. Additionally, consider the handle type; twisted paper handles offer a classic, rustic look, while flat paper handles are highly practical, and cotton rope handles provide a premium, comfortable grip.
Products mentioned in this guide
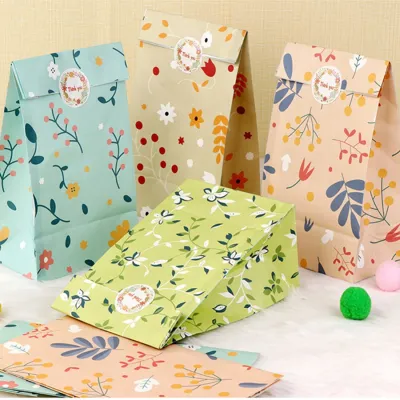
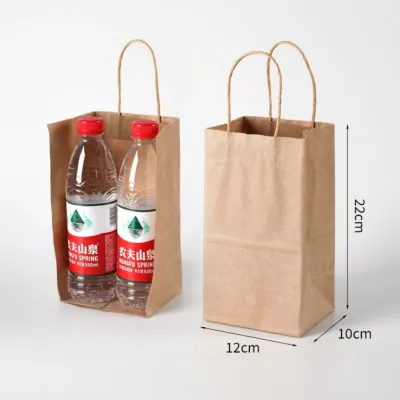
Prices are valid at publication and may change. Please refer to the product page for the latest price.
Adhesives play a critical role in securing your decorations without compromising the integrity of the paper. Standard liquid school glues contain high water content, which can easily saturate porous kraft paper, causing it to warp, wrinkle, or bleed through to the other side. Instead, select dry or low-moisture adhesives such as high-tack double-sided tape, clear glue dots, or a specialized craft glue formulated specifically for porous paper surfaces. For three-dimensional elements that require a bit of lift, double-sided foam tape is an excellent choice to add depth and dimension to your design.
The decorative elements you choose will define the overall theme of your gift presentation. Gather a selection of ribbons in various textures and widths, such as smooth satin, ribbed grosgrain, delicate organza, or rustic jute twine. For adding patterns and text, assemble rubber stamps with clear, crisp designs, along with high-quality ink pads. Stencils are also highly effective for creating repeatable borders or central motifs. Finally, collect lightweight embellishments like dried pressed flowers, wooden cutouts, paper tags, or metallic charms to add a tactile, premium feel to the bag.
Having the right tools on hand will make the decorating process smooth and enjoyable. Ensure you have a pair of sharp craft scissors for clean ribbon cuts without fraying, and a metal ruler for precise alignment and measurement. A bone folder is an invaluable tool for creating crisp, professional creases and flattening any stubborn folds in the paper. Lastly, keep a standard single-hole punch or a multi-size rotary punch nearby, which will allow you to create clean holes for threading ribbons or attaching gift tags securely.
Prepare the Kraft Bag Surface
Before applying any ink, paint, or adhesive, you must prepare the kraft bag to ensure a smooth, stable, and clean working canvas. Plain paper bags are often packed tightly during shipping and storage, which can leave them with deep creases, folded handles, or slightly warped panels. Lay the bag completely flat on a clean, hard work surface. Using a bone folder or the smooth, flat edge of a plastic ruler, gently press along the natural fold lines of the bag to flatten the main panels. This step ensures that your stamps will make even contact with the paper and that your stencils will lie completely flat, preventing ink from bleeding underneath.

Next, perform a thorough surface check to identify any issues that could affect your decorations. Kraft paper is highly fibrous and can sometimes collect fine paper dust, loose fibers, or minor manufacturing oils during production. Gently wipe the front and back panels with a dry, lint-free microfiber cloth to remove any dust or debris. Inspect the paper for any pre-existing moisture spots, tears, or uneven patches in the pulp. Ensuring the surface is completely dry and clean is vital for achieving optimal ink absorption and a strong, permanent bond with your adhesives.
Finally, inspect and reinforce the structural components of the bag, particularly if your gift has some weight to it. Examine the bottom gusset to ensure the paper fold is secure and the adhesive holding the base together is intact. If the bag feels slightly thin at the bottom, you can cut a piece of heavy cardstock to the exact dimensions of the base and slide it inside to act as a reinforcing insert. Additionally, check the handle attachments on the interior of the bag. If the handles are glued on with simple paper patches, you can reinforce them by applying a strip of strong double-sided tape over the patch, ensuring they will not pull away when the bag is lifted.
Step-by-Step Decorating Techniques
Decorating a kraft bag requires a thoughtful, step-by-step approach to ensure that your design is balanced, cohesive, and free from accidental smudges. The first step in this process is design planning. Before committing any permanent ink or glue to the bag, sketch a light layout on a scrap piece of paper, or arrange your physical embellishments loosely on top of the flat bag. This allows you to visualize the spacing, check the alignment of your text, and ensure that your design does not sit too close to the edges or get obscured by the handles when the bag is fully opened.
Once you have finalized your layout, it is crucial to follow a logical technique sequencing. Always apply flat, surface-level designs first before moving on to dimensional or textured elements. This means that any stamping, stenciling, drawing, or painting must be completed and allowed to dry fully while the bag is completely flat. Attempting to stamp or write on a bag that already has ribbons, bows, or thick embellishments attached will result in uneven ink coverage, smudging, and potential tearing of the paper. Only after the flat designs are set should you begin attaching three-dimensional items.
Understanding material compatibility is the final key to a successful decoration process. Kraft paper is highly porous and uncoated, meaning it behaves differently than glossy or semi-glossy wrapping papers. Inks will soak into the fibers, which can cause them to spread slightly and appear softer or more muted once dry. Adhesives will also be absorbed into the paper, so using the correct amount is essential—too little will result in a weak bond, while too much can saturate the paper and cause unsightly dark spots. Always perform a quick test of your inks, pens, and glues on a scrap piece of kraft paper or on the bottom gusset of the bag to observe how they dry and bond.
Stamping and Stenciling
Stamping and stenciling are highly effective techniques for adding intricate patterns, elegant borders, or personalized messages to a plain kraft bag. When selecting ink for kraft paper, opt for fast-drying, smudge-resistant pigment inks or archival dye inks. Pigment inks contain solid color particles that sit on top of the paper fibers rather than soaking deeply into them, resulting in a more vibrant, opaque color that stands out beautifully against the brown kraft background. White, metallic gold, and rich black inks are particularly striking on kraft paper, offering a classic and sophisticated color palette.
To achieve a clean, professional stamp impression, place a flat, hard object—such as a clipboard, a piece of thick cardstock, or a cutting mat—inside the flattened bag directly beneath the area you plan to stamp. This provides a solid, level surface and prevents the seams or folds on the back of the bag from creating uneven gaps in your stamped image. Apply ink evenly to your rubber stamp, and test the impression on a scrap piece of kraft paper first to check the ink flow and alignment. When stamping the bag, press down firmly and evenly without rocking the stamp, then lift it straight up to avoid smudging.
Stenciling allows you to create beautiful, repeatable patterns or large focal designs with ease. Position your stencil on the bag and secure the edges with low-tack painter’s tape or drafting tape, which can be removed easily without tearing the delicate paper fibers. To apply ink or acrylic paint through the stencil, use a dense foam sponge, a stencil brush, or a specialized dauber. Lightly tap the sponge into your ink or paint, then dab it onto a paper towel to remove any excess moisture. Apply the color to the stencil using a gentle, vertical tapping motion; using too much paint or rubbing horizontally will cause the medium to bleed under the stencil edges, ruining the clean lines.
Adding Ribbons, Twine, and Bows
Incorporating ribbons, twine, and bows is an excellent way to introduce rich textures, vibrant colors, and a sense of luxury to your decorated kraft bag. One highly effective method is handle integration, which connects your decorative elements directly to the structure of the bag. If your bag has pre-punched holes with rope handles, you can untie the existing handles and thread a luxurious satin or grosgrain ribbon through the holes instead, tying neat knots on the inside to secure them. For bags with fixed paper handles, you can wrap a coordinating ribbon around the base of the handles, securing the ends with a small dab of craft glue or a glue dot for a clean, wrapped look.
Creating and securing bows requires the right technique to ensure they remain perfectly in place during transit. Instead of tying a bow directly around the bag handles—which can cause the paper to bunch up or tear—it is often better to construct a structured bow separately. You can tie a classic bow using high-quality ribbon, trim the ends at an angle or in a swallowtail shape to prevent fraying, and then attach the completed bow to the bag using a strong glue dot or a strip of double-sided foam tape. This method allows you to position the bow precisely where it looks best, such as at the base of a handle or centered on the front panel.
Layering different materials is a wonderful way to add depth and visual interest to your design. Try pairing a rustic, textured material like jute twine or baker’s twine with a smooth, elegant material like satin or organza ribbon. For example, you can wrap a wide band of satin ribbon horizontally around the center of the bag, and then wrap several strands of thin jute twine over the top of the ribbon, tying them in a simple knot. When layering materials, always monitor the combined weight of your decorations. Heavy ribbons and thick cords can add unnecessary strain to the paper bag, so ensure that your attachments are secure and do not pull or distort the bag’s shape.
Attaching Embellishments and Gift Tags
Attaching three-dimensional embellishments and personalized gift tags is the final step in creating a truly unique and memorable gift presentation. Gift tags should be positioned thoughtfully to maintain visual balance and ensure they are easily readable. A classic placement is hanging the tag from the base of one of the handles using a short piece of twine or ribbon. Alternatively, you can adhere the tag flat against the front panel of the bag, framing it with stamped borders or stenciled designs. Ensure the tag is of a coordinating color—such as cream, white, or a contrasting pastel—to make the handwritten message stand out clearly.
When attaching heavier or dimensional embellishments—such as wooden shapes, dried pressed flowers, clay ornaments, or small metal charms—selecting the correct adhesive is paramount. For lightweight paper or wooden elements, high-tack double-sided tape or glue dots provide an instant, mess-free bond. For heavier or highly textured items like dried flowers or metal charms, a specialized, low-moisture craft glue or a multi-surface adhesive is recommended. Apply the adhesive sparingly to the back of the embellishment, focusing on the center and key contact points, to prevent any excess glue from squeezing out and staining the surrounding kraft paper.
Allowing adequate drying and setting time is crucial for the longevity of your decorated bag. Wet adhesives, even fast-drying craft glues, require time to cure fully and establish a permanent bond with the porous paper fibers. Once you have attached your embellishments, lay the bag flat in a well-ventilated, dust-free area and leave it undisturbed for at least thirty minutes to an hour, depending on the adhesive manufacturer’s instructions. Avoid moving, filling, or stacking the bags during this time, as any premature movement can cause the embellishments to shift, slide, or peel away, leaving unsightly glue marks on your beautifully decorated surface.
Finishing Touches and Quality Checks
Once your decorations are complete and all adhesives have had ample time to dry, it is time to perform a few quick quality checks to ensure your gift bag is flawless and ready for presentation. Begin with a thorough smudge and bleed inspection. Carefully examine both the exterior and interior of the bag under good lighting. Look for any stray ink marks, wet glue spots that have seeped through the paper, or accidental fingerprints. If you find any minor pencil guidelines, gently erase them using a soft, clean vinyl eraser, taking care not to rub too hard and scuff the kraft paper fibers.
Next, conduct a gentle handle stress test to verify the structural integrity of the bag. Lift the empty bag by its handles and give it a soft shake to ensure that all attached ribbons, bows, and embellishments are securely anchored and do not wobble or slip. If you have added heavy decorations to the front panel, observe whether the paper sags or bends excessively under the weight. If necessary, you can add a secondary piece of stiff cardstock inside the bag, pressing it flat against the decorated panel to provide internal structural support and keep the bag looking crisp and upright.
Finally, consider the interior lining of the bag to protect both your gift and your hard work. If your design includes elements that required gluing on the inside, or if you have used sharp metal brads or wire to attach tags, these can easily snag on delicate gifts like clothing or knitwear. To prevent this, place a sheet of clean tissue paper or a custom-cut cardstock liner inside the bag to cover any exposed adhesive or rough edges. Additionally, layering coordinating tissue paper blooming out of the top of the bag not only conceals the gift inside but also adds a beautiful, professional finishing touch that completes the entire presentation.
Frequently Asked Questions (FAQ)
How do I prevent ink from smudging or feathering on kraft paper?
To prevent ink from smudging or feathering on highly porous kraft paper, it is essential to choose fast-drying, pigment-based inks or archival pens rather than standard water-based options. Pigment inks contain solid color particles that sit on the surface of the paper fibers, resulting in sharp, clean lines, whereas water-based inks tend to soak in and spread, causing feathering. You can also use a craft heat tool to set the ink quickly, which is particularly helpful when working in humid climates. To avoid accidental smudges while working, place a clean sheet of scrap paper under your hand to act as a barrier, and always allow the ink to dry completely before touching or moving the bag.
What is the best adhesive for heavy embellishments on paper bags?
The best adhesive for securing heavy or dimensional embellishments—such as wooden shapes, thick cardstock, or dried flowers—is a low-moisture, high-tack craft glue or clear glue dots. Avoid standard liquid school glues, as their high water content will warp and wrinkle the kraft paper. For instant adhesion without any drying time, heavy-duty double-sided tape or dimensional foam tape works exceptionally well and adds a pleasing drop-shadow effect. Before applying any adhesive to your main design, it is highly recommended to perform a quick test patch on a scrap piece of kraft paper or on the bottom gusset of the bag to verify the bond strength and ensure it does not bleed through.
Can I use regular markers or pens to write on a kraft bag?
While you can use regular pens, standard water-based markers and ballpoint pens often perform poorly on kraft paper, as the dark, porous fibers absorb the ink, making the writing appear faded, streaky, or feathered. For clean, opaque, and highly visible lines, the best alternatives are acrylic paint pens, metallic markers, or fine-liner archival pens. These writing instruments deliver highly pigmented, opaque ink that sits beautifully on top of the brown paper. To ensure perfect spacing and alignment for calligraphy or centered text, always sketch your design lightly with a soft pencil first, then trace over it with your chosen pen once you are satisfied with the layout.

Community discussion
Share your experience or ask a question. Comments are reviewed before publication.