
Transforming a basic, plain happy birthday paper bag into a bespoke gift presentation is an elegant way to show thoughtfulness before the recipient even opens the gift. By incorporating high-quality ribbons, creative embellishments, and personalized details, you can turn a budget-friendly kraft or white paper bag—often costing less than S$2 at local stationery shops—into a stunning, premium presentation. This guide provides a step-by-step approach to selecting the right materials, planning a cohesive design, and executing precise decorating techniques that ensure a professional and durable finish.
What You Need: Materials and Tools for Bag Decoration
To achieve a polished result, you must start with the right foundation. Gathering your supplies beforehand ensures a smooth workflow and prevents interruptions once you begin assembling your design. The base of your project is a plain happy birthday paper bag, which typically comes in standard kraft brown, clean white, or solid pastel and vibrant colors. For decorating, look for bags made from sturdy paper, ideally between 120gsm and 150gsm, which can support the weight of added embellishments without sagging or tearing.
Next, select your ribbons based on the visual effect you want to achieve. Satin ribbons offer a smooth, glossy surface that reflects light beautifully, making them excellent for elegant, flowing bows. Grosgrain ribbons feature a distinct ribbed texture that provides excellent grip and structural integrity, making them ideal for crisp, multi-loop bows that hold their shape over time. Curling ribbons are lightweight, synthetic options that can be easily spiraled with scissors to add a playful, energetic touch to the presentation.
Products mentioned in this guide
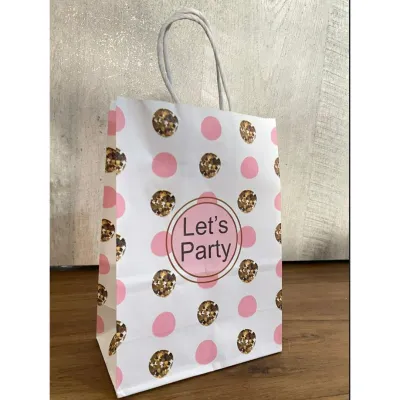

![[SG Stock] 10 Pcs Kraft Paper Bags with Handles Party Bags Birthday Bags Goodie Bags Colour Paper Bags Gift Bags](https://img.lazcdn.com/g/p/125c8522e89dfb6d8f20af7b66e96f8b.jpg_400x400q80.jpg_.webp)
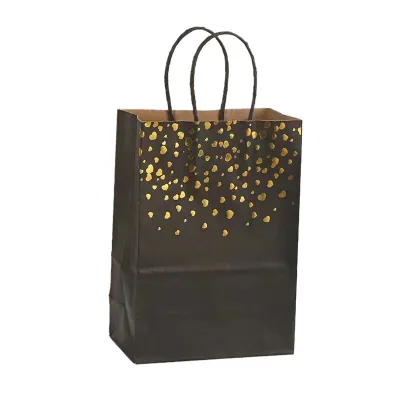
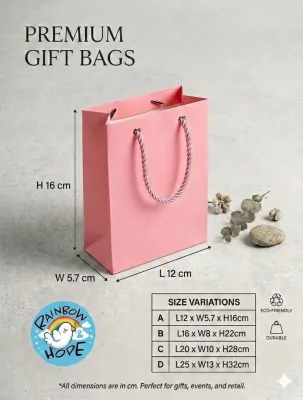
![[SG READY STOCK] Birthday Gift Bag Goodie Bags Kraft Paper Bag Thank you Bags Happy Everyday Wrapping Gift Bag Thank you Paper Bags](https://img.lazcdn.com/g/ff/kf/Sb2b79d065b9e4efeaa97df0eddd08956t.jpg_400x400q80.jpg_.webp)
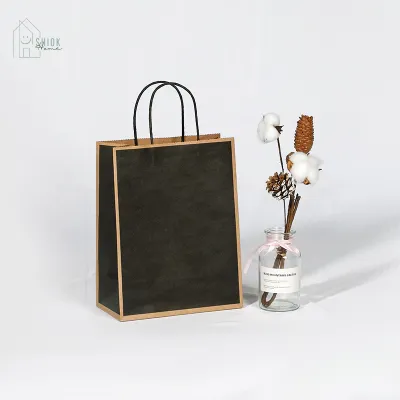

Prices are valid at publication and may change. Please refer to the product page for the latest price.
Embellishments allow you to customize the bag’s theme to match the recipient’s personality. Consider using adhesive stickers, pre-cut paper die-cuts with birthday motifs, washi tape for clean borders, or rubber stamps with pigment-based ink. To assemble these elements, gather the correct tools. You will need sharp scissors—preferably fabric shears for clean ribbon cuts and paper scissors for other tasks—and a standard 6mm single hole punch. For adhesives, avoid wet glues and instead opt for double-sided tape, adhesive glue dots, or a precise dry glue pen to keep the paper flat and wrinkle-free. When using sharp craft scissors or handling small tools, always work on a stable surface to ensure safety.
Planning Your Design: Themes and Color Coordination
Before applying any permanent adhesives, it is essential to establish a cohesive design plan. A well-thought-out color palette prevents the bag from looking cluttered or chaotic. For a rustic or vintage aesthetic, pair a standard kraft paper bag with natural tones like sage green, cream, or soft terracotta. If you are designing for a child’s birthday party, vibrant primary colors or bright pastels against a clean white paper bag create a cheerful, high-energy presentation.

Visual balance is key to a professional finish. Rather than covering every square inch of the paper bag, choose one or two focal points to draw the eye. A large, beautifully tied bow on the handle combined with a single, prominent “Happy Birthday” die-cut in the center of the bag creates a balanced, elegant composition. Leave sufficient empty space—also known as negative space—around your design elements to allow each decoration to stand out clearly.
To ensure perfect spacing and composition, always perform a dry run. Lay the paper bag completely flat on your work surface and arrange your ribbons, stickers, and tags on top without removing their adhesive backings. Take a step back to evaluate the layout, adjusting the placement of each element until the design feels balanced, symmetrical, and visually appealing.
Step-by-Step Guide to Decorating the Paper Bag
Decorating a paper bag requires a systematic approach to ensure that each element is secure and does not interfere with the bag’s structure. The logical order of operations begins with upgrading the handles, which establishes the upper frame of your design. Next, you will move to the main canvas of the bag—the front and sides—to apply your primary visual elements. Finally, you will add personalized accents, gift tags, and interior tissue paper to complete the presentation.
Always work on a clean, flat, and hard surface, such as a crafting mat or a clean dining table. This prevents the paper bag from getting accidentally creased, bent, or smudged with adhesive residue during the decorating process. Keep your tools organized and within arm’s reach to maintain an efficient and enjoyable workflow.
Upgrading the Handles with Ribbons
The handles of a paper bag are often the most handled part of the package, making them an excellent opportunity for a decorative upgrade. If your bag has pre-existing rope or twisted paper handles, you can tie a classic bow at the base of one or both handles. To do this, cut a length of satin or grosgrain ribbon, loop it securely around the handle base, and tie a neat double knot before forming the bow loops. Adjust the loops so they are symmetrical, and trim the ribbon tails at a sharp 45-degree angle to prevent fraying.
For bags with flat paper handles, wrapping them with ribbon adds a luxurious texture and hides plain paper. Secure the start of a narrow ribbon at the inner base of the handle using a small piece of double-sided tape. Wrap the ribbon tightly and evenly along the entire length of the handle, overlapping each turn slightly to ensure complete coverage. Secure the end of the ribbon at the opposite base with another piece of tape, ensuring all adhesive is hidden on the inside of the bag.
If you are working with a bag that has no handles, you can easily create a custom ribbon closure. Fold the top 2 centimeters of the bag downward to create a neat flap. Use a single hole punch to make two evenly spaced holes through both the flap and the body of the bag. Thread a long piece of decorative ribbon through the holes from the back to the front, and tie a large, secure bow to keep the bag closed while acting as a beautiful focal point.
Embellishing the Front and Sides
Once the handles are complete, focus on the main body of the paper bag. Start by applying your largest focal embellishment, such as a central “Happy Birthday” die-cut or a large themed sticker. Position this element slightly above the vertical center of the bag, as this placement is visually pleasing and mimics classic design layouts. Press down firmly from the center outward to ensure the adhesive bonds completely with the paper without trapping air bubbles.
To create depth and visual interest, employ layering techniques. Instead of sticking a design directly onto the bag, place a slightly larger piece of patterned paper or a few strips of coordinating washi tape behind it first. This creates a framed border effect that makes your central design pop. For instance, a gold foil sticker placed over a circular piece of textured cream paper instantly looks more sophisticated and deliberate.
After securing the focal point, add secondary accents to complete the composition. You can scatter smaller star or dot stickers around the main design, or use a rubber stamp with a complementary ink color to print a subtle border pattern along the bottom edge of the bag. When stamping, choose a pigment-based ink pad rather than a dye-based one, as pigment inks sit on top of the paper fibers and provide a crisper, more vibrant impression on porous kraft paper. Always perform a trial stamp on a scrap piece of paper to check the ink coverage and drying time before stamping directly onto the bag. Place a flat piece of cardboard inside the bag to provide a firm, even stamping surface, ensuring a clean, crisp impression without ink smudges.
Adding Personalized Gift Tags and Accents
A personalized gift tag is the final touch that connects your beautiful wrapping to the recipient. Select a cardstock tag that matches your established color theme. Write your birthday greeting using a high-quality pen or calligraphy marker, ensuring the ink is completely dry before handling the tag to prevent smearing. Before writing on your final gift tag, perform a quick test on a scrap piece of the same cardstock to verify the ink’s drying speed and bleed resistance, as some gel pens or calligraphy inks may feather or smudge on glossy papers.
Punch a hole at the top of the tag, thread a thin piece of twine or narrow ribbon through it, and tie it securely to the base of one of the bag’s handles. To elevate the tactile quality of your gift presentation, consider tucking small, lightweight accents into the handle knot. A small sprig of dried or faux greenery, a tiny paper flower, or a cluster of curled ribbon strands adds a charming, three-dimensional element. Ensure these accents are lightweight so they do not pull on the handles or cause the paper bag to tear when lifted.
The interior presentation is just as important as the exterior. Prepare several sheets of coordinating tissue paper by holding a sheet in the center, giving it a gentle twist, and shaking it out to create volume. Place the tissue paper inside the bag so that the ruffled edges peek out elegantly from the top, fully concealing the gift inside while adding a luxurious, professional volume to the overall silhouette.
Common Mistakes to Avoid When Decorating Paper Bags
While decorating a paper bag is a highly creative process, avoiding technical mistakes will ensure your hard work lasts until the gift is opened. The most common error is using liquid white glue or school glue on standard-weight paper bags. The high water content in liquid glues quickly saturates paper fibers, causing the paper to swell, warp, wrinkle, or tear as it dries. Always rely on dry adhesives, such as high-tack double-sided tape, adhesive rollers, or glue dots, which provide an instant, strong bond without introducing moisture.
Another mistake is overloading the bag’s handles with excessively heavy decorations or overly thick, heavy ribbons. This can put undue stress on the handle attachments, which are often only secured with a light adhesive or paper patch inside the bag. Keep handle decorations lightweight, and avoid pulling or tugging on the handles while tying your bows to prevent them from detaching when the bag is lifted.
Additionally, avoid placing stickers, washi tape, or die-cuts too close to the bag’s natural folds, side gussets, or bottom creases. When the decorated bag is expanded to hold a gift, these folded areas stretch and flex. Any embellishments placed over these creases will warp, crack, or peel away. Always keep your decorations centered on the flat, stable panels of the bag to maintain their pristine appearance.
Final Touches and Presentation Tips
Before presenting your decorated happy birthday paper bag, perform a quick quality check. Gently press down on all adhesive areas to ensure a secure bond. Inspect the ribbon ends and use a sharp pair of scissors to trim any frayed threads, cutting them at a clean diagonal angle. Open the bag fully and place it on a flat surface to verify that it stands upright on its own and that the weight of the decorations does not cause it to tip over.
Given Singapore’s warm and humid climate, it is crucial to store your finished paper bag properly until it is time to gift it. Keep the bag in a cool, dry place away from direct sunlight, which can fade paper colors and weaken adhesives over time. Avoid storing it in highly humid environments like kitchens or near open windows, as moisture in the air can soften the paper fibers and cause curled ribbons to lose their shape.
Taking the time to decorate a plain happy birthday paper bag turns a simple container into a deeply personal, memorable part of the gifting experience. Your recipient will appreciate the effort, creativity, and thoughtfulness that went into crafting a bespoke presentation, making the act of giving just as special as the gift itself.
Frequently Asked Questions (FAQ)
Can I use liquid glue on a thin paper bag?
No, it is highly recommended to avoid standard liquid glues on thin paper bags. The moisture in liquid glue is absorbed by the paper fibers, leading to warping, wrinkling, and structural weakening. Instead, use dry adhesives such as double-sided tape, glue dots, or dry adhesive rollers. These options provide a strong, immediate bond while keeping the paper perfectly flat, smooth, and professional.
How do I keep the ribbon from fraying at the ends?
To prevent ribbon ends from fraying, always cut them at a sharp 45-degree angle or a neat V-shape using very sharp scissors. For synthetic ribbons like polyester satin or grosgrain, you can carefully pass the cut edge near a small flame (such as a lighter) for a split second to melt and seal the fibers. When using a flame, always work in a well-ventilated space and keep tools out of reach of children to ensure a safe crafting environment. For natural fibers like cotton or jute, apply a tiny dab of clear nail polish or fabric fray-check liquid to the very edge and let it dry completely.

Community discussion
Share your experience or ask a question. Comments are reviewed before publication.