
Decorating a plain gift pouch with ribbons and embellishments is an elegant, cost-effective way to elevate your gift-giving presentation. By transforming a simple fabric or paper container into a personalized keepsake, you show the recipient an extra layer of care. Whether you are preparing for a wedding, a corporate event, or a festive celebration, mastering a few basic wrapping and embellishing techniques allows you to create stunning, professional-grade packaging at home. The process requires minimal specialized skills, relying instead on careful material selection, proper surface preparation, and neat execution.
Gather Your Materials and Tools
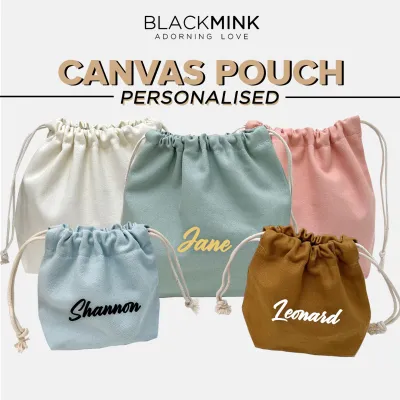
To achieve a polished finish, you must first match your decorative elements to the structural properties of your gift pouch. Plain pouches generally come in materials like cotton canvas, velvet, organza, or heavy kraft paper. Lightweight pouches, such as those made of sheer organza, cannot support heavy metal charms or thick, dense velvet ribbons without sagging. Conversely, a sturdy cotton canvas or thick velvet pouch pairs beautifully with heavier satin ribbons, wooden beads, or metal charms. Always consider the weight and drape of both the pouch and the decorative elements before beginning your project.
Having the right tools on hand ensures clean lines and prevents damage. High-quality fabric scissors are essential for cutting ribbons cleanly without leaving frayed edges. For securing decorations, gather adhesives tailored to your pouch material. Double-sided fabric tape is excellent for temporary or low-mess applications on paper and smooth fabrics. For a permanent bond on textured fabrics like cotton or velvet, a flexible fabric glue or a low-temperature hot glue gun works best. In humid climates like Singapore, liquid fabric glues require extended drying times, making low-temperature hot glue a convenient alternative for rapid assembly.
Products mentioned in this guide
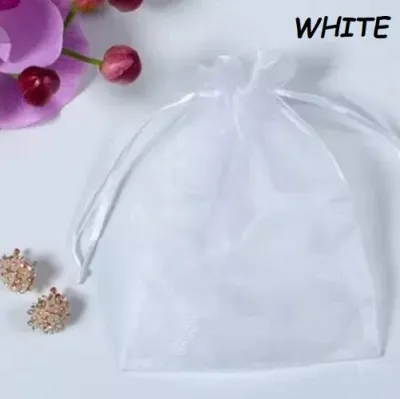
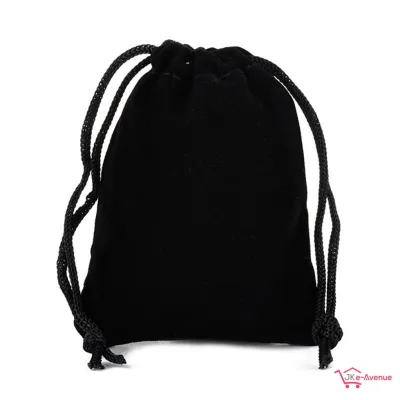
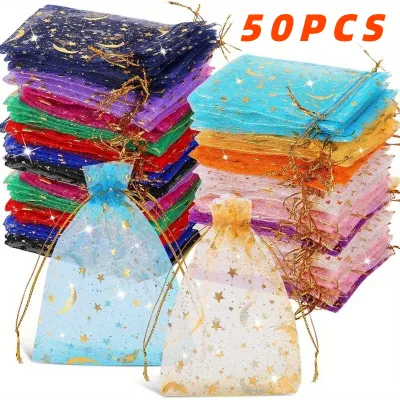
![[SG ready stocks] Drawstring Burlaps Pouch Linen Pouch perfume bags bamboo charcoal cloth bag](https://img.lazcdn.com/g/p/18b2669203f5c8b6168d6bff7110a3a2.jpg_400x400q80.jpg_.webp)
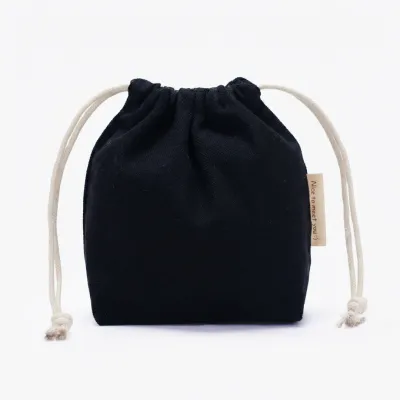
Prices are valid at publication and may change. Please refer to the product page for the latest price.
When selecting embellishments, look for items that complement your gift’s theme. Small wooden beads, dried flower sprigs, metallic charms, and embroidered appliqués are excellent choices. Ensure any natural elements, such as dried lavender, are completely dry to prevent staining the pouch fabric. If you plan to use beads or charms, ensure you have thin craft wire, embroidery thread, or jump rings to attach them securely to the drawstrings or ribbon loops. For example, a basic cotton pouch costing under S$2 can be transformed into a high-end keepsake with just a few cents’ worth of ribbon.
Prepare the Gift Pouch Surface
Before applying any adhesive or decorative trim, you must prepare the surface of the gift pouch to ensure optimal adhesion and a neat appearance. Inspect the pouch thoroughly for any dust, loose threads, lint, or manufacturing residues. For fabric pouches, a quick pass with a lint roller or a clean, dry microfiber cloth will remove surface particles that could interfere with glue bonding. If the pouch has deep creases from storage, gently press it with an iron on a low heat setting appropriate for the fabric type, taking care to avoid synthetic drawstrings that might melt under direct heat.

Once the pouch is clean and flat, identify the primary display area where your decorations will be placed. This is typically the center-front of the pouch, well below the drawstring path or opening mechanism. Avoid placing permanent decorations directly over seams, structural folds, or the path of the drawstring, as this can restrict the pouch’s functionality or cause the decorations to warp when the pouch is closed. If you are working with a paper pouch, ensure the surface is completely dry and free of oils from your hands.
Before committing to your design, always perform a spot test with your chosen adhesive on a hidden area of the pouch, such as the inside seam or the bottom fold. Apply a tiny drop of glue or a small piece of tape and let it sit for a few minutes. Check the opposite side of the fabric to ensure the adhesive does not bleed through, leave a dark stain, or cause synthetic fibers to melt. This simple precautionary step prevents you from ruining a pouch with incompatible materials.
Step-by-Step Ribbon Application Techniques
Applying ribbons to a gift pouch requires a steady hand and a clear plan to ensure the final product looks neat and professional. The key to success lies in choosing the right attachment method and maintaining consistent tension throughout the application process.
Tying Classic and Decorative Bows
A beautifully tied bow serves as the perfect focal point for any decorated gift pouch. To create a classic bow, start by cutting a length of ribbon that is proportional to the size of your pouch; a ribbon that is too wide can overwhelm a small pouch, while a thin ribbon may look lost on a larger one. Fold the ribbon to form two even loops, cross them over, and pull one loop through the center space to create a standard bow. Adjust the loops and tails until they are symmetrical, then cut the tails at a clean 45-degree angle or a decorative V-shape to give it a tailored finish.
To ensure your bow maintains its shape and does not come undone during transit, you can secure the center knot. Wrap a small piece of fine craft wire or matching sewing thread tightly around the center of the knot, tucking the ends neatly out of sight. Alternatively, place a tiny dab of fabric glue or hot glue inside the knot before tightening it completely. This locks the loops in place permanently, allowing the recipient to open the pouch without ruining the decorative bow.
Once your bow is constructed, decide on its placement. You can attach it directly to the ends of the pouch’s drawstrings, or anchor it to the front face of the pouch. To attach it to the fabric, apply a small dot of adhesive to the back of the bow’s center knot and press it firmly onto the designated spot on the pouch. If the pouch has a drawstring closure, you can tie the bow directly around the gathered fabric once the gift is placed inside, ensuring the bow can be easily untied or slid off when opening.
Wrapping and Securing Ribbons
Wrapping ribbons around the body of the pouch adds texture and visual interest, creating a layered look. Before applying any adhesive, wrap the ribbon around the pouch to plan the placement and measure the exact length needed, leaving a small overlap at the back seam. Symmetrical placement is crucial, so you may want to use a fabric pencil or tailor’s chalk to lightly mark where the top and bottom edges of the ribbon should sit.
To secure the ribbon flat against the pouch surface, apply your adhesive in thin, controlled lines. If you are using double-sided fabric tape, apply it directly to the back of the ribbon, peel off the backing, and press the ribbon firmly onto the fabric from one side to the other to avoid air bubbles or wrinkles. If you prefer liquid fabric glue, apply a very thin, continuous line along the edges of the ribbon. Avoid applying too much glue, as excess adhesive can squeeze out from the sides or bleed through the ribbon fibers, leaving unsightly shiny patches.
Press the ribbon firmly onto the pouch surface, smoothing it out with your fingers from the center outward. If you are using a liquid adhesive, allow the pouch to dry completely flat for the duration recommended on the product label. In humid environments, placing a clean, heavy object like a book over a piece of parchment paper on top of the ribbon can help keep it flat and secure while the glue cures.
Adding Embellishments for a Polished Finish
Embellishments provide the final, personalized touch that transforms your gift pouch from simple to extraordinary. Before permanently attaching any charms, beads, or dried flowers, arrange them on top of the pouch to experiment with different layouts. This dry run allows you to assess the visual balance, spacing, and color harmony of your design. Aim for a balanced composition; for instance, if you have a large bow on one side, place a small cluster of beads or a delicate charm on the opposite side to balance the visual weight.
Selecting the right adhesive for your embellishments is critical for durability. Lightweight paper or fabric appliqués can be secured with standard fabric glue or double-sided tape. However, heavier or non-porous items like metal charms, plastic beads, or wooden elements require a stronger bond. A low-temperature hot glue gun is highly effective for these materials, as it cools quickly and creates a strong mechanical bond. When gluing delicate dried flowers, apply a tiny dot of glue to the stem rather than the petals to avoid crushing or discoloring the fragile blooms.
As you add embellishments, always keep the functionality of the pouch in mind. Ensure that none of the decorative elements block the opening of the pouch or restrict the movement of the drawstrings. Additionally, avoid adding too many heavy elements to one side of a lightweight pouch, as this can cause the pouch to tip over, sag, or lose its shape when displayed. The goal is to enhance the pouch’s aesthetic appeal while preserving its practical use as a functional gift container.
Final Inspection and Presentation Tips
Once all your adhesives have dried and your decorations are in place, conduct a thorough final inspection to ensure your gift pouch is ready for presentation. Gently tug on each ribbon, bow, and embellishment to verify that they are securely attached. If any element feels loose, apply a small touch-up of adhesive and allow it to cure. Inspect the surface for any visible glue residue, hot glue strings, or loose threads, and carefully remove them using tweezers or a clean pair of scissors.
Next, test the closure mechanism of the pouch. Gently pull the drawstrings or fold the opening to ensure that the pouch opens and closes smoothly without putting strain on your decorations. If a ribbon or charm restricts the movement, adjust its position slightly to allow for free operation. This step ensures that the recipient can easily access their gift without damaging the beautiful exterior you have created.
Finally, store and transport your decorated pouches with care to prevent your hard work from being undone. Keep the finished pouches flat in a clean, dry box, avoiding stacking heavy items on top of them, which could crush delicate bows or break fragile dried flowers. If you are transporting the pouches to an event, place them in a sturdy bag or container with tissue paper layered between them to prevent friction and keep the embellishments looking pristine until the moment they are presented.
Frequently Asked Questions (FAQ)
How do I prevent ribbon edges from fraying?
To keep your ribbon edges looking neat and professional, you must seal the cut ends. For synthetic ribbons like polyester satin, organza, or grosgrain, you can carefully pass the cut edge near a small flame from a lighter or match for a fraction of a second; the heat will melt the synthetic fibers together, creating a permanent seal. Always test this on a scrap piece of ribbon first to avoid burning the material. For natural fibers like cotton or silk, which do not melt, apply a thin line of clear nail polish or specialized fabric sealant along the cut edge to lock the threads in place.
Can I wash a decorated gift pouch?
Whether a decorated gift pouch is washable depends entirely on the materials and adhesives you used. If you decorated the pouch with permanent, waterproof fabric glue and water-safe embellishments like synthetic ribbons or plastic beads, you can gently hand wash the pouch in cold water and lay it flat to dry. However, if you used hot glue, double-sided tape, delicate dried flowers, or metal charms that are prone to rusting, washing the pouch is not recommended. In these cases, spot clean any soiled areas with a damp cloth, taking care to avoid the decorated sections.

Community discussion
Share your experience or ask a question. Comments are reviewed before publication.