
Transforming a plain, utilitarian paper bag into a stunning, custom-designed gift presentation is a simple and highly rewarding craft. By combining standard kraft or cardstock bags with beautiful wrapping paper and elegant ribbons, you can create a bespoke gift bag that rivals high-end boutique packaging. This technique not only saves money but also allows you to tailor the design perfectly to the recipient and the occasion, whether it is a birthday, wedding, or festive celebration in Singapore.
The process involves measuring the bag’s dimensions, cutting coordinating wrapping paper to fit the panels, adhering it smoothly to avoid bubbles, and finishing with beautifully tied ribbons. This guide walks you through the entire process, from selecting the right materials to troubleshooting common wrapping mishaps, ensuring a flawless, professional-grade finish every time.
Gathering Your Wrapping Materials and Tools
To achieve a polished look, you must start with the right foundation. A sturdy plain gift bag is essential. Look for bags made from thick kraft paper or heavy cardstock, which are widely available in stationery shops across Singapore. A flimsy bag will sag or warp under the weight of the wrapping paper and adhesive, ruining the clean lines of your finished project. Ensure the bag handles are securely attached and can withstand handling once the extra layers are applied.
Products mentioned in this guide
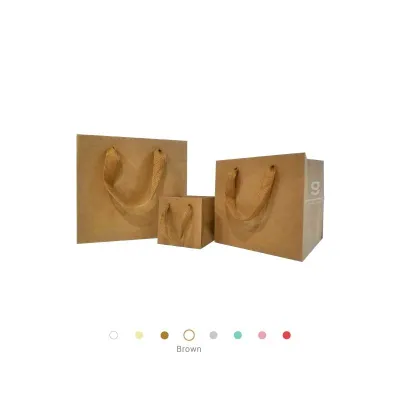
Prices are valid at publication and may change. Please refer to the product page for the latest price.
Next, consider the wrapping paper. The thickness of the paper plays a critical role in the success of your project. Standard wrapping paper (around 70 to 80 gsm) is highly flexible and easy to fold around corners, but very thin paper may tear easily or show glue lines underneath. Conversely, heavy-duty or textured handmade papers add a luxurious feel but require stronger adhesives and careful scoring to fold cleanly. For ribbons, choose textures that complement your paper. Satin, grosgrain, and organza ribbons are excellent choices that hold their shape well when tied into bows.
Your tool kit should include sharp scissors or a utility knife, a metal ruler, a cutting mat, and a bone folder. A bone folder is a flat, dull-edged tool used to crease paper cleanly without tearing it. For adhesives, double-sided tape is highly recommended for its clean, instant hold, while a high-quality glue stick or quick-drying craft glue can be used for larger flat surfaces. Since you will be working with sharp cutting tools and adhesives, always work on a flat, stable surface, keep blades pointed away from your body, and ensure your workspace is well-ventilated if using liquid glues.
Before committing to your project, perform a quick test on a small scrap of your wrapping paper and bag material. Apply a small amount of your chosen adhesive to the scrap paper to observe its drying speed, smoothness, and bleed resistance. Some thin papers may show wet spots or bleed-through when paired with liquid glues, while others might wrinkle as the adhesive dries. This simple trial ensures your material combination is compatible and will yield a clean, professional finish.
Measuring and Cutting the Wrapping Paper
Accurate measurements are the secret to a seamless wrap. To begin, empty the gift bag completely and lay it flat on your clean work surface. You will need to measure three key dimensions: the width of the front panel, the height of the bag (excluding the handles), and the depth of the side gussets. Write these measurements down so you do not have to re-measure later.

When calculating the size of the wrapping paper to cut, you must add an overlap allowance. For a full wrap that covers the front, sides, and back in one continuous piece, the width of your paper should equal the total perimeter of the bag plus an extra 2 to 3 centimeters for a clean seam. The height of the paper should match the height of the bag plus an extra 3 to 4 centimeters at the top to fold inside the rim, and another 3 to 4 centimeters at the bottom to fold neatly across the base. If you prefer a simpler method, you can cut individual panels for the front and back, adding a 1-centimeter overlap on each side to wrap around the corners.
Once your measurements are calculated, mark them lightly on the back of the wrapping paper using a pencil and a metal ruler. To ensure perfectly straight, symmetrical lines, use a grid-lined cutting mat as a guide. Cut the paper slowly using sharp scissors or a utility knife guided by your metal ruler. Clean, straight cuts prevent frayed edges and make alignment much easier during the application phase.
Step-by-Step Guide to Applying the Paper
Applying the paper smoothly requires patience and a systematic approach. Start by preparing your adhesive. If you are using double-sided tape, apply strips along the top, bottom, and side edges of the bag’s front panel. If you prefer liquid craft glue or a glue stick, apply a thin, even layer across the entire panel. Avoid using too much liquid glue, as excess moisture can saturate the paper, causing it to warp, bubble, or tear.
Align the top edge of your cut wrapping paper with the top rim of the gift bag, leaving the excess paper extending past the bottom and sides as planned. Gently lower the paper onto the adhesive-covered front panel. Starting from the center of the panel, use your hands or a soft cloth to smooth the paper outward toward the edges. This motion pushes out any trapped air and ensures a firm, uniform bond.
Once the front panel is secure, move to the sides. If you are doing a continuous wrap, fold the paper carefully around the corners, using your bone folder to create sharp, crisp creases along the vertical edges. Apply adhesive to the side gussets and smooth the paper down, paying close attention to the folding creases of the gusset so the bag can still fold flat if needed. Repeat this process for the back panel, securing the final seam with a thin strip of double-sided tape for a clean, invisible finish.
To finish the top and bottom edges, you will need to make precise folds. At the top rim, fold the excess paper inward over the edge of the bag and secure it inside with double-sided tape. This hides the raw cut edge of the paper and reinforces the top of the bag where the handles emerge. For the bottom, fold the excess paper inward like a standard gift box, creating neat triangular flaps. Secure these flaps tightly to the base of the bag with tape. If the added paper layers create tension on the bag’s base, cut a piece of stiff cardstock to the exact dimensions of the bag’s bottom and glue it inside to reinforce the gusset and support the weight of your gift.
Adding Ribbons and Final Decorative Touches
Ribbons add texture, color, and a sense of luxury to your decorated gift bag. There are several ways to incorporate them. One classic method is to thread a coordinating ribbon through the existing handle holes. If your plain bag has rope handles, you can untie the knots inside, slide the handles out, and replace them entirely with wide satin or grosgrain ribbons. Tie secure knots on the inside of the bag to keep the new ribbon handles in place, ensuring they are even in length.
Alternatively, you can wrap a wide ribbon horizontally around the center or lower third of the bag, securing it at the back with double-sided tape. This not only adds a beautiful band of contrasting color but also helps conceal any minor seams or imperfections in your paper application. To complete the look, tie a separate, elegant bow and adhere it to the front of the bag where the ribbon band meets, or tie it directly to one of the handle bases.
When working with fabric ribbons, the cut ends can easily fray over time, making your hard work look untidy. To prevent this, always trim the ribbon ends at a sharp 45-degree angle or cut a neat “V” shape into the tips. For synthetic ribbons like polyester or nylon, you can carefully pass the cut edge near a small flame for a fraction of a second to melt and seal the fibers. Always exercise extreme caution when using heat, work in a safe environment, and keep flammable materials away.
Troubleshooting Common Wrapping Mistakes
Even with careful planning, mistakes can happen during the crafting process. If you notice trapped air bubbles or wrinkles after applying the paper, do not try to rip the paper off, as this will tear both the wrapping paper and the underlying bag. Instead, take a fine sewing needle and gently prick the center of the bubble. Use your finger or a bone folder to smooth the air out through the tiny hole, pressing the paper flat against the adhesive.
If you end up with uneven cuts, misaligned seams, or visible adhesive spills, you can easily conceal them with strategic embellishments. A misplaced seam on the front of the bag can be hidden under a vertical strip of ribbon, a decorative gift tag, or a beautiful paper cutout. Adhesive residue can often be gently rubbed away with a clean eraser once dry, or covered with a small decorative element like a paper flower or a festive sticker.
Sometimes, the added layers of wrapping paper can make the bag stiff, restricting the movement of the handles or making the bag difficult to carry. If the paper has covered the handle holes, use a sharp hole punch or a utility knife to carefully clear the openings. If the handles feel weak under the weight of the decorated bag, reinforce the interior handle area with a strip of heavy packing tape or a small piece of cardboard glued to the inside rim.
Frequently Asked Questions (FAQ)
What type of adhesive works best for wrapping paper on gift bags?
Double-sided tape is generally the best option for wrapping paper because it provides an instant, strong hold without introducing moisture, which eliminates the risk of paper wrinkling or bubbling. For larger flat panels, a high-quality glue stick works well if applied evenly. Liquid craft glues should be used sparingly and spread thin with a brush or scraper to prevent the paper from warping or showing wet spots.
How can I keep the wrapping paper from tearing when folding the edges?
To prevent tearing, avoid pulling the paper too tightly over sharp corners. Using a bone folder to score a light crease along your fold lines before making the actual fold helps guide the paper naturally and reduces tension on the fibers. If you are using thick or textured paper, scoring is essential to achieve clean, crisp edges without cracking or tearing the decorative surface.
Is it better to wrap the bag before or after putting the gift inside?
It is highly recommended to wrap the gift bag while it is empty. This allows you to lay the bag completely flat on your work surface, making it much easier to measure, align, and smooth down the wrapping paper without any obstructions. Wrapping an empty bag also eliminates the risk of accidentally crushing delicate gifts or spilling contents during the decorating process. Once the adhesive is fully dry, you can safely open the bag and place your gift inside.

Community discussion
Share your experience or ask a question. Comments are reviewed before publication.