
Transforming a plain paper or fabric gift bag with a handle into a bespoke, premium package is an incredibly satisfying way to elevate your presentation. Rather than relying on generic, pre-printed gift wrap, personalizing a basic carrier demonstrates a high level of thoughtfulness and care. Whether you are preparing a gift for a wedding, a birthday, or a festive holiday, mastering a few core ribbon-tying and embellishing techniques allows you to create a high-end look using simple, budget-friendly materials.
To achieve a flawless finish, it is essential to understand how different materials interact, how to select the right tools, and how to apply adhesives that can withstand environmental factors like high humidity. By focusing on structural balance, clean execution, and thoughtful color theory, you can turn a standard gift bag with a handle into a beautiful keepsake that your recipient will hesitate to open.
Gather Your Materials and Tools
Before beginning your project, gather high-quality materials that complement each other in weight, texture, and color. The foundation of your design is a plain gift bag with a handle, which typically comes in either thick kraft paper (ranging from 120 gsm to 180 gsm) or non-woven fabric. Kraft paper bags offer a sturdy, matte surface that is highly receptive to adhesives, while non-woven fabric bags provide a reusable, textured base that requires flexible bonding agents.
Products mentioned in this guide
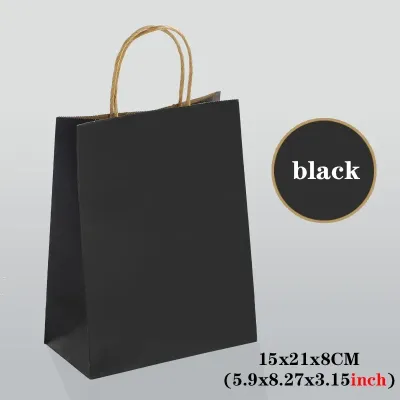
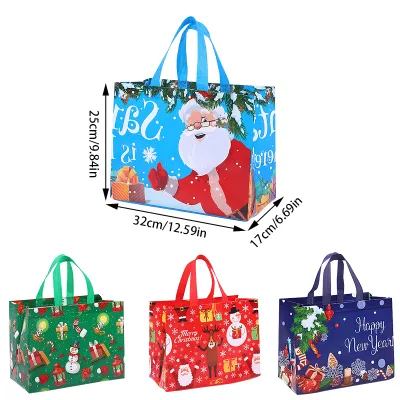
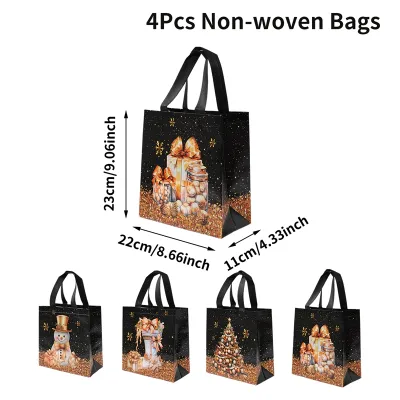


Prices are valid at publication and may change. Please refer to the product page for the latest price.
Next, select your ribbons based on the structure and aesthetic you wish to achieve. Double-faced satin ribbons offer a smooth, glossy finish on both sides, creating a luxurious drape that is perfect for elegant bows. Grosgrain ribbons feature a distinctive ribbed texture that provides excellent structural integrity, making them ideal for crisp, structured bows that will not sag. Sheer organza ribbons add a delicate, airy layer of sophistication, which works beautifully when layered over solid ribbons. Ensure you choose appropriate ribbon widths: thin 6mm or 10mm ribbons are excellent for wrapping handles, while wider 25mm or 38mm ribbons are best for creating bold statement bows on the bag’s body.
For embellishments, prepare items that add texture and personal detail. These can include thick cardstock gift tags, delicate dried flower sprigs (such as lavender, baby’s breath, or mini eucalyptus), decorative stickers, or pre-made wax seals equipped with self-adhesive backings.
The right tools are crucial for executing clean, professional-looking designs. A pair of dedicated, ultra-sharp fabric scissors is essential for cutting ribbons cleanly without fraying the edges. Keep a pair of fine-tipped crafting tweezers nearby to handle small, delicate embellishments like dried flower stems or tiny gems without smudging your adhesives.
Adhesive selection is particularly critical, especially when crafting in Singapore’s humid tropical climate. Standard liquid white glues or school glues introduce excess moisture to paper fibers, which inevitably leads to unsightly paper warping, wrinkling, and incredibly slow drying times. High-temperature hot glue guns can also be problematic, as they can burn through thin paper bags and leave bulky, uneven ridges beneath flat ribbons. Instead, prioritize high-tack double-sided tape, clear glue dots, or dry adhesive runner rollers. These options provide an instant, moisture-free bond that keeps heavy ribbons and dimensional items securely anchored without compromising the smooth surface of the paper. Always ensure you handle sharp scissors and blades safely, and work in a well-ventilated space if using any specialized craft adhesives.
Step-by-Step Ribbon Techniques for Handles and Bag Body
Ribbons serve as the primary design architecture of your decorated gift bag. By applying them systematically to both the handles and the bag’s flat surfaces, you establish a balanced, cohesive theme.

Wrapping and Tying the Handles
Enhancing the handles of a gift bag elevates the first touchpoint your recipient interacts with. To wrap a handle for a clean, color-blocked look, select a ribbon width that matches the handle’s thickness—typically 10mm to 15mm works best for standard paper twist, cotton rope, or ribbon handles. Begin by securing the starting end of the ribbon at the inner base of the handle, right where it meets the bag body, using a small piece of high-bond double-sided tape. Wrap the ribbon tightly upward in a spiral pattern, keeping the tension consistent and overlapping each turn by about half the ribbon’s width to ensure no part of the original handle peeks through. Once you reach the opposite base, secure the end with another discreet piece of tape on the inside of the bag.
If you prefer a classic bow or a simple knot, tie it directly at the root where the handle meets the bag body. This placement anchors the decoration and draws the eye to the bag’s opening. When tying bows, ensure the loops are symmetrical and the tails drape naturally down the front of the bag. Always trim the ribbon tails at a sharp 45-degree angle, or cut a clean “V” shape (chevron cut) into the ends. This not only looks highly professional but also prevents the woven threads of satin or grosgrain from fraying over time.
Because different ribbon materials react uniquely to being cut, it is wise to perform a quick trial on a scrap piece of ribbon first. Observe if the edges fray immediately; if they do, you can apply a microscopic amount of clear nail polish or a specialized fray-preventing liquid to the very edge of the cut.
Be mindful of the bag’s construction during this process. Avoid pulling or tying ribbons too tightly around the handle insertion holes or metal eyelets. Tight knots can pinch the paper or put unnecessary stress on the handle anchors. When the bag is later filled with a heavy gift, this tension can tear the paper around the holes, causing the handle to fail entirely during transport.
Adding Ribbon Accents to the Bag Body
Decorating the flat surfaces of the bag allows you to play with geometric structure and scale. To apply ribbons flat against the bag body, use a high-quality double-sided tape that matches the width of your ribbon. Apply the tape directly to the paper bag first, smoothing it down with your fingers to eliminate air bubbles and ensure full contact. Peel back the protective liner and press the ribbon firmly onto the adhesive, working from one end to the other while keeping the ribbon taut. This technique is perfect for creating clean horizontal borders, a classic gift-box cross pattern, or modern diagonal stripes across the front panel.
Alternatively, you can create a three-dimensional focal point by assembling a multi-loop bow or a ribbon rosette separately before mounting it. To make a multi-loop bow, loop the ribbon back and forth in your hand, securing the center tightly with a thin wire or thread, then fluff out the loops to build volume. Attach this pre-made bow to the center-top or the bottom corner of the bag using a heavy-duty glue dot. This method ensures the bow remains perfectly symmetrical and doesn’t sag under its own weight.
Precision is key to a polished final look. Always use a ruler to measure the dimensions of your bag panels and cut your ribbon pieces with an extra 2 centimeters of length on each side. This extra length allows you to wrap the raw ribbon ends around the side edges or tuck them neatly under the bottom flap of the bag, hiding the cut edges completely from view. Never attempt to trim the ribbon flush with the bag’s edge after applying the adhesive, as this often leads to uneven cuts or accidental damage to the bag itself.
Layering Embellishments for a Polished Presentation
Once your ribbon base is secure, layering smaller embellishments adds depth, texture, and a highly personalized touch. The goal is to make the design look curated rather than cluttered, which requires careful placement and a mix of tactile materials.
Begin with the functional elements, such as gift tags. Instead of simply taping a tag flat to the bag, thread a thin piece of jute twine, metallic thread, or 3mm satin ribbon through the tag’s eyelet. Tie this twine directly around the base of the bag’s handle or slip it under the knot of your main handle bow. This allows the tag to dangle naturally, adding movement and a sense of dimension to the package. If you are writing a personalized message on the tag, verify your pen’s ink compatibility first. In humid environments, slow-drying gel pens or heavy ink markers can easily smudge on glossy cardstock. Perform a quick test on a scrap piece of cardstock to ensure the ink dries quickly, resists bleeding, and remains crisp before writing your final message.
Next, introduce tactile, three-dimensional elements to create visual interest. Dried flower sprigs—such as a single stem of dried lavender, a small bundle of baby’s breath, or a pressed fern leaf—pair beautifully with paper packaging. Position these natural elements so their stems tuck neatly behind your ribbon band or bow. Use fine-tipped tweezers to hold the delicate stems in place, and apply a tiny glue dot or a small drop of quick-dry craft adhesive to the sturdiest part of the stem to secure it. For a vintage or formal touch, press a wax seal directly over the ribbon intersection or the stem of the dried flower. Pre-made wax seals with self-adhesive backings are ideal here, as they eliminate the risk of hot wax dripping onto and staining the paper bag.
To keep the design sophisticated, apply the principle of visual balance. Avoid scattering stickers, gems, or flowers evenly across the entire surface of the bag, which can look chaotic and distracting. Instead, cluster your embellishments in a single focal area. The base of one handle or the bottom-right corner of the bag are excellent focal points. A clustered arrangement guides the recipient’s eye naturally to the most detailed part of the design, leaving ample negative space on the rest of the bag to highlight the clean texture of the paper.
Varying the textures of your chosen materials is another simple way to elevate the presentation. Pair contrasting surfaces to create a sensory experience: the smooth, glossy finish of a double-faced satin ribbon contrasts beautifully against the rustic, matte texture of a brown kraft paper bag. Adding a rough jute twine string, a crisp cardstock tag, or a textured wax seal creates layers of depth that make the entire package feel incredibly premium and thoughtful.
Design Pairings for Different Gifting Occasions
Adapting your decorating style to the specific occasion ensures your gift bag feels appropriate and highly tailored to the recipient. By choosing targeted color palettes and themed embellishments, you can match any event’s tone perfectly.
For birthdays, focus on vibrant, energetic designs. Opt for bright, contrasting ribbon colors—such as a sunny yellow grosgrain ribbon paired with a royal blue paper bag. You can add playful accents by running strips of patterned washi tape along the bag’s bottom border or scattering colorful, high-quality stickers across the front panel. For an extra element of surprise, attach a clear, hollow gift tag filled with colorful confetti that shakes when the bag is moved.
Weddings, anniversaries, and formal celebrations call for a refined, minimalist aesthetic. Select a palette of elegant, muted tones such as ivory, champagne, blush pink, or soft sage green. Use sheer organza ribbons or delicate silk ribbons that drape gracefully down the side of the bag. You can secure the ribbon with a pearl-headed pin (ensuring the sharp point is safely embedded within a thick cardboard backing inside the bag) or a monogrammed wax seal. Pair this with a high-gsm cardstock tag featuring clean, minimalist calligraphy for a timeless finish.
During festive holidays, draw inspiration from classic seasonal motifs while keeping the design modern. For year-end holidays, combine deep forest green and rich crimson satin ribbons, or pair navy blue with shimmering metallic gold. You can tie small, natural elements directly to the handle base, such as a tiny pinecone, a cinnamon stick, or a sprig of preserved holly. For local celebrations like Lunar New Year, opt for a vibrant red paper bag decorated with a structured gold grosgrain ribbon, and hang a small, stylized paper lantern or a gold-embossed blossom tag from the handle to symbolize prosperity.
Common Mistakes to Avoid and Final Presentation Checks
Before placing your gift inside the decorated bag, taking a few moments to troubleshoot and inspect your work ensures the packaging remains both beautiful and functional throughout its journey.
The most common pitfall when decorating paper bags is the overuse of liquid craft glue. Excess liquid moisture easily penetrates paper fibers, leading to unsightly warping, wrinkling, and dark glue stains that remain visible even after drying. Liquid glue can also seep through the ribbon weave, ruining its sheen. Always rely on dry adhesives like double-sided tape or clear glue dots for paper-to-ribbon contact.
Additionally, always verify that your decorations have not compromised the bag’s structural integrity. After tying ribbons or attaching embellishments near the handle roots, gently lift the bag by its handles to test its weight capacity. Ensure that no knots are pulling too tightly against the paper holes and that heavy decorative elements, like large wax seals or wooden tags, do not cause the bag’s top edge to sag or fold inward.
Conclude with a quick visual and physical checklist. Use your scissors to clean up any stray threads or frayed edges on the ribbon tails. Peer closely at the edges to confirm that all adhesive tabs, tape liners, and glue dot backings are completely hidden from view. Finally, run your hand gently over the front panel to ensure no dimensional embellishments, such as dried flowers or tags, are loose or placed where they might easily snag on clothing or other items during transport.
Frequently Asked Questions (FAQ)
What is the best adhesive for decorating paper gift bags?
For flat ribbons and paper borders, high-tack double-sided tape or dry adhesive rollers are the absolute best choices because they offer an instant bond without introducing moisture. For dimensional embellishments like dried flowers, heavy cardstock tags, or pre-made wax seals, clear glue dots provide excellent localized holding power. Avoid using standard liquid school glues, which warp paper, or high-temperature hot glue guns, which can burn through thin paper bags and leave bulky, uneven ridges beneath your ribbons.
How do I keep ribbon bows from unraveling on the handles?
To prevent slippery ribbons like satin or organza from coming undone, apply a tiny dot of clear-drying craft glue or a small piece of double-sided tape directly inside the center knot of the bow as you pull it tight. If you want to keep the ribbon tails positioned flat against the face of the bag, you can anchor them discreetly by placing a small piece of double-sided tape on the underside of the ribbon tail and pressing it gently against the paper.

Community discussion
Share your experience or ask a question. Comments are reviewed before publication.