
Transforming a plain paper gift bag into a beautifully customized token of appreciation is an excellent way to show gratitude to a teacher. By combining basic kraft or solid-color bags with leftover wrapping paper panels and coordinated ribbon accents, you can create a polished, high-end look without spending a fortune. This approach allows you to tailor the design to the teacher’s personality, making the presentation of the gift just as thoughtful as the item inside.
Personalizing your own gift packaging also ensures that the bag is sturdy enough to hold classroom supplies, books, or treats. With a few standard stationery tools and some careful measuring, you can achieve clean lines and seamless edges that rival professional gift-wrapping services. The following guide details how to select the right materials, execute the decorating process step-by-step, and add elegant finishing touches that any educator will appreciate.
Materials and Tools You Will Need
To achieve a clean, durable finish, start by selecting a sturdy plain paper bag. A bag made from heavy kraft paper or cardstock (ideally 120 GSM or higher) provides a stable foundation that can support the weight of added wrapping paper layers and heavy ribbon embellishments without sagging or tearing. If the base bag is too thin, the moisture from adhesives or the tension from the handles can cause the paper to buckle.
Products mentioned in this guide
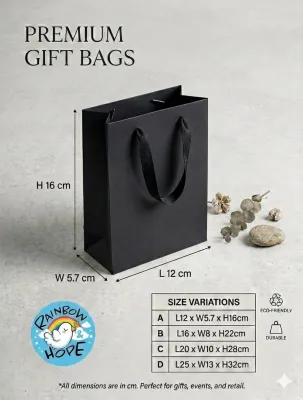
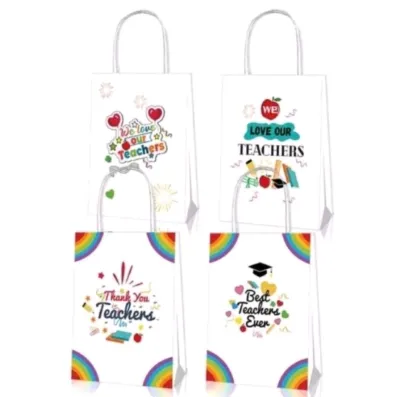

Prices are valid at publication and may change. Please refer to the product page for the latest price.
Choosing the right adhesive is critical for a professional look. Double-sided craft tape is highly recommended because it provides an instant, strong bond with zero drying time and no risk of warping the paper. If you prefer glue sticks, select a high-tack, acid-free variety. Avoid standard liquid school glues or hot glue guns for the main panels; liquid glues introduce excess moisture that causes thin wrapping paper to wrinkle, while hot glue creates unsightly lumps beneath the surface.
For precise cuts, gather a sharp pair of scissors, a utility or craft knife, a metal ruler, and a self-healing cutting mat. A metal ruler is essential because it will not nick when guiding a blade, ensuring perfectly straight edges. When working with cutting blades and adhesives, always prioritize safety: work on a flat, stable surface, cut away from your body, and keep your fingers clear of the blade’s path.
Finally, select wrapping paper and ribbon textures that complement each other. A matte or textured wrapping paper pairs beautifully with a smooth satin or grosgrain ribbon. For a cohesive look, choose a color palette that reflects a classic school theme—such as warm forest greens, deep blues, or soft pastels—paired with neutral kraft paper.
Step-by-Step Guide to Decorating the Gift Bag
Decorating a gift bag requires a systematic approach to ensure the final product looks neat and holds together during transport. The process moves from measuring and cutting the paper panels to adhering them smoothly, and finally adding the ribbon handles and decorative accents. Taking your time during each phase prevents alignment errors and minimizes wasted materials.

Before applying any adhesive, it is vital to measure the physical dimensions of your bag. Even standard-sized bags can have slight manufacturing variances, so measuring the exact height and width of the panels you plan to cover is the best way to ensure a perfect fit.
As you work, establish clear stopping conditions. If you notice the wrapping paper beginning to wrinkle, or if the adhesive fails to bond securely to a glossy bag surface, stop immediately. Test your adhesive on a small, inconspicuous area—such as the inside flap or the bottom of the bag—to verify compatibility before proceeding with the main panels.
Preparing the Wrapping Paper Accents
Begin by measuring the front and back panels of your plain gift bag. Use your ruler to find the exact height and width of the flat face of the bag. If you want the wrapping paper to cover the entire front panel, add an extra 1.5 centimeters to the top measurement; this extra margin will be folded over the top rim of the bag for a seamless, professional edge.
Place your wrapping paper face down on the cutting mat. Using your metal ruler as a straightedge, mark your cutting lines lightly on the back of the paper with a pencil. Align the ruler with your marks, press down firmly to prevent slipping, and draw your craft knife along the edge in a single, continuous motion to achieve a crisp, clean cut. If you are using scissors, cut slowly along the pencil lines to avoid jagged edges.
Once your paper panels are cut, perform a “dry fit” by placing them against the bag without any tape or glue. This step allows you to check the alignment of any patterns on the paper, such as stripes or geometric designs, and verify that the paper sits flush with the edges of the bag. Trim any excess paper before moving on to the adhesive stage.
Attaching the Paper and Securing the Edges
Because adhesive bond strength and paper warping depend heavily on the exact combination of your bag’s finish and the wrapping paper’s weight, always test a small scrap first. Once you are satisfied with the test, apply double-sided tape along the outer perimeter of the bag’s front panel, keeping the tape about 2 millimeters inside the edge to prevent it from showing. Add a few diagonal strips of tape across the center of the panel to ensure the middle of the paper does not bubble or sag.
Align the bottom edge of your cut wrapping paper with the bottom edge of the bag. Slowly lower the paper onto the taped surface, starting from the bottom and working your way up. Use a clean, dry cloth or a plastic scraper to smooth the paper outward from the center to the edges, pushing out any trapped air bubbles as you go.
If you included an extra margin at the top, fold this excess paper neatly over the top rim of the bag. Apply a thin strip of double-sided tape to the inside collar of the bag and press the folded paper down firmly. This technique hides the raw cut edge of the wrapping paper and reinforces the top rim where the handles are attached.
Adding Ribbon Bows and Handles
Ribbon elements add texture and visual interest to your decorated bag. If your plain bag has basic paper twist handles, you can elevate them by wrapping them in ribbon. Secure the end of a narrow satin or grosgrain ribbon to the base of the handle with a small piece of double-sided tape, wrap the ribbon tightly around the entire length of the handle, and secure the opposite end at the base with more tape.
To create a focal point, tie a classic bow using a wider, coordinating ribbon. Cut a length of ribbon, fold it into two loops, cross them, and pull one loop through the center space to form a neat bow. Pull the loops tight and trim the ribbon tails at a 45-degree angle or in a V-shape to prevent fraying. If you are using synthetic ribbon, you can carefully pass the cut ends near a small heat source for a split second to melt and seal the fibers.
Attach the completed bow to the base of one of the handles or directly onto the front panel of the bag. Use a strong, high-tack double-sided tape or a small dot of specialized craft glue to secure it. Press and hold the bow in place for at least thirty seconds to ensure the adhesive forms a permanent bond with the paper surface.
Personalizing the Bag for a Teacher
To make the gift bag feel truly special, incorporate subtle educational motifs that celebrate the teaching profession. You can use leftover scraps of wrapping paper or colored cardstock to cut out simple shapes, such as a classic apple, a stack of books, or a pencil. Adhering these shapes to the front panel using foam tape creates a beautiful three-dimensional effect that adds depth to your design.
Another thoughtful touch is integrating a personalized thank-you note directly into the bag’s design. Cut a small rectangle of high-quality cardstock, write a heartfelt message, and punch a hole in the corner. Thread a piece of thin ribbon or baker’s twine through the hole and tie it around the handle of the bag, allowing the tag to drape elegantly over the front panel.
When adding these personal touches, remember to balance the visual weight of your decorations. Leave enough negative space—the plain areas of the bag—so that your wrapping paper panels and ribbon accents stand out. A cluttered design can look messy, whereas a balanced layout looks intentional, elegant, and highly professional.
Common Mistakes to Avoid
One of the most common crafting pitfalls is using excessive liquid glue. Liquid glues saturate paper fibers quickly, leading to warping, wrinkling, and a weakened structure that can cause the bag to fail when carried. Stick to dry adhesives like double-sided tape or high-quality glue sticks to maintain a flat, pristine finish.
Another mistake is overloading a lightweight bag with heavy embellishments. If your base paper bag is thin, adding heavy wooden cutouts, thick layers of cardstock, or massive ribbon bows can cause the bag to sag or rip at the handles. Always match the weight of your decorations to the structural capacity of the bag itself.
Finally, never skip the dry-fitting step. Applying adhesive before verifying the alignment of your paper panels often results in crooked patterns, exposed tape, or uneven borders. Taking a few extra seconds to position and trim your materials before committing to the adhesive will save you time, frustration, and wasted supplies.
Frequently Asked Questions (FAQ)
Can I use fabric ribbon instead of satin or curling ribbon?
Yes, fabric ribbons like grosgrain, cotton, or velvet can be used and often provide a more premium, tactile feel than standard curling ribbon. However, because fabric is heavier and more porous than plastic-based ribbons, standard lightweight tape may not hold it securely. Use a heavy-duty double-sided craft tape or a specialized fabric glue to ensure a strong bond. Additionally, fabric ribbon is highly prone to fraying; always cut the ends with very sharp fabric shears and seal the edges with a fray-check solution or a quick heat-sealing technique.
What should I do if the wrapping paper tears while attaching it?
If your wrapping paper tears during assembly, you do not necessarily have to start over. If the adhesive is still wet or you are using a low-tack tape, you can try to gently peel the paper back, but do so slowly to avoid tearing the underlying bag. If the paper is firmly stuck, the easiest solution is to cover the tear strategically. Place a decorative element—such as a hand-cut paper apple, a personalized gift tag, or a large ribbon bow—directly over the damaged area to conceal the mistake while adding to the design.
How can I make the decorated bag more durable for heavy gifts?
To reinforce a decorated paper bag for heavier items like books, mugs, or stationery sets, start by strengthening the base. Cut a piece of thick, rigid cardboard or heavy cardstock to the exact dimensions of the bag’s bottom panel and slide it inside to distribute the weight evenly. You can also reinforce the handle area by applying a strip of heavy-duty packing tape to the inside of the bag where the handles are attached, which prevents the paper from tearing under tension.

Community discussion
Share your experience or ask a question. Comments are reviewed before publication.