
Elevating a simple mini paper bag into a polished, boutique-style gift presentation does not require professional wrapping skills. With a few carefully selected stationery supplies, such as high-quality ribbons, custom stamps, and elegant tags, you can transform plain packaging into a memorable keepsake. The key to success lies in preparing the paper base, mastering clean ribbon techniques, and layering decorative elements without cluttering the design. This guide walks you through the step-by-step process of decorating a mini paper bag to achieve a secure, professional, and visually stunning finish.
By focusing on structural integrity and thoughtful color coordination, you can customize your packaging for any occasion. Whether you are preparing party favors, corporate gifts, or holiday presents, these techniques ensure your packaging looks intentional and refined.
Gather Your Materials and Tools
Before beginning your project, select a mini paper bag that matches the scale and weight of your gift. For most small items, a bag made from kraft paper with a thickness of 120 to 150 gsm (grams per square meter) provides a sturdy foundation that resists tearing. Ensure the bag’s dimensions allow your gift to sit comfortably inside without stretching the paper seams.
Products mentioned in this guide
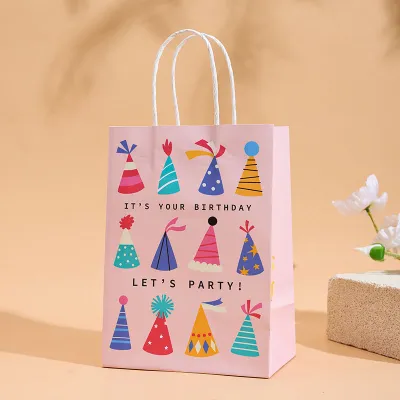
![[ FOR MINI ME ] 10 PCS KRAFT PAPER BAG PARTY BAG KIDS BIRTHDAY GOODIE BAG CHRISTMAS CNY WRAPPING](https://img.lazcdn.com/g/p/716f5be262fbbce0a60bfa23a232a224.jpg_400x400q80.jpg_.webp)
![[Paper Gift Bag] Kraft Paper Bag for packing Small Goodies Treat Bag / Birthday Party Valentines Day Gift Goodie Bag](https://img.lazcdn.com/g/p/be5210273589415dc88a39d7685aa9a5.jpg_400x400q80.jpg_.webp)
![[ Paper Gift Bag ] Kraft Paper Bag for packing Small Goodies Treat Bag / Cake Box / Pastries Box / Wedding Gift Bag](https://img.lazcdn.com/g/p/976c26fa4b1bf860f6b9fcc438f87a4f.jpg_400x400q80.jpg_.webp)
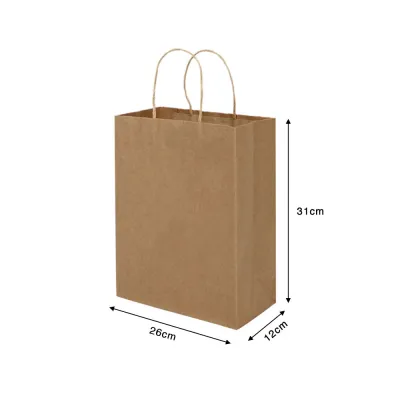
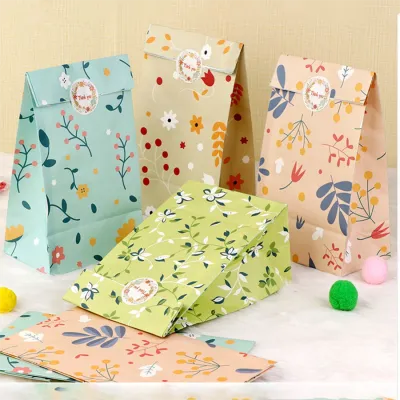

Prices are valid at publication and may change. Please refer to the product page for the latest price.
Next, choose your ribbons and decorative ties. Satin, grosgrain, and organza ribbons offer different textures and levels of stiffness, while cotton twine or jute cord provides a rustic, natural look. Select a ribbon width that is proportional to the bag; a 10mm to 15mm ribbon typically works best for mini bags.
Gather your essential tools on a clean, flat workspace. You will need a pair of sharp scissors to make clean cuts without fraying the ribbon edges. Keep high-tack double-sided tape and adhesive dots on hand for discreet securing, and ensure you have a cutting mat to protect your work surface.
For safety when preparing your materials, always cut away from your body and keep sharp scissors closed when not in use. If you choose to use strong liquid craft glues or solvent-based adhesives, work in a well-ventilated room and avoid direct skin contact to prevent irritation.
Finally, collect your optional embellishments. These can include cardstock gift tags, patterned washi tape, decorative stamps, and small dried botanicals like lavender sprigs or eucalyptus leaves. Having all your materials organized beforehand keeps the assembly process smooth and efficient.
Prepare the Mini Paper Bag for Decorating
To ensure your decorated bag looks pristine, start by preparing its structure. Inspect the handles to verify they are securely glued or anchored to the inside of the bag. If the handles feel loose, reinforce them with a small strip of double-sided tape or a dab of craft glue before adding any weight.

Next, fold the top edge of the bag inward or outward by approximately two centimeters to create a crisp, reinforced rim. This simple fold hides raw paper edges and adds structural strength to the top of the bag, preventing it from sagging when you attach ribbons or tags. Use a bone folder or the side of a clean ruler to press the fold flat and sharp.
Before applying any decorative elements, wipe the exterior surface of the bag with a dry, lint-free microfiber cloth. Paper bags often carry a fine layer of paper dust from the manufacturing process, which can prevent adhesive tapes, stickers, and washi tape from bonding securely.
Fill the bag with tissue paper or crinkle-cut paper filler before you begin decorating. This internal volume supports the shape of the bag, making it easier to apply pressure when sticking down tape or stamping designs. Gently fluff the tissue paper and let it drape slightly over the top rim for a professional, layered look.
Tie and Secure Ribbons for a Professional Finish
Ribbons serve as both a functional closure and a major visual element of your gift presentation. To avoid wasting material, measure your ribbon by wrapping it around the bag and adding an extra thirty centimeters to accommodate your knots and loops. Cut the ribbon at a clean angle to prevent the woven threads from unraveling.
When securing ribbons around the bag, use small, strategically placed pieces of double-sided tape to hold the ribbon in place. This prevents the ribbon from sliding up or down the smooth paper surface during handling. Position the tape underneath where the ribbon will sit so it remains completely hidden from view.
Maintain consistent, gentle tension as you tie your knots. Pulling the ribbon too tightly can crease or crush the paper bag, while leaving it too loose will make the presentation look untidy. Aim for a snug fit that holds the bag’s shape without distorting the paper.
The Classic Bow Tie Method
To create a traditional, symmetrical bow, start by threading your ribbon through the bag’s handles or around the gathered neck of the bag. Ensure both ends of the ribbon are of equal length before making your first knot. This balance is crucial for achieving even loops and tails.
Form two even loops, often referred to as “bunny ears,” and cross them over to tie a standard bow. Gently pull the loops to tighten the knot while holding the center secure with your finger. Adjust the size of the loops and the length of the tails until they are perfectly proportional to the mini bag.
Finish by trimming the ribbon tails to a professional standard. Cut the ends at a sharp 45-degree angle, or fold the ribbon vertically and cut upward at an angle to create a classic V-cut chevron shape. This step not only looks polished but also seals the woven edges against fraying.
The Cross-Wrap Technique
For a structured, box-like presentation, the cross-wrap technique wraps the ribbon around the entire body of the bag. Place the bag face down on your workspace and lay the ribbon vertically across the back. Bring the ribbon ends up, cross them over each other, and twist them 90 degrees to run horizontally.
Bring the horizontal ribbon ends around to the front of the bag, ensuring the ribbon lies flat and untwisted against the paper. Secure the intersection point on the front with a tiny dot of double-sided tape to keep the wrap centered and taut.
Tie a simple, neat knot at the front intersection point. You can leave the knot as a minimalist detail, or attach a pre-made bow directly over the knot using an adhesive dot for a perfectly centered, dimensional focal point.
Add Embellishments and Wrapping Accessories
Layering accessories onto your mini paper bag adds personal charm, but maintaining visual balance is essential. Avoid overcrowding the small surface area of a mini bag; choose one or two complementary elements rather than using every accessory at once.
Because paper surfaces and coatings vary, always perform an adhesive test. Apply a small piece of your double-sided tape, glue dot, or washi tape to a scrap piece of the same bag material or an inconspicuous area like the bottom flap. Observe the test piece to ensure the adhesive does not leave oily stains or tear the paper fibers.
Press all added embellishments firmly for at least five seconds to ensure a strong bond. This step is especially important if your gift will be transported, as temperature changes and movement can cause poorly bonded elements to detach.
Attaching Gift Tags and Labels
To integrate a gift tag seamlessly, thread the tag’s string or wire onto your ribbon before tying the final bow. This keeps the tag securely attached to the main closure and allows it to drape naturally over the front of the bag without requiring extra adhesive.
If you are using flat adhesive labels or stickers, opt for double-sided tape or adhesive dots instead of liquid school glue. Liquid glues contain water, which can warp thin paper bags and leave unsightly wrinkles. Adhesive dots provide an instant, dry bond that keeps the label perfectly flat.
Position your tags and labels so they face forward and remain easily readable. Avoid placing them too close to the bottom edge where they might fold under, or too close to the handles where they might get crumpled when the bag is lifted.
Using Washi Tape, Stamps, and Natural Elements
Washi tape is an excellent tool for creating clean, geometric borders along the folded top rim or the bottom base of your bag. Apply the tape in straight lines, smoothing out any air bubbles with your thumb, and trim the ends cleanly at the side seams of the bag.
If you want to stamp designs directly onto the paper, verify your ink type first. Pigment-based inks work best on porous kraft paper as they offer vibrant color and excellent bleed resistance. Perform a trial stamp on a scrap piece of paper to check the drying speed and ensure the ink does not bleed through to the inside of the bag.
For a tactile, organic finish, tuck a small sprig of dried lavender, rosemary, or a pressed leaf under your ribbon knot. Secure the stem with a tiny drop of craft glue or slide it directly behind the ribbon wrap to keep it stable and prevent it from slipping out during transit.
Final Checks for a Secure and Cohesive Look
Once your decorations are complete, lift the bag gently by its handles or main ribbon closure to test its weight distribution. Ensure the bag hangs straight and that the bottom does not sag or pull apart under the weight of the gift inside.
Inspect the exterior of the bag for any exposed adhesive residue. If you find any sticky spots, gently rub them away with a clean finger or cover them with a small decorative element to prevent the bag from sticking to other items or collecting dust.
Smooth out any accidental creases, dents, or crushed areas on the paper surface by gently pressing from the inside of the bag with your hand. A clean, smooth paper surface is essential for maintaining a high-end, professional appearance.
Finally, step back and review the overall presentation. Ensure your color palette is cohesive, your ribbon tails are even, and your embellishments are secure. Your beautifully decorated mini paper bag is now ready to make a lasting impression on your recipient.
Frequently Asked Questions (FAQ)
How do I prevent the ribbon from slipping off smooth paper handles?
To secure ribbon on slippery or laminated paper handles, apply a small piece of high-tack double-sided tape directly to the handle surface before wrapping or tying the ribbon. Alternatively, wrap the ribbon tightly around the base of the handle where it meets the bag body, rather than just looping it through the handle opening. A discreet dab of craft glue can also lock the knot permanently in place.
Can I decorate a mini paper bag if it already has a printed pattern?
Yes, you can decorate patterned bags by choosing solid-colored ribbons that match one of the secondary colors in the print. Avoid busy stamps or contrasting washi tape that will compete with the existing design. Instead, focus on a single, elegant focal point, such as a minimalist cardstock tag or a simple satin bow, to keep the presentation clean and balanced.

Community discussion
Share your experience or ask a question. Comments are reviewed before publication.