
Starting your first embroidery project is an exciting step into a creative craft, but walking down the needlework aisle can quickly feel overwhelming. With dozens of individual options, choosing a dedicated needle set is the most practical way to ensure you have the right tools on hand. A well-curated starter set saves you from the frustration of split threads, damaged fabrics, and hand fatigue before you even complete your first stitch.
To make an informed purchase, you need to understand how different needles interact with various fabrics and threads. The ideal starter set should offer versatility, allowing you to experiment with different techniques without requiring a massive financial investment. By focusing on needle types, sizing conventions, and material quality, you can confidently select a set that supports your learning journey.
Understanding the Main Types of Embroidery Needles
Embroidery needles are engineered to work with specific combinations of fabric weave and thread thickness. When browsing for a needle set, you will primarily encounter three distinct styles: crewel, tapestry, and chenille needles. Understanding the anatomy and purpose of each type is the first step in selecting a versatile starter set.
Products mentioned in this guide
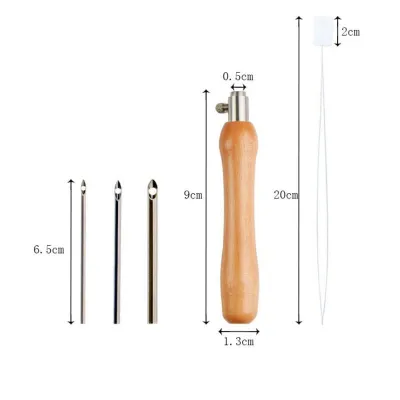
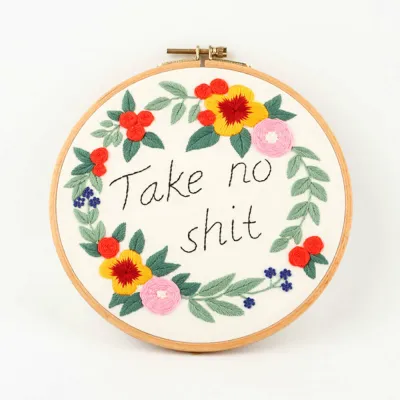
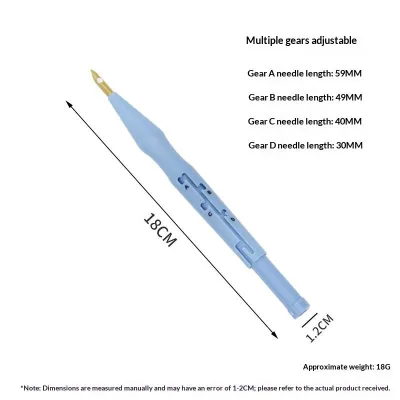
Prices are valid at publication and may change. Please refer to the product page for the latest price.
Crewel needles, often simply labeled as embroidery needles, are the most common variety you will use for surface embroidery. These needles feature a sharp point designed to pierce tightly woven fabrics like cotton, linen, or muslin easily. They also have a medium-to-long oval eye that accommodates multiple strands of standard embroidery floss without causing excessive friction. If your first project involves stitching floral patterns or line art onto a standard cotton tote bag, crewel needles are your primary tool.
Tapestry needles serve a completely different purpose and are essential for counted thread work, cross-stitch, and needlepoint. Unlike crewel needles, tapestry needles have a blunt, rounded tip that is designed to slip between the threads of open-weave fabrics like Aida or evenweave linen rather than piercing them. They also feature a significantly larger, elongated eye to accommodate thicker threads, such as pearl cotton or multi-strand wool. Using a blunt tip prevents you from accidentally splitting the fabric threads, ensuring your stitches remain perfectly aligned.
Chenille needles combine the best features of both crewel and tapestry designs, making them highly useful for heavy-duty projects. A chenille needle features a sharp, piercing point like a crewel needle, but it is paired with the exceptionally large eye of a tapestry needle. This unique combination allows you to pull thick threads, crewel wool, or even silk ribbons through heavy, tightly woven fabrics like canvas, denim, or upholstery material. Including a few chenille needles in your starter set ensures you can transition to thicker decorative threads without struggling to thread the needle.
Evaluating Needle Sizes and Eye Dimensions
Once you understand the basic types, you must navigate the sizing conventions used by manufacturers. Needle sizing can be counterintuitive for beginners because the numbering system operates in reverse: the larger the size number, the smaller and thinner the needle. For example, a size 3 crewel needle is much thicker and longer than a size 10 crewel needle. A good beginner needle set should clearly label these sizes on the packaging so you can learn to identify them visually.

Matching your thread thickness to the needle eye is critical for protecting your materials and ensuring smooth stitching. If the needle eye is too small for your thread, the constant friction of pulling the thread through the metal will cause the fibers to fray, shred, or break mid-stitch. Conversely, if the needle eye and shaft are too large for your thread, they will stretch the fabric fibers apart, leaving permanent, unsightly holes in your finished piece. The needle should create a hole just large enough for the thread to pass through smoothly without resistance.
To verify the fit before you begin stitching, you can perform a simple, observable fit test. Thread your chosen needle with the number of strands specified in your pattern, and let the needle hang freely on a short length of the thread. Slide the needle up and down the thread; it should move smoothly without catching or shredding the fibers. Next, gently pull the threaded needle through a small scrap piece of your project fabric. If you have to tug hard to force the needle through, or if the fabric puckers around the entry point, your needle is too thick, and you should switch to a higher size number.
What to Look for in a Beginner Needle Set
When shopping for your first needle set, look for options that offer a practical variety of sizes rather than a large quantity of a single size. A versatile starter set typically includes a range of sizes, such as crewel needles from size 5 to 10. This variety allows you to experiment with different thread thicknesses—from a single delicate strand of floss up to the full six strands—without needing to purchase multiple separate packs.
The packaging and included accessories can significantly enhance your early stitching experience. Look for sets that come in a secure, reusable storage container, such as a compact plastic tube, a wooden needle case, or a folding paper envelope with labeled slots. Loose needles are easily lost and can pose a safety hazard in your home. Additionally, a set that includes a sturdy needle threader is highly beneficial for beginners, as threading fine eyes can be a tedious process that causes unnecessary eye strain.
Pay close attention to the material and finish of the needles, as these factors directly affect how smoothly they glide through fabric. Most standard needles are made of high-quality carbon steel and are plated with nickel or stainless steel to provide a smooth, corrosion-resistant surface. When purchasing, check the manufacturer’s label for rust-prevention claims or protective coatings. Avoid unbranded, extremely cheap sets that feel rough to the touch, as these often lack proper polishing and can snag your delicate embroidery threads.
How to Test and Maintain Your New Needles
Before you begin your first project, it is wise to perform a quick visual and tactile inspection of your new needles. Run your fingertips gently along the shaft and tip of each needle to check for any manufacturing defects, such as tiny metal burrs, bent tips, or rough edges inside the eye. A needle with a burr will snag your fabric and shred your thread, turning an enjoyable hobby into a frustrating chore. If you detect any roughness, set that needle aside and use a different one from the set.
Proper storage is the key to maintaining the smooth finish of your needles and preventing rust. Moisture is the primary enemy of steel needles, so avoid leaving them exposed to humid air or stuck directly into damp fabric. Store your set in a dry place, preferably inside a dedicated needle case or stuck into a fabric pincushion filled with emery sand, which helps clean and polish the metal surface. If you live in a humid climate, adding a small silica gel packet to your embroidery storage box can help absorb excess moisture.
Knowing when to retire a needle is just as important as knowing how to care for it. Over time, even high-quality needles will experience wear and tear from constant friction against fabric. If you notice that a needle has become slightly bent, has lost its sharp point, or shows signs of dark tarnish or rust, it is time to replace it. Forcing a dull or damaged needle through fabric requires more physical effort, which can lead to hand fatigue and uneven stitch tension.
Common Beginner Mistakes to Avoid When Buying
One of the most common mistakes beginners make is confusing standard hand sewing or quilting needles with dedicated embroidery needles. While they may look similar at a glance, standard sewing needles (often called sharps) have very small, round eyes designed for thin sewing thread. Attempting to force multi-strand embroidery floss through a standard sewing needle eye is incredibly difficult and will quickly damage your thread. Always look for packaging specifically labeled for embroidery, crewel, tapestry, or chenille.
Another frequent error is purchasing highly restrictive sets that contain only one specific size or needle type. While a pack of twenty size 8 crewel needles might seem like a good value, it limits your ability to try different fabrics or thicker threads. A beginner needs the flexibility to test different combinations, making a multi-size variety pack a much smarter and more economical choice for your first purchase.
Finally, do not ignore the specific requirements of your chosen starter pattern or kit. Many beginners buy a needle set based solely on price or visual appeal, only to find that the needles are too thick for the delicate linen fabric or too small for the thick wool yarn included in their project. Before making a purchase, check your pattern instructions for any recommended needle types or sizes, and match your set selection to those specific guidelines.
Frequently Asked Questions (FAQ)
Can I use regular sewing needles for embroidery?
While it is physically possible to use regular sewing needles for very fine, single-strand embroidery, it is generally not recommended. Regular sewing needles have small, round eyes that make threading thick embroidery floss difficult and cause the thread to fray quickly. Dedicated embroidery needles feature elongated eyes designed to hold multiple strands of floss securely while minimizing friction as you pull them through the fabric.
How long should a beginner needle set last?
The lifespan of a needle set depends on how often you stitch, the density of your fabrics, and how well you maintain your tools. For a casual beginner, a single high-quality needle can last through several medium-sized projects before showing signs of wear. You will know it is time to replace a needle when it begins to feel dull, snags the fabric, bends, or shows visible signs of rust or tarnish.
Do I need gold-plated needles as a beginner?
Gold-plated needles are a premium option designed to reduce friction and resist tarnish, making them popular among experienced stitchers and those with nickel allergies. However, they are not a necessity for beginners. Standard nickel-plated or stainless steel needles from a reputable brand offer excellent performance and durability for learning basic stitches, allowing you to build your skills without unnecessary extra expense.

Community discussion
Share your experience or ask a question. Comments are reviewed before publication.