
Choosing the right zipper for your sewing project requires matching the structural demands of your design with the physical characteristics of the zipper itself. By evaluating the fabric weight, the type of opening required, and the stress the closure will endure, you can select a zipper that functions smoothly and preserves the drape of your garment or home textile.
Diagnose Your Project Requirements
Before purchasing any haberdashery supplies, analyze the mechanical function of your project’s closure. Does the opening need to open completely, like a jacket, or does it simply need to expand an opening while remaining joined at the bottom, like a skirt or a cushion? Identifying this fundamental requirement prevents structural failures and ensures the item remains fully usable.
Next, consider the stress points of the finished item. Activewear, fitted trousers, and heavy-duty bags experience significant lateral tension during use, requiring a robust closure system. Conversely, loose-fitting blouses or decorative pillow covers experience minimal strain, allowing for lighter, more delicate zipper options.
Products mentioned in this guide
Prices are valid at publication and may change. Please refer to the product page for the latest price.
Analyze the weight and drape of your fabric to ensure compatibility. A heavy metal zipper sewn into a lightweight silk or voile fabric will pull, sag, and distort the seam line, ruining the silhouette of the garment. Matching the weight of the zipper to the weight of the fabric ensures that the closure behaves as an extension of the material rather than a rigid structural barrier.
Finally, determine the desired aesthetic finish. Some designs benefit from a completely hidden closure where the seam line remains uninterrupted, while other projects utilize the zipper as a prominent design feature, such as an exposed metal zipper on a denim skirt or a contrasting plastic zipper on a modern pouch.
Match Zipper Types to Specific Applications
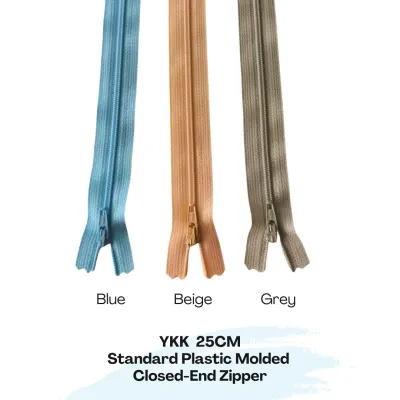
Conventional closed-end zippers are the standard choice for projects where the bottom of the opening remains permanently joined. These zippers feature a metal or plastic stop at the base that prevents the slider from running off the tracks. They are highly suited for trousers, skirts, dresses, pockets, and interior home decor items like cushion covers.

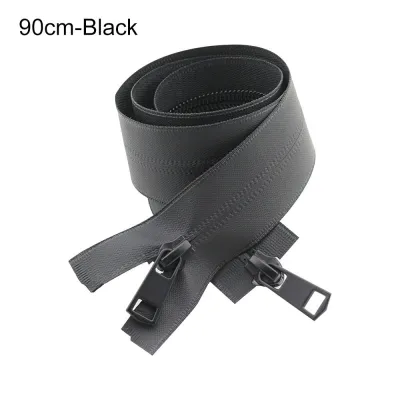
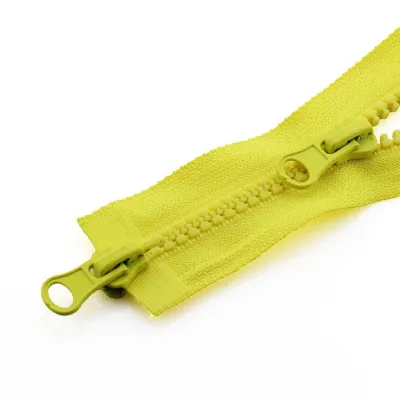
Separating open-end zippers are designed for garments and items that must open completely into two distinct halves. These zippers feature a box-and-pin mechanism at the bottom instead of a fixed stop, allowing the left and right sides of the tape to detach entirely. You will need this type for outerwear, cardigans, detachable hoods, and removable upholstery covers.
Invisible zippers are engineered to hide completely within a seam, leaving only the tiny, teardrop-shaped pull tab visible from the right side of the fabric. The teeth of an invisible zipper are coiled on the reverse side of the tape, allowing the fabric to fold directly over them. This makes them the ideal choice for formal wear, elegant dresses, and lightweight skirts where a visible zipper line would disrupt the clean lines of the design.
Specialty variations, such as two-way separating zippers, offer additional flexibility for long coats or sleeping bags by allowing the user to open the closure from both the top and the bottom. Understanding these primary categories allows you to narrow down your choices immediately based on the functional blueprint of your sewing pattern.
Decode Zipper Sizes and Measure for Length
Zipper sizes are designated by a numbering system, typically ranging from #3 to #10, which corresponds directly to the width of the zipper teeth in millimeters when closed. A #3 zipper has teeth that measure approximately 3 mm across and is suited for lightweight garments, delicate fabrics, and small pouches. A #5 zipper, measuring 5 mm across, is the standard workhorse size for medium-weight jackets, jeans, and everyday bags.
Larger sizes, such as #8 or #10, feature wide, heavy-duty teeth designed for rugged applications like canvas tents, heavy winter coats, and large travel luggage. Choosing a size that is too small for a high-stress application can lead to the teeth separating under tension, while choosing a size that is too large will add unnecessary bulk and stiffness to your project.
Measuring for the correct zipper length requires measuring the actual opening of your project, from the top stop to the bottom stop of the zipper teeth, excluding the extra fabric tape at either end. When working from a commercial sewing pattern, the required length will be specified, but custom projects require measuring the physical seam opening directly. Always measure along the seam line where the zipper will be installed, taking into account any seam allowances or waistbands.
If you cannot find a zipper in the exact length required, it is generally safer to purchase a longer zipper and shorten it to fit your project. Shortening a zipper is a straightforward process that can be done at home, whereas trying to stretch or adapt a zipper that is too short will compromise the structural integrity of the opening. You can purchase zipper tape by the yard or meter for custom-sized projects, which allows you to cut the exact length needed and slide on your own pulls.
Evaluate Teeth Materials and Tape Compatibility
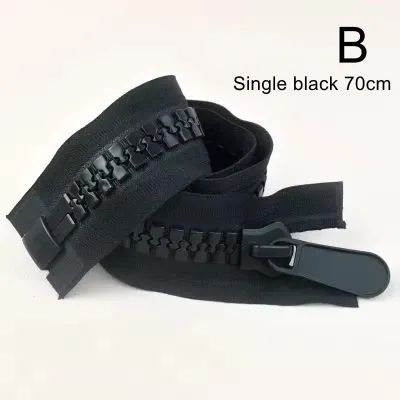
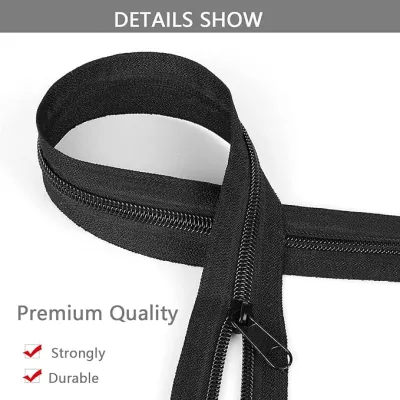
The material of the zipper teeth determines the flexibility, weight, and durability of the closure. Nylon coil zippers are highly flexible, lightweight, and heat-resistant, making them excellent for curved seams, knit fabrics, and general garment sewing. Molded plastic zippers feature individual teeth fused directly onto the tape, offering a sporty look, excellent water resistance, and smooth operation for outerwear and activewear.
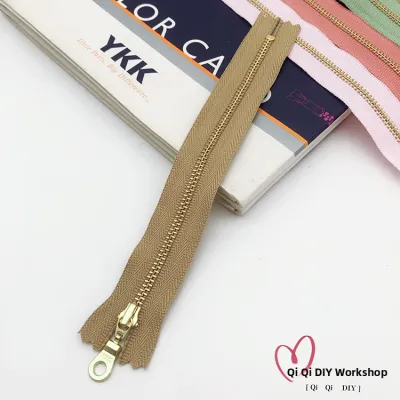
Metal zippers, constructed with brass, aluminum, or nickel teeth, offer the highest level of durability and a classic, high-quality aesthetic. They are ideal for heavy fabrics like denim, leather, and canvas, but they add significant weight and lack the flexibility of nylon or plastic. When selecting metal zippers, ensure the metal finish matches any other hardware on your project, such as snaps, buckles, or rivets.
The zipper tape itself is typically made of polyester, which is highly durable, shrink-resistant, and quick-drying. However, if you are working with natural fiber fabrics that will undergo hot washing or dyeing, you must verify that the zipper tape can withstand the same care conditions. Cotton zipper tapes are available for specialty projects where the entire item, including the zipper, needs to be dyed after construction.
Always review the care instructions of both your fabric and the zipper before assembly. Polyester and nylon zippers can generally handle standard machine washing and low-temperature ironing, but direct contact with a hot iron can melt plastic or nylon teeth. Metal zippers can withstand higher heat but may become hot to the touch during pressing, requiring a pressing cloth to protect the surrounding fabric.
Frequently Asked Questions (FAQ)
Can I shorten a zipper that is too long for my project?
Yes, most zippers can be shortened easily at home using basic sewing tools. Nylon coil and molded plastic zippers are the easiest to modify because you can sew directly across the teeth to create a new bottom stop, either by hand with a heavy thread bar tack or with a wide zigzag stitch on your sewing machine. Once the new stop is securely in place, you can trim the excess zipper tape about 2.5 centimeters below the stop.
Metal zippers require a slightly different approach because you cannot sew through metal teeth without damaging your needle. To shorten a metal zipper, you must measure the desired length from the top down, use pliers to gently pry off the individual metal teeth above your mark, and then clamp a new metal top stop onto the tape. Alternatively, you can shorten a metal zipper from the bottom by removing teeth and applying a new bottom stop, ensuring you wear eye protection when removing metal components.
Why does my invisible zipper keep puckering the fabric?
Puckering along an invisible zipper seam usually occurs when there is a mismatch between the tension of the zipper tape and the fabric, or when the fabric lacks sufficient stabilization. Because invisible zippers are sewn very close to the teeth, any slight stretching of the fabric during installation will result in ripples once the seam relaxes. To prevent this, always apply a thin strip of fusible interfacing to the wrong side of the seam allowance before sewing to stabilize the fabric.
Another common cause is failing to press the zipper coils open before stitching. Before sewing, use a synthetic-safe iron setting to gently press the coiled teeth of the invisible zipper flat so that you can stitch precisely in the groove next to the coils. Using a specialized invisible zipper presser foot is highly recommended, as its grooves automatically unroll and guide the coils under the needle, ensuring a perfectly flat, unpuckered finish.

Community discussion
Share your experience or ask a question. Comments are reviewed before publication.