
Selecting your first tie dye starter kit is the most important step toward a successful, colorful crafting project. For beginners, the ideal kit simplifies the process by providing pre-measured dyes, essential protective gear, and clear instructions, eliminating the need for separate trips to the craft store. Rather than simply choosing the kit with the most colors, evaluating the underlying dye chemistry, fabric compatibility, and tool quality will ensure your finished designs remain vibrant and wash-fast for years to come.
By focusing on how the dyes are formulated and how the tools are designed, you can avoid common pitfalls like faded colors, messy workspaces, and ruined garments. A well-thought-out kit allows you to focus on the creative joy of folding and binding, turning a simple white t-shirt into a personalized work of art. Whether you are planning a solo weekend project or a lively group activity in a shared space, understanding what goes into a quality starter kit ensures a frustration-free experience.
Essential Components to Look for in a Starter Kit
A complete beginner kit must include several non-negotiable items to ensure you can complete your project from start to finish without needing immediate supplementary purchases. The most critical component is the dye itself, which typically comes in one of two formats: pre-mixed liquid bottles or dry powder packets pre-loaded into squeeze bottles. Dry powder formats are highly recommended for beginners because they offer an exceptional shelf life; the dye remains stable and potent until you add water, whereas pre-mixed liquids can degrade in quality over time.
Products mentioned in this guide
![🇸🇬 [New Product Sale] Tie Dye Kit Fabric Dye Non-toxic Permanent Textile Tie Dye Set Dit-A-Dot](https://img.lazcdn.com/g/p/3ee382937e8a3c125cc95cef1e0be08f.jpg_400x400q80.jpg_.webp)
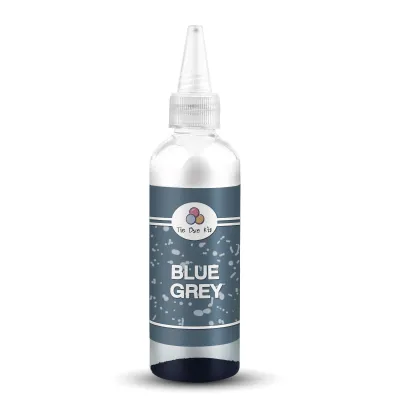
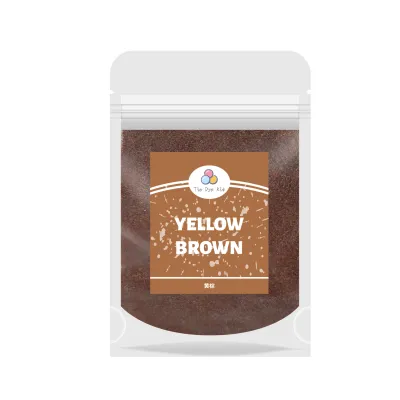
Prices are valid at publication and may change. Please refer to the product page for the latest price.
Beyond the dye, the kit must provide reliable binding and resist tools to create your patterns. High-elasticity rubber bands are the standard choice, as they apply the consistent, tight pressure needed to block dye from reaching certain areas of the fabric. Some kits also include durable string or plastic sinew, which allows for more intricate, fine-line patterns. Having a variety of these resist tools in your kit gives you the freedom to experiment with different folding techniques right out of the box.
Protective gear is another essential element that should never be overlooked. A quality starter kit will supply heavy-duty disposable gloves to prevent the dye from staining your hands, along with a large plastic drop cloth or surface cover to protect your table or floor. In typical home environments, especially in compact apartments where outdoor space might be limited, having robust physical barriers to contain splatters is vital for a stress-free cleanup.
Finally, look for kits that feature comprehensive, highly visual instructional guides. A good manual should not only explain how to mix the dyes but also provide step-by-step folding templates for classic patterns like spirals, bullseyes, and stripes. Clear diagrams or photographic steps are much easier to follow mid-project than dense blocks of text, helping you achieve the exact visual results you want on your first try.
Evaluating Dye Types and Fabric Compatibility
Understanding the relationship between dye chemistry and fabric composition is the key to achieving professional-looking, long-lasting results. The gold standard for home tie-dyeing is fiber-reactive dye, which chemically bonds with cellulose fibers at room temperature. Unlike all-purpose dyes that require boiling water to activate, fiber-reactive dyes create a permanent, covalent bond that will not wash out or fade significantly after repeated cycles in the washing machine.

To get the most out of fiber-reactive dyes, you must match them with the correct fabric types. These dyes work beautifully on 100% natural fibers such as cotton, linen, rayon, and bamboo. If you attempt to use a standard kit on synthetic materials like polyester, nylon, or acrylic, the dye molecules will have nothing to latch onto, resulting in colors that wash completely down the drain or leave behind extremely faint, patchy stains.
Before purchasing a kit, check if it includes a color fixative, which is typically sodium carbonate, commonly known as soda ash. Soda ash raises the pH level of the fabric, activating the cellulose fibers so they can readily bond with the fiber-reactive dye. Some kits require you to pre-soak your garments in a soda ash solution before dyeing, while others pre-mix the fixative directly into the dye powder so you only need to add water. If a kit does not mention soda ash or a built-in fixative, you may need to purchase it separately to ensure your colors do not fade.
Always verify the manufacturer’s specifications on the packaging regarding fabric compatibility. A reliable brand will explicitly state the minimum percentage of natural fiber required for successful color uptake. For the best and most vibrant results, aim to use garments that are 100% cotton, though blends with at least 80% natural fiber can still yield acceptable, slightly softer pastel tones.
Assessing Tool Quality and Safety Features
The physical design of the tools in your kit plays a major role in how easy and safe the dyeing process will be. Squeeze bottles are the primary applicator for tie dye, and they should be made from flexible, durable plastic that is easy to squeeze without cracking. Look for bottles equipped with fine-tip, anti-leak nozzles and secure caps that prevent accidental splatters when you are shaking the bottle to mix the powder and water.
Clear volume markings on the side of the applicator bottles are incredibly helpful for beginners. These measurements allow you to dilute the dye powder precisely, giving you control over the intensity of the colors. If you want a softer, pastel look, you can easily add more water based on the markings, whereas keeping the water level at the recommended fill line ensures maximum color saturation.
Safety labeling is another crucial factor, especially if you are crafting with children. Ensure the kit carries recognized non-toxic certifications, such as ASTM D-4236, which indicates that the art materials have been evaluated by a toxicologist and deemed safe for home use. The packaging should also feature clear age-appropriate guidelines and basic first-aid instructions for accidental eye or skin contact.
Proper ventilation and cleanup protocols should be outlined in the kit’s instructions. Because dry dye powders consist of very fine particles, they can easily become airborne when you pour them or open the bottles. It is best to mix these powders in a well-ventilated area, and some crafters prefer to wear a simple dust mask during the mixing phase to avoid inhaling any fine powder. A well-designed kit will highlight these safety practices clearly on the instruction sheet.
Ergonomics should also influence your choice of kit. Large 120ml or 240ml bottles are excellent for covering large areas of fabric quickly, but they can be difficult for smaller hands to grip and squeeze. If you are planning a family crafting session, look for kits that include smaller, more manageable bottles that allow younger creators to apply the dye with precision and control.
Comparing Kit Sizes and Project Yields
Selecting the right kit size depends on the scope of your planned projects and whether you are working alone or in a group. For absolute beginners, a simple three-color kit featuring primary colors—cyan, magenta, and yellow—is an excellent starting point. These kits are perfect for learning basic color theory, as you can overlap the primary shades to create beautiful greens, oranges, and purples without the risk of accidentally mixing muddy, brown tones.
If you want to create more complex, multi-colored patterns, larger kits containing 5 to 12 pre-mixed colors offer incredible convenience. These larger sets allow you to apply specific shades directly to the fabric without having to mix custom colors yourself. However, keep in mind that using too many colors in close proximity can sometimes lead to bleeding and blending, so a bit of planning is required to keep your designs looking clean.
When evaluating project yields, look closely at the manufacturer’s estimates, which are often stated in terms of the number of adult t-shirts the kit can dye. Keep in mind that these estimates are approximate and assume a moderate level of dye saturation. If you prefer deep, fully saturated designs with very little white space left on the fabric, you will use significantly more dye, which can cut the estimated yield of the kit in half.
For those who plan to continue tie-dyeing beyond their first project, consider the availability of refills. Choosing a kit from an established brand that sells standalone dye powders or refill packets is highly cost-effective. This allows you to reuse your original plastic squeeze bottles, rubber bands, and measuring tools, reducing waste and saving money on future crafting sessions.
If you are organizing a group activity, such as a birthday party or a school event, ensure the kit is designed for multiple users. A true group kit should provide enough individual squeeze bottles, gloves, and protective covers so that several people can work simultaneously. This prevents cross-contamination of colors and ensures that everyone has a safe, clean space to create their designs.
Red Flags and What to Avoid in Beginner Kits
As you shop for a tie dye starter kit, being able to spot potential red flags can save you from a disappointing crafting experience. One of the most common issues with low-quality kits is the omission of essential color-setting chemicals. If a kit uses standard fiber-reactive dyes but does not include soda ash or a built-in fixative, your beautiful designs will likely wash out during the very first rinse, leaving behind faded, muddy stains.
Avoid kits that feature vague or overly simplistic instructions. A quality starter set must provide precise water-to-dye ratios, recommended curing times, and detailed post-dye washing steps. Without these guidelines, you may end up under-diluting your dyes, rinsing the fabric too early, or accidentally staining other clothes in your washing machine during the final cleanup phase.
Be highly skeptical of kits that make universal fabric claims, such as promising vibrant results on “all fabrics” including polyester, nylon, and acrylic. Because synthetic fibers require entirely different dye chemistries and high-heat application methods, any cold-water squeeze bottle kit that claims to dye synthetics is misleading. Stick to kits that are honest about their limitations and explicitly recommend 100% natural fibers for the best results.
Finally, pay attention to how the kit is packaged. Dye powders should always be sealed in secure, moisture-proof inner bags or tightly sealed bottles. Avoid kits where loose powder is free-floating inside the box, as this indicates poor quality control and increases the risk of moisture damage or messy spills during transit. A well-packaged kit ensures that your materials arrive dry, safe, and ready to use.
Frequently Asked Questions (FAQ)
Can I use a standard tie dye kit on synthetic fabrics like polyester?
Standard tie dye kits utilize fiber-reactive dyes that are formulated specifically to bond with natural cellulose fibers like cotton, linen, and rayon. These dyes cannot form a chemical bond with synthetic fibers such as polyester, nylon, or acrylic. If you attempt to use a standard kit on synthetic fabrics, the dye will fail to penetrate the material and will almost completely wash away during the rinsing process, leaving behind extremely faint, patchy stains. For synthetic fabrics, you must look for specialized disperse dyes that require a high-heat stovetop method to set.
Do I need to wash the fabric before using the kit?
Yes, pre-washing your fabric is a critical step that should never be skipped. New garments and fabrics are typically treated with manufacturing finishes, sizing agents, or starches that prevent the dye from absorbing evenly into the fibers. Washing the fabric in warm water with a mild detergent removes these invisible barriers, along with any natural oils or dirt. Avoid using fabric softeners or dryer sheets during this pre-wash, as they leave a chemical coating that can block the dye and cause patchy, uneven coloring. Leave the fabric damp after washing if your kit instructions recommend wet-dyeing, as damp fibers absorb the dye more readily than dry ones.

Community discussion
Share your experience or ask a question. Comments are reviewed before publication.