
Selecting the correct stainless steel needle size for your embroidery project is the foundation of clean, puckering-free stitching and smooth thread management. The ideal needle must create a hole in your fabric that is just large enough for your thread to pass through without friction, yet small enough that the fabric fibers close back up around the finished stitch. Choosing the wrong size can lead to shredded threads, distorted fabric weaves, or visible, unsightly holes that ruin your hard work. By understanding how needle sizing systems work and how to match your needle to both your fabric weight and thread thickness, you can ensure a seamless stitching experience from start to finish.
In humid environments like Singapore, choosing high-quality stainless steel needles is particularly beneficial. Stainless steel naturally resists rust and corrosion caused by moisture in the air and oils from your hands, ensuring the needle glides smoothly through the fabric over long stitching sessions. Whether you are working on delicate silk or heavy canvas, mastering the relationship between your needle, thread, and fabric is the first step toward professional-looking embroidery.
Decoding Needle Sizing Systems for Accurate Selection
Navigating the needle aisle can be confusing because embroidery needle sizing operates on an inverse scale. For almost all standard hand embroidery needles, a larger size number indicates a thinner, finer needle, while a smaller size number indicates a thicker, stouter needle. For example, a size 10 embroidery needle is incredibly fine and delicate, whereas a size 1 embroidery needle is thick and robust. This inverse relationship is a universal standard across major manufacturers, making it easier to select tools once you memorize this basic rule.
Products mentioned in this guide
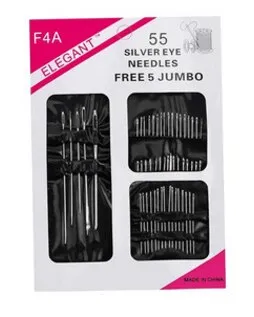
Prices are valid at publication and may change. Please refer to the product page for the latest price.
When reading needle packaging, you will typically see a range of numbers, such as “Sizes 5-10” or “Size 7.” A multi-size pack is highly useful for beginners because it offers a variety of thicknesses to test against different threads. The packaging will also specify the needle type, such as “Crewel” (standard embroidery needles), “Tapestry,” or “Chenille.” Always check the back of the packaging for a size chart or diameter measurement, which some manufacturers print to show the exact millimeter thickness of the shaft.
Understanding these numbers allows you to make precise adjustments to your setup. If you find that your needle is leaving large, permanent holes in your fabric, you know you need to move up to a higher size number, such as transitioning from a size 7 to a size 9. Conversely, if you are struggling to pull the needle through the fabric, moving down to a lower size number will provide a thicker shaft to clear a wider path for your thread.
Matching Needle Thickness to Fabric Weight and Weave
The primary rule of matching a stainless steel needle to your fabric is that the needle must never overpower the weave. Delicate, lightweight fabrics such as silk, organza, batiste, and fine linen require very thin needles, typically between sizes 9 and 12. Using a needle that is too thick on these materials will permanently displace or break the delicate warp and weft threads, leaving visible punctures that cannot be washed or massaged out. The needle should slip between the fibers with minimal resistance, leaving no trace of its passage once the thread is pulled through.

Medium-weight woven fabrics, such as standard quilting cotton, linen blends, and light canvas, offer more structural resilience and are best paired with mid-range needles, typically sizes 5 to 8. These fabrics can handle slightly larger holes because the woven fibers have enough natural elasticity to spring back and hug the embroidery thread. When working with heavy materials like denim, thick canvas, or upholstery fabrics, you will need a thick needle, such as a size 1 to 4. These robust needles have the structural strength to pierce dense layers without bending or snapping under pressure.
To guarantee a perfect match before committing to your main project, always perform a simple scrap test. Take a small remnant of your project fabric, tension it in your embroidery hoop, and pierce it with your chosen needle without any thread. Pull the needle completely through the fabric and inspect the resulting hole. If the hole remains wide open and the surrounding fibers look stretched or distorted, your needle is too thick; switch to a higher size number. If the hole virtually disappears or closes up with a gentle rub of your fingernail, the needle is safe to use.
Coordinating Needle Eyes with Embroidery Thread Thickness
While the needle shaft must match the fabric, the needle eye must perfectly accommodate your embroidery thread. The eye of an embroidery needle is elongated to allow multiple strands of thread to lay flat side-by-side. If the eye is too small for the thread, you will struggle to thread the needle, and the constant friction as you pull the thread through the fabric will quickly shred, fuzz, or snap the fibers. Conversely, if the eye is excessively large for a thin thread, the thread will slip out of the eye constantly, and the needle will create a hole far larger than the thread can fill, resulting in loose, sloppy stitches.
When working with standard six-strand cotton embroidery floss, the number of strands you choose to stitch with dictates your needle size. For a single strand of floss, a very fine needle like a size 10 or 12 is ideal. If you are using two to three strands, a size 7 or 8 needle provides the perfect balance. For four to six strands, or when working with thicker specialty threads like pearl cotton (size 5 or 8) or fine wool yarn, you will need to drop down to a size 3 to 5 needle to ensure the eye is wide enough to prevent friction.
You can easily verify the compatibility of your thread and needle with a quick friction test. Thread your needle with a comfortable length of your chosen thread and hold the needle vertically. The needle should slide down the thread under its own weight when you tilt the strand slightly, but it should not slip off instantly with the slightest movement. Next, pull a section of the thread back and forth through the eye; if you feel any catching, resistance, or see immediate fuzzing of the fibers, the eye is too small. Switch to a larger needle (lower size number) or reduce the number of thread strands.
Choosing the Correct Needle Point for Your Embroidery Technique
The shape of the needle point determines how it interacts with the fabric fibers, and choosing the wrong point can make certain embroidery techniques nearly impossible. Sharp points, found on standard embroidery (crewel) needles and chenille needles, are designed to pierce directly through the threads of tightly woven fabrics. This is essential for surface embroidery techniques like satin stitch, long and short stitch, and French knots, where you must place stitches precisely, often splitting existing stitches or piercing the fabric at exact coordinates.
Blunt points, characteristic of tapestry needles, are designed specifically for counted thread work, such as cross stitch, hardanger, and needlepoint. These techniques are worked on open-weave fabrics like Aida, evenweave linen, or canvas, which have pre-existing holes. A blunt needle glides smoothly into these open spaces without piercing or splitting the fabric’s structural threads. Using a sharp needle for cross stitch often results in misplaced stitches and split fabric threads, which ruins the geometric alignment of the pattern.
Specialty needles also feature unique point and eye configurations tailored to specific techniques. For example, milliner needles (also known as straws) have a shaft that is the exact same thickness from the point to just below the eye, making them perfect for wrapped stitches like bullion knots because the wraps slide off the needle effortlessly. When purchasing needles, always read the manufacturer’s packaging labels to identify the point type and intended technique, ensuring you do not accidentally use a blunt tapestry needle for a project that requires piercing dense fabric.
Troubleshooting Common Needle Sizing Mistakes
Even experienced stitchers occasionally encounter issues due to a mismatched needle, but most problems can be resolved with a few quick adjustments. If you notice your fabric puckering around your stitches, or if you see large, empty holes where the needle entered, your needle is likely too thick for the fabric weight. To fix this, switch to a finer needle (higher size number) and ensure your fabric is properly tensioned in your hoop. Puckering can also occur if your thread tension is too tight, so try relaxing your pull as you complete each stitch.
If your embroidery thread is constantly fraying, developing fuzz, or snapping mid-stitch, the culprit is almost certainly a needle eye that is too small or has a rough internal burr. The constant friction of pulling a thick thread through a tight eye wears down the fibers rapidly. Immediately replace the needle with one that has a larger eye (lower size number), or inspect the inside of the eye for manufacturing defects. If the issue persists even with a larger needle, try using shorter lengths of thread to minimize the number of times each section of thread passes through the fabric.
When a needle feels heavy, drags as you pull it through, or begins to bend, you are likely using a needle that is too thin or dull for the density of your fabric. A needle that is too thin cannot clear a wide enough path for the thread, forcing you to pull harder and causing the needle to flex. Switch to a thicker needle (lower size number) to reduce physical strain on both your hands and the tool. If the needle is the correct size but still drags, it may have accumulated oils from your fingers or lost its polished finish; wiping it with a microfiber cloth or replacing it with a fresh stainless steel needle will restore smooth gliding.
Building and Maintaining a Practical Starter Needle Kit
For those beginning their embroidery journey, building a versatile needle kit does not require a massive investment. Start by purchasing a few multi-size variety packs of high-quality stainless steel embroidery needles, typically containing sizes 3 to 9 or 5 to 10. These packs allow you to experiment with different thread thicknesses and fabric weights without needing to buy individual size packs. Having a range of sizes on hand ensures you can immediately troubleshoot and adjust your tools mid-project if you encounter fabric distortion or thread fraying.
Proper storage is essential to keep your stainless steel needles organized and in pristine condition. Avoid leaving needles loose in drawers or stuck directly into random scraps of fabric, which can attract moisture and lead to dull points. Instead, use a dedicated needle case, a magnetic needle minder, or a classic pincushion. Group your needles by type and size, and use small labels or color-coded compartments to identify them quickly. This prevents the common frustration of guessing whether a needle is a size 7 or a size 8 during a busy stitching session.
Finally, learn to recognize the physical signs that indicate a needle has reached the end of its lifespan. While stainless steel is highly durable, needles are still subject to wear and tear over time. Run your fingertip carefully over the point and shaft; if you feel any rough spots, microscopic burrs, or a slight bend, discard the needle safely. A damaged needle will snag delicate fabric fibers and shred thread, costing you far more in ruined materials than the price of a fresh replacement. Regularly replacing worn needles ensures your stitching remains smooth, precise, and enjoyable.

Community discussion
Share your experience or ask a question. Comments are reviewed before publication.