
Choosing the right sponge brush depends on matching the tool’s physical characteristics—specifically its size, density, and edge shape—to the scale and texture of your painting surface. Unlike traditional bristle brushes, sponge brushes apply paint by releasing it from porous cells under gentle pressure, making them excellent for smooth finishes, stenciling, and quick touch-ups. By selecting a brush with the correct density and shape, you can prevent common issues like paint bleeding, visible streaks, and premature tearing.
Understanding Sponge Brush Anatomy and Materials
To select the best tool for your project, it helps to understand how a sponge brush is constructed and how its materials interact with different paints. The most common sponge brushes feature a polyurethane foam head attached to a wooden or plastic dowel. This foam head acts as a reservoir, holding paint within its open-cell structure until you press it onto a surface.
Synthetic foam is the standard material for most commercial sponge brushes, offering a uniform cell structure that provides consistent paint distribution. These synthetic sponges are highly effective with water-based paints, such as acrylics and latex, because they absorb the liquid evenly and release it smoothly. Natural sea sponges, while less common in pre-mounted brush forms, are sometimes used for specialized decorative finishes due to their irregular, organic pore patterns.
Products mentioned in this guide
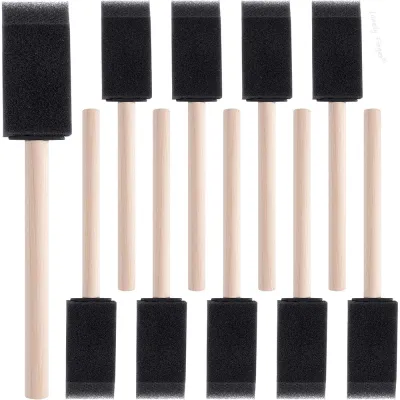
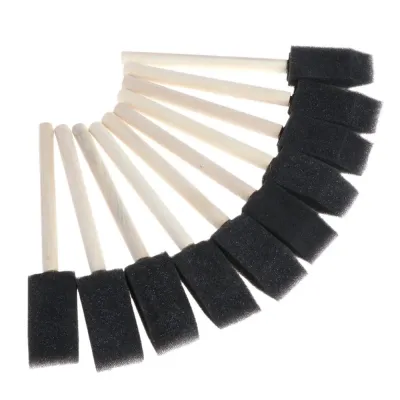
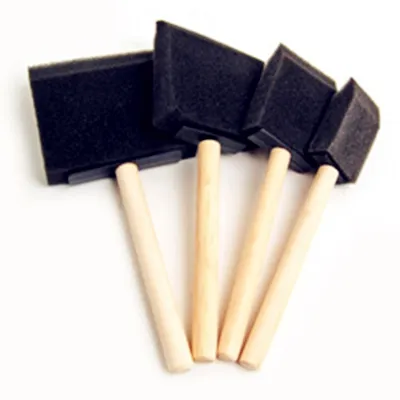

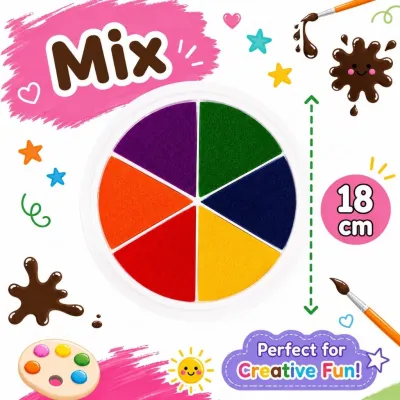

Prices are valid at publication and may change. Please refer to the product page for the latest price.
The handle design plays a critical role in your comfort and control, especially during long painting sessions. Traditional wooden handles offer a classic, rigid grip that allows you to apply firm, even pressure across the surface. Plastic handles, often found on utility-grade brushes, are lightweight and impervious to water damage, though they may flex slightly under heavy pressure. Choosing a handle length that fits comfortably in your palm helps prevent hand fatigue and ensures steady strokes.
Another vital component is the internal stiffener and the adhesive bond that secures the foam to the handle. High-quality sponge brushes contain a plastic insert inside the foam head that extends from the handle, providing structural support and preventing the foam from flopping or tearing during use. When evaluating a brush, gently wiggle the foam head to check the security of this bond; a weak connection will quickly fail when saturated with heavy paint or subjected to repeated washing.
Matching Sponge Brushes to Common Painting Scenarios
Different painting projects present unique challenges, from the vast, flat expanses of wooden furniture to the intricate, delicate borders of a stenciled craft. The scale of your project and the texture of the substrate are the primary factors that should dictate your choice of brush. Matching the physical profile of the sponge to your specific scenario ensures efficient paint application and a professional-looking finish.

Furniture Refinishing and Large Surfaces
When refinishing furniture, cabinets, or large wooden panels, your primary goal is to achieve a smooth, uniform finish with minimal overlap marks. For these broad surfaces, a wide, flat sponge brush—typically between 50 mm and 100 mm in width—is highly effective. The wide footprint allows you to cover large areas quickly, reducing the number of individual strokes and minimizing the risk of the paint drying before you can blend adjacent sections.
The density of the foam is equally important when working on large, flat surfaces. A high-density foam head is preferred because it holds a substantial volume of paint without dripping, allowing for long, continuous strokes. This high density also resists collapsing under pressure, which helps maintain a consistent film thickness across the entire panel and prevents the wooden handle insert from scraping against your freshly painted surface.
Wall Touch-Ups and Textured Effects
For wall touch-ups and decorative paint techniques, the requirements shift toward blending and texture creation. When patching a small scuff on a wall, a medium-sized sponge brush (around 25 mm to 50 mm) allows you to apply paint precisely over the damaged area. By gently dabbing or stippling the sponge rather than dragging it, you can mimic the existing roller texture of the wall, making the repair virtually invisible.
If you are intentionally creating textured effects, such as a mottled or faux-finish wall, a low-density or textured sponge brush is the ideal choice. Low-density sponges have larger, more irregular pores that release paint unevenly, creating a soft, dappled pattern on the wall. Selecting a brush that matches the scale of your desired pattern allows you to build up layers of color gradually, achieving a depth of texture that is difficult to replicate with standard bristles.
Detailed Craft Work and Stenciling
Precision is the defining requirement for detailed craft projects, model painting, and stenciling. For these tasks, you need a small, high-density sponge brush, often referred to as a foam pouncer or a detail dauber. These brushes typically feature a round, flat-bottomed foam head or a sharp, angled edge that allows you to apply paint exactly where you want it without spreading.
When stenciling, paint bleed is the most common issue, occurring when excess paint seeps under the edges of the stencil template. A high-density sponge brush prevents this by holding paint firmly within its tight cell structure, releasing only a minimal amount when dabbed vertically. Using a small, pointed, or angled sponge brush also allows you to navigate tight corners, fine lines, and intricate details on three-dimensional craft objects with high accuracy.
Key Selection Criteria: Size, Density, and Edge Type
To make an informed decision at the craft store or online marketplace, you should evaluate three primary physical attributes: size, density, and edge type. Balancing these three criteria allows you to customize your tool kit for any painting project.
Size selection is a matter of matching the brush footprint to the dimensions of your working surface. A brush that is too small for a large canvas will require excessive strokes, leading to uneven drying and visible lines, while a brush that is too large for a detailed project will result in messy overlaps. As a general guideline, keep a variety of sizes on hand, ranging from 12 mm for fine details to 100 mm for broad surfaces, so you can transition smoothly between different stages of your project.
Density directly influences both paint retention and the smoothness of the final finish. High-density foam brushes have smaller, more tightly packed pores, which hold more paint and release it in a thin, even layer, making them ideal for varnishes, stains, and glossy paints. Low-density foam brushes have larger pores, which hold less paint but are excellent for creating textured, organic finishes or applying thick, textured mediums.
The edge type of the sponge brush determines the shape of your stroke and your ability to reach tight spaces. Flat-edged brushes are the standard for general painting, providing clean, straight lines when dragged along a guide. Angled or chisel-tipped brushes are highly versatile, allowing you to use the broad flat side for coverage and the sharp point for cutting into corners or painting fine lines. Rounded or dome-shaped sponges are best for stippling, blending, and soft, circular paint applications.
Care and Maintenance for Longevity
While sponge brushes are often treated as disposable items, proper care and maintenance can significantly extend their lifespan, saving money and reducing waste. The key to preserving a sponge brush is immediate action after your painting session is complete. Never allow paint to dry inside the foam, as the hardened pigments will destroy the flexible cell structure and render the brush unusable.
To clean a water-based paint from your sponge brush, submerge the foam head in warm, soapy water and gently squeeze it repeatedly to release the paint. Avoid twisting or wringing the sponge, as this twisting motion can tear the delicate foam or break the adhesive bond holding it to the handle. Continue rinsing and squeezing under running water until the water runs completely clear, ensuring that no paint residue remains trapped deep within the core of the sponge.
Proper drying is essential to maintain the sponge’s original shape and density. After washing, gently press the brush between a clean towel to remove excess moisture, then lay it flat or hang it upside down to dry. Storing a wet sponge brush upright on its handle can cause water to pool inside the foam head, weakening the adhesive bond and leading to mold growth.
Even with meticulous care, sponge brushes will eventually wear out. Inspect your brushes regularly for signs of degradation, such as crumbling foam, a loose handle connection, or a permanently misshapen tip. If the foam begins to shed small particles onto your painting surface or loses its springiness, it is time to replace the brush to ensure your finishes remain clean and professional.
Frequently Asked Questions (FAQ)
Can I use the same sponge brush for both acrylic and watercolor paints?
Yes, you can use a sponge brush for both acrylic and watercolor paints, but you must manage the different viscosities and cleaning requirements of these mediums. Acrylic paint is thicker and dries to a water-resistant, plastic-like finish, meaning you must wash the brush immediately to prevent permanent hardening. Watercolor is highly fluid and remains water-soluble even after drying, making it much easier to rinse out of the sponge. If you plan to switch between these mediums, ensure the brush is thoroughly washed and completely dry, as any residual acrylic paint left in the pores will ruin the soft, absorbent qualities needed for watercolor washes.
How do I prevent a sponge brush from leaving a stippled texture when I want a smooth finish?
To achieve a smooth finish without a stippled texture, you should use a high-density sponge brush and adjust your application technique. Stippling occurs when air bubbles are trapped in the paint and pop as it dries, or when the sponge is lifted vertically off the surface. To minimize this, apply the paint using long, continuous, horizontal strokes with light, even pressure, keeping the brush at a 45-degree angle to the surface. Additionally, ensuring your paint is of a suitable viscosity—sometimes requiring a slight thinning with an appropriate medium—allows the paint to self-level and smooth out before it cures.

Community discussion
Share your experience or ask a question. Comments are reviewed before publication.