
To choose the right size white bubble polymailer, you must calculate both the width and length of your product while accounting for its thickness and the space occupied by the internal bubble lining. A mailer that is too small will split at the seams or fail to seal, while an oversized mailer increases shipping costs and allows items to slide around during transit. By measuring your product’s maximum dimensions and applying a simple sizing formula, you can select a mailer that keeps your items secure and professional-looking.
Selecting the correct packaging is a critical step for any business or individual sending items through the post. When using a white bubble polymailer, finding the perfect fit requires more than a quick guess based on visual estimation. A mailer that is too small will stretch, strain the seams, or refuse to seal, leaving your items vulnerable to damage. Conversely, an oversized mailer allows contents to shift during transit, which can lead to scuffing and unnecessarily high shipping fees due to dimensional weight pricing.
To choose the right size, you must measure your product’s three dimensions—length, width, and thickness—and factor in the space occupied by the internal bubble lining. This guide provides a systematic approach to measuring your products, calculating the necessary mailer dimensions, and avoiding common packaging pitfalls. By taking these steps, you ensure your shipments arrive intact while maintaining a clean, professional presentation.
Products mentioned in this guide
![[SG] ⭐CHEAPEST BUNDLE⭐ Bubble Polymailer | Bubble Envelope | Bubble Mailer | Padded Envelope | Bulk Purchase](https://img.lazcdn.com/g/p/d1f9b06ebe577dd9b0f70feb1fa794ad.jpg_400x400q80.jpg_.webp)
Prices are valid at publication and may change. Please refer to the product page for the latest price.
Understanding How Polymailer Sizes Are Measured
When browsing packaging supplies, you will typically see dimensions listed in a standard Width x Length format. For example, a common size might be labeled as 150mm x 230mm or 6 x 9 inches. It is crucial to understand that these numbers represent the external flat dimensions of the mailer when it is empty. They do not represent the actual volume or the maximum size of an object that can fit inside.
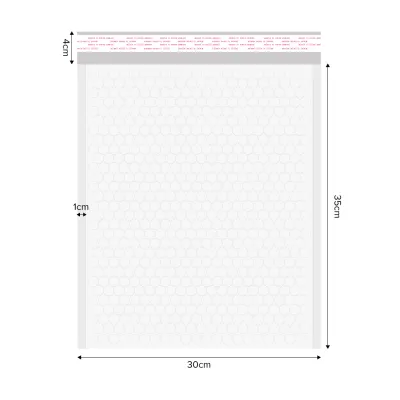
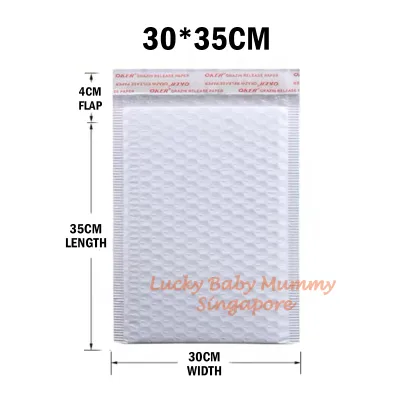
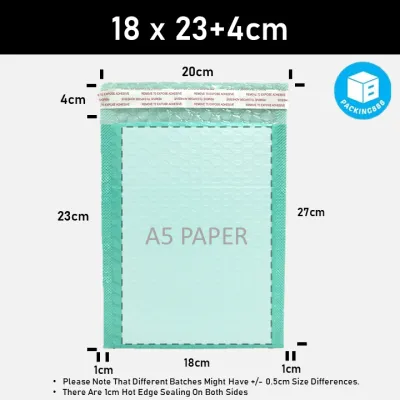
The adhesive sealing flap, often referred to as the lip, is almost always excluded from the stated length measurement. This flap extends beyond the main body of the mailer and is folded over to seal the opening. When calculating whether your product will fit, you must rely on the body length of the mailer and ignore the flap length, as that portion is strictly reserved for securing the closure.
Additionally, the internal bubble lining significantly reduces the usable space inside the mailer. Because the bubble wrap is laminated to the inner walls of the plastic film, it creates a cushioned barrier that eats into both the width and the length of the pocket. Typically, the internal usable width and length are at least 10mm to 20mm smaller than the external flat measurements. This reduction varies depending on the thickness of the bubble layer used by the manufacturer.
Measuring Your Products for Shipping
Before you can select a mailer size, you must obtain precise measurements of your product in its final, ready-to-ship state. This means you should measure the item after it has been prepared with any primary packaging. If you wrap your products in tissue paper, place them inside protective clear polybags, or attach cardboard backing cards, perform your measurements with these additions in place.

Use a reliable ruler or measuring tape to find the maximum length, width, and height of the item. The height, or thickness, is often the most overlooked dimension, yet it has the greatest impact on how a flat mailer stretches to accommodate an object. Always measure the thickest point of the product, even if the rest of the item is relatively flat.
The physical nature of your product also dictates how you should approach these measurements. Rigid items, such as books, boxed cosmetics, or electronic accessories, do not flex or compress. Their dimensions are fixed, meaning your calculations must be highly precise to prevent the mailer from splitting. Flexible items, such as t-shirts, socks, or soft textiles, can be folded, rolled, or compressed, allowing for slightly more flexibility when choosing a mailer size.
Calculating the Right Mailer Dimensions
To translate your product’s physical dimensions into the correct mailer size, you can use a straightforward mathematical formula. This formula accounts for the three-dimensional volume of your item and the space required for the mailer to close comfortably.
To determine the minimum required mailer width, use the following calculation: Minimum Mailer Width = Product Width + Product Thickness + Bubble Allowance. The bubble allowance is a buffer that accounts for the thickness of the internal bubble lining and the seam welds on either side of the mailer. For standard bubble mailers, adding a buffer of 15mm to 25mm to the width is generally recommended to ensure a smooth fit.
To determine the minimum required mailer length, apply a similar logic: Minimum Mailer Length = Product Length + Product Thickness + Seam Allowance. Just like the width, the length requires a buffer of at least 15mm to 25mm. This ensures that the product sits fully below the opening line of the mailer, allowing the adhesive flap to fold over flat and seal securely against the exterior plastic without being pulled or distorted by the product’s bulk.
Always compare your calculated minimum dimensions against the manufacturer’s official sizing chart. Because bubble thicknesses and seam widths vary between suppliers, checking the specific inner dimensions provided by the manufacturer is the safest way to verify compatibility before purchasing in bulk.
Adjusting Sizes for Different Product Types
Different categories of goods require unique considerations when selecting a white bubble polymailer. For instance, apparel and textiles are highly forgiving. You can often fold a garment tightly or roll it into a cylindrical shape to fit a narrower mailer. When shipping clothing, compressing the air out of the item before sealing can help you use a smaller, more cost-effective mailer size.
For rigid or bulky items, such as hardback books, framed prints, or plastic cases, you must adhere strictly to your calculated thickness allowances. Rigid corners exert concentrated pressure on the seams of a polymailer. If the mailer is too tight, these sharp corners can easily puncture the plastic or split the side welds during sorting and transit. If your rigid product is close to the maximum limit of a specific mailer size, it is always safer to step up to the next available size.
Weight and puncture resistance are also critical factors for heavier or sharp-edged items. While white bubble polymailers are made from durable polyethylene, heavy items can slide around and tear the inner bubble lining. If you are shipping items with sharp edges, such as metal tools or pointed stationery, consider wrapping the sharp points in extra paper or cardboard before placing them in the mailer, or select a mailer with a higher puncture-resistance rating.
Common Sizing Mistakes to Avoid
One of the most frequent errors in packaging selection is forgetting to add the item’s thickness to both the width and length calculations. It is easy to look at a flat item like a book and assume it will fit into a mailer of similar flat dimensions. However, as soon as the book is inserted, the mailer must expand outward to accommodate the thickness, which pulls the sides inward and shortens the available length.
Another common mistake is assuming that the adhesive flap contributes to the usable internal length of the mailer. The flap is designed solely to fold over and seal the opening. If your product extends into the flap area, you will not be able to create a secure, airtight seal. This leaves the adhesive exposed to dust and moisture, which can cause the mailer to pop open during delivery.
Finally, some shippers choose excessively large mailers “just in case” they need the extra space. While this guarantees the item will fit, it creates several new problems. Loose items will slide around inside the mailer, increasing the risk of internal damage and scuffing. Furthermore, major postal carriers calculate shipping rates based on dimensional weight. Using a mailer that is significantly larger than necessary can lead to higher shipping costs, and the excess, floppy plastic looks unprofessional to the end customer.
Frequently Asked Questions (FAQ)
Can I use a bubble polymailer for fragile items without a box?
White bubble polymailers provide excellent protection against surface scratches, dust, and light moisture, but they do not offer structural rigidity. Fragile items made of glass, ceramics, or delicate plastics can easily be crushed under the weight of heavier packages during transit. For fragile goods, it is highly recommended to pack the item securely inside a sturdy corrugated box with appropriate cushioning material, rather than relying solely on a bubble mailer.
Do white bubble polymailers show dirt or scuff marks easily?
Because of their bright, clean appearance, white bubble polymailers can show transit scuffs, dirt, and conveyor belt marks more visibly than darker packaging options. However, these cosmetic marks do not affect the protective performance of the mailer. If maintaining a pristine exterior is critical for your brand presentation, you can opt to place the mailer inside a secondary outer bag, or choose high-quality polymailers with a matte finish that resists scuffing.

Community discussion
Share your experience or ask a question. Comments are reviewed before publication.